
A Step-by-Step Guide to Finding Your Apple ID From Your iPhone 8 Plus
A Step-by-Step Guide to Finding Your Apple ID On Your Apple iPhone 8 Plus
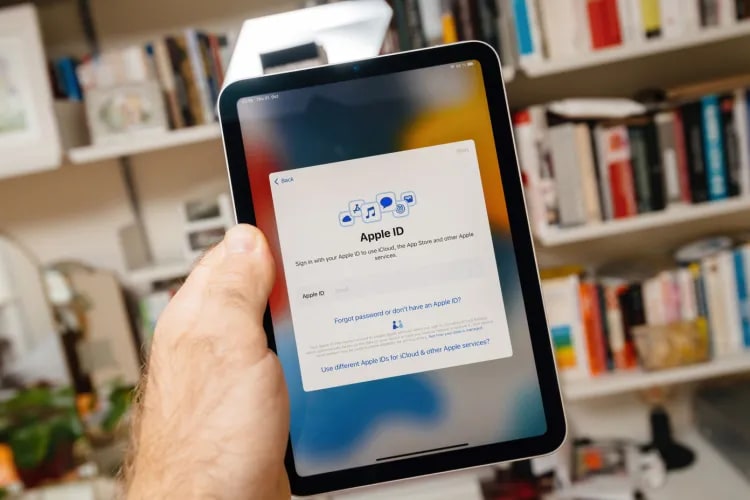
In the world of Apple devices and services, your Apple ID is your key to unlocking a world of possibilities. The digital fingerprint connects you to your Apple iPhone 8 Plus, iPad, Mac, and all the apps and services you love. But if you’re asking, “How do I find my Apple ID?” you’ve come to the right place.
This article will take you on a journey to discover your Apple ID. The mission? To provide you with a clear guide, ensuring that finding your Apple ID is as easy as pie. So, dive in and unravel the secrets of your Apple ID!

Part I. A Brief Introduction to Apple ID?
At the heart of your Apple experience is an Apple ID. But what exactly is it, and why is it so important?

What Is My Apple ID?
Think of your Apple ID as your unique passkey to the entire Apple ecosystem. It’s a combination of your email address and a secure password that you use to sign in to all things Apple. Whether it’s your cherished iPhone, trusty iPad, or reliable Mac, your Apple ID ties them all together, making your digital life seamless.
Why Is Your Apple ID Significant?
Your Apple ID plays a crucial role in your digital journey. Here are some key points to highlight its significance:
- **Access to Apple Services.**Your ID is your golden ticket to various Apple services like the App Store, iTunes, and iCloud. It’s how you download apps, purchase music, and store your cherished photos and files in the cloud.
- **Device Linkage.**Your Apple ID serves as the glue that binds your devices. It ensures that your Apple iPhone 8 Plus, iPad, and Mac are in sync. When you change something on one device, it reflects across all your Apple gadgets.
- **Security and Privacy.**Apple places a high premium on security and privacy. Your ID helps keep your data safe and confidential, whether it’s your messages, emails, or personal information.
- **Find My.**If you ever misplace your Apple iPhone 8 Plus or other Apple devices, your Apple ID is your lifeline to track and recover them using the “Find My” feature.
- **App Purchases.**Your Apple ID remembers all the apps you’ve purchased, making it easy to reinstall them on a new device without repurchasing.
In a nutshell, your Apple ID is the gateway to a world of digital convenience and security. It makes your life easier, keeps your data safe, and ensures your Apple devices work seamlessly together. Now that you understand the importance of your Apple ID let’s move on to the exciting part: finding it!
Part II. How Do I Find My Apple ID on iPhone/iPad/Mac/Windows?
Knowing your Apple ID is the key to unlocking your Apple world. You’ll need your Apple ID if you’re an iPhone aficionado, a Mac enthusiast, or a Windows user dipping into the Apple ecosystem. Let’s explore how to find Apple ID on various devices.
On iPhone or iPad
The following steps are for finding your Apple ID on an iPhone or an iPad:
- Step 1: Begin by unlocking your Apple iPhone 8 Plus or iPad. Now, open the Settings app. It’s the one with the gearwheel icon – you can’t miss it!

- Step 2: Scroll down and tap “Sign in to your [Device].” If you’re already signed in, your name and Apple ID should be at the top.
- Step 3: There it is! Your Apple ID is displayed at the top of the screen, just beneath your name. Write it down or take a screenshot for safekeeping.

On Mac
Here’s how to locate your Apple ID on a Mac device:
- Step 1: If you’re on a Mac, click the “Apple logo” in the top-left corner of the screen. From the drop-down menu, select System Preferences.

- Step 3: In the System Preferences window, click on Apple ID.

- Step 4: Your Apple ID is now right in front of you, under your profile picture. Jot it down or take a screenshot – just in case.

On Windows PC
If you’ve lost your Apple ID and need to find it on your Windows device, follow these steps:
- Step 1: If you’re using a Windows PC, launch iCloud on your PC. Syncing your Apple device (such as an iPhone or iPad) to your computer is probably why you installed this.
Note: You can use iTunes instead of iCloud if you don’t have one on your Windows PC yet.

- Step 2: And that’s it! Your Apple ID should be there. Your Apple ID will be associated with your name as long as you are logged in.
Why It’s Important
Even on a Windows PC, your Apple ID is your gateway to Apple services, which means you can access your iCloud data and enjoy Apple Music and the iTunes Store.
Remember Knowing Your Apple ID Is Crucial
Your Apple ID is the key to a world of apps, services, and secure data. Knowing how to find it on your device is the first step in making the most of your Apple experience. So, take a moment to discover your Apple ID on your Apple iPhone 8 Plus, iPad, Mac, or Windows PC. It’s a small effort that brings you big benefits!
Part III. Want a Quicker Way To Unlock Your Apple Devices?
Have you ever found yourself locked out of your Apple device, desperately seeking a solution to regain access? If so, you’re not alone. For those times when you need a quick and reliable way to unlock your Apple device, Wondershare Dr.Fone - Screen Unlock is here to the rescue.
Introduction to Dr.Fone - Screen Unlock
So, what is Dr.Fone - Screen Unlock? It’s a nifty tool designed to simplify unlocking your Apple devices. Whether it’s a forgotten passcode, a locked screen, or an Apple ID issue, Dr.Fone - Screen Unlock is your go-to solution.

Key Features and Benefits
Let’s explore the key features and benefits of Dr.Fone - Screen Unlock:
- **Simplicity at Its Best.**One of the standout features of Dr.Fone - Screen Unlock is its simplicity. There is no need for technical expertise or hours of frustration. With a user-friendly interface, this tool makes the unlocking process a breeze, even for the less tech-savvy.
- Dr.Fone - Screen Unlock is designed to work swiftly, ensuring you regain access to your device in no time.
- It’s not limited to specific Apple devices – it supports various models, making it an all-in-one solution.
- **Data Protection.**The tool ensures your data remains intact during the unlocking process, so you don’t have to worry about losing precious information.
- Dr.Fone - Screen Unlock has a dedicated support team to assist you if you encounter any issues.
How To Use Dr.Fone - Screen Unlock
Unlocking your Apple device with Dr.Fone - Screen Unlock is as easy as 1-2-3. Here’s a step-by-step guide:
- Step 1: After Wondershare Dr.Fone has finished installing on your computer, go to Toolbox > Screen Unlock > iOS to open the relevant window.
- Step 2: Select the Unlock iOS Screen button repeatedly within the new window that has opened up so that you can proceed with unlocking the screen of your iOS device.

- Step 3: To begin unlocking the iOS device, tap Start on the following screen. Check to see if your gadget has adequate battery life.

- Step 4: The next step is to enter Recovery Mode on your iOS device. Put your iDevice into the appropriate mode by following the on-screen prompts. If you cannot get your iDevice to boot into Recovery Mode, you can attempt putting it into DFU mode by tapping the Try to enter DFU Mode button at the bottom.

- Step 5: The platform automatically recognizes the Device Model after users successfully enter Recovery Mode on their iDevice. Make any necessary adjustments to the model and pick the System Version. After that, tap the Start button to continue the screen unlocking process.

- Step 6: The next screen will show you where your device’s iOS firmware download stands. If you want to cancel the operation, just hit the Stop button. If the iOS firmware takes a long time to download on your platform, you can copy the download link by clicking the Copy option.

- Step 7: Once the iOS firmware has been downloaded and verified, it will be displayed on the following screen. Continue by clicking the Unlock Now button.

- Step 8: A dialog box asking for confirmation of the action will pop up on the screen. Enter the unlock code and select Unlock to continue.

- Step 9: On the following screen, you’ll see an iOS device’s unlocking status. Don’t forget to keep the Apple iPhone 8 Plus device plugged in, as doing otherwise will disrupt it.
- Step 10: To complete unlocking your iDevice, tap the Done button once you’re done. If you’re still stuck with a locked iOS device, tap the Try Again button to try again.

It’s important to note that Dr.Fone - Screen Unlock is a trusted solution that prioritizes data security and ease of use. So, if you ever find yourself locked out of your Apple device and need a quick and reliable way to unlock it, Dr.Fone - Screen Unlock should be your first choice.
Part IV. Additional Tips and Troubleshooting
While this guide has covered the basics of finding your Apple ID and using Dr.Fone - Screen Unlock, there are some common issues that Apple users might encounter. Here are some tips and troubleshooting solutions to help you navigate these problems:
Forgotten Apple ID Password
Issue: If you’ve forgotten your Apple ID password, don’t worry. You can reset it by following these steps:
- Visit the Forgot Apple ID or passwordlink on the Apple website.
- Enter your Apple ID and follow the prompts to reset your password.
Two-Factor Authentication Issues
Issue: Sometimes, two-factor authentication can cause access problems. Here’s what you can do:
- Ensure your trusted device is nearby when you sign in with your Apple ID.
- Verify that your device has an internet connection.
- Double-check your date and time settings.
Account Locked for Security Reasons
Issue: If your Apple ID is locked for security reasons, follow these steps:
- Visit iforgot.apple.com and unlock your account using your Apple ID and password.
- You may need to answer security questions or use two-factor authentication.
Problems With Apple ID Verification
Issue: If you’re having trouble with Apple ID verification, try these tips:
- Ensure you’re using the correct Apple ID and password.
- Check your email for a verification link.
- Follow the on-screen prompts for verification.
Unable To Sign Into iCloud
Issue: If you can’t sign in to iCloud, follow these steps:
- Make sure your device is running the latest software.
- Verify your network connection.
- Try signing in using a different device.
With these additional tips and troubleshooting solutions, you’ll be better prepared to handle any hiccups related to your Apple ID and password. We hope this information helps you make the most of your Apple experience!
Conclusion
In the vast Apple universe, your Apple ID is your golden ticket to an array of services and endless convenience. Remember, it’s not just a passcode; it’s your passport to an easier digital life. This “How to find Apple ID“ journey has been even smoother with Dr.Fone - Screen Unlock. This trusted tool simplifies the process, making it accessible to everyone.
So, explore Dr.Fone - Screen Unlock and make your Apple experience hassle-free. And don’t forget to safeguard your Apple ID like the treasure it is. Because with your Apple ID secure, you’re ready to unlock a world of endless possibilities!
Removing Device From Apple ID For your Apple iPhone 8 Plus
Has the latest iPhone taken your attention lately? With a new Apple device in use, you might have cluttered a lot of devices under a single Apple ID. You can face multiple issues when you turn to backup content or save it on your Apple ID. It might be possible that the data of some other Apple device gets restored onto your new Apple device, which is never your priority.
This leads to removing unwanted devices from the Apple ID. If you are about to sell out or close down a device in the future, it is best to remove the Apple iPhone 8 Plus device from Apple ID. This will help you save yourselves from the complicated conditions created by having multiple devices on the same Apple ID.
Part 1: Should I Remove Old Devices From My Apple ID?
Why should one look to remove their old devices from the Apple ID? There are multiple reasons involving the methods of removing devices from Apple ID. Before we get to the methods, let us first review why this is needed:
- Managing Devices on Apple ID: If you consider removing the Apple iPhone 8 Plus devices from the Apple ID, this will help you keep track of all the associated devices with your credentials. Devices that have been sold and are not linked are not your responsibility to manage.
- Avoid Notifications and Updates: For devices that are old and will be sold out by you, you might receive notifications and updates. To avoid them, it is best to remove the Apple iPhone 8 Plus device from your Apple ID to stop all notifications and updates.
- Protection of Privacy: When a device is sold out, it is best to remove it from your Apple ID to avoid breaching personal information. Someone else might try accessing or receiving your data.
Part 2: 4 Ways to Remove a Device From Apple ID
You would’ve surely understood the reasons for removing a device from the Apple ID. This can help you propagate into understanding the multiple techniques of performing this action. We have outlined some unique methods for removing Apple devices. To know how to remove the Apple iPhone 8 Plus device from Apple ID, find out more about these methods below:
Method 1: Using an iPhone, iPad, or iPod Touch
The first and most straightforward technique of removing devices from Apple ID is through iPhone, iPad, or iPod Touch. If you wish to remove a device from your Apple ID, use any of the available Apple iOS devices and continue with these steps:
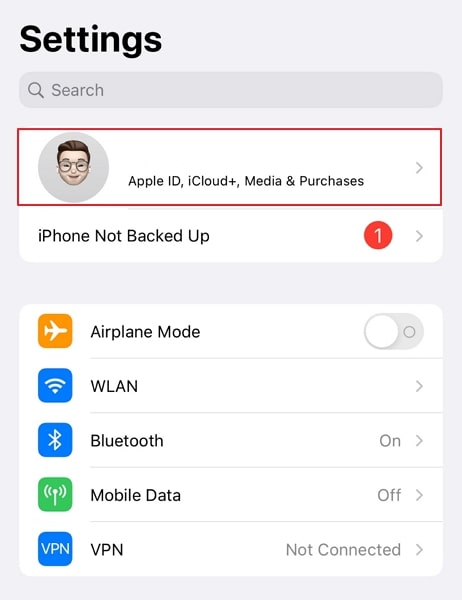
Step 1: Start by opening the “Settings” application on your iOS device and select your name displayed on the top.
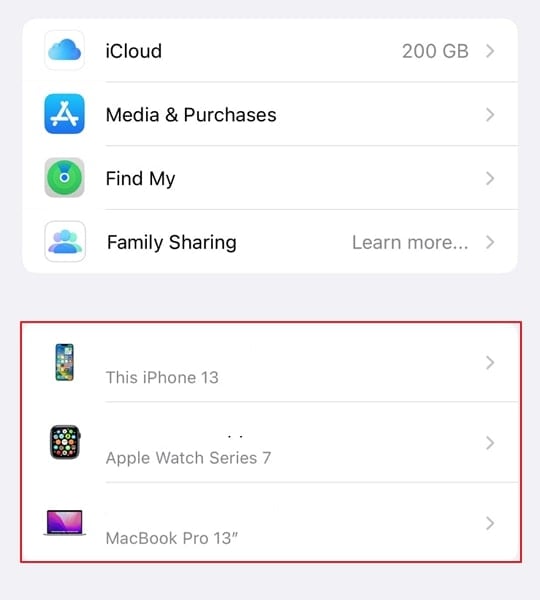
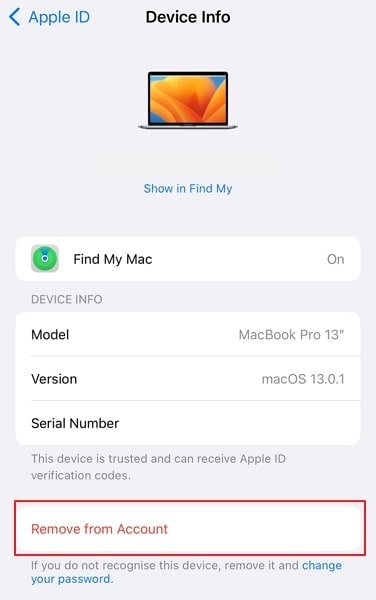
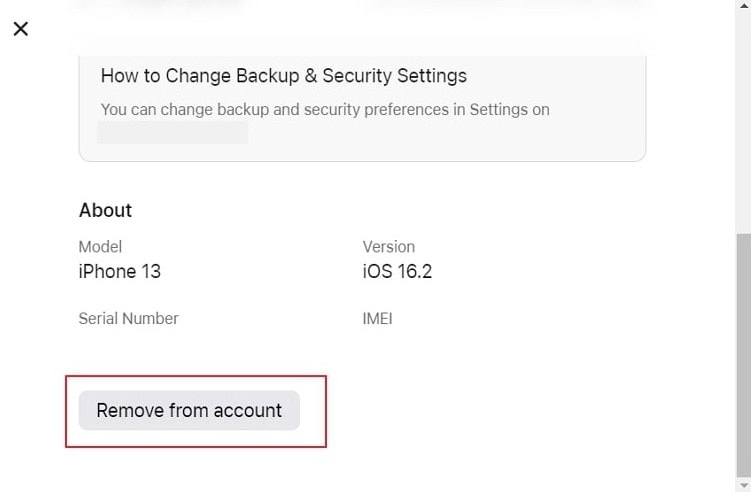
Step 2: On the next screen, find the Apple iPhone 8 Plus devices connected to the same Apple ID. Select the particular device that you wish to remove from the ID.
Step 3: As you proceed into the next window, find the “Remove from Account” option for executing the task. Once selected, you will be prompted again, where you have to select “Remove” to confirm the actions.
Method 2: Using a Mac
You can also try using your Mac to remove a particular device from your Apple ID. To do that perfectly, it is best to use the following steps as a guide for removing the Apple iPhone 8 Plus device:
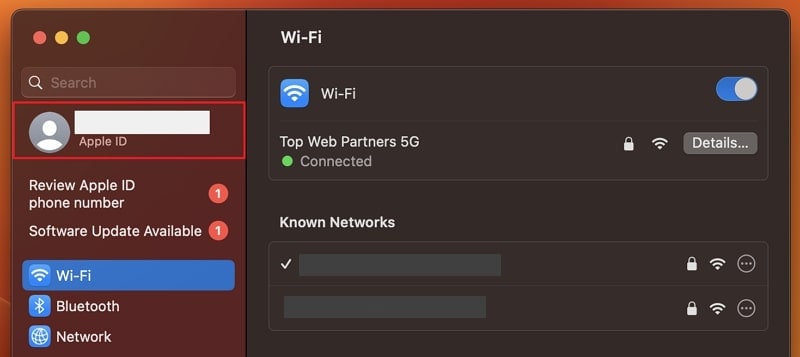
Step 1: Launch your Mac and click on the “Apple” icon displayed on the top-left of the screen. Next, you have to tap on the “System Settings” option from the drop-down menu.

Step 2: As a new window opens, continue by clicking on your name to access your Apple ID details. With the screen displaying all options, scroll down to find the respective device.
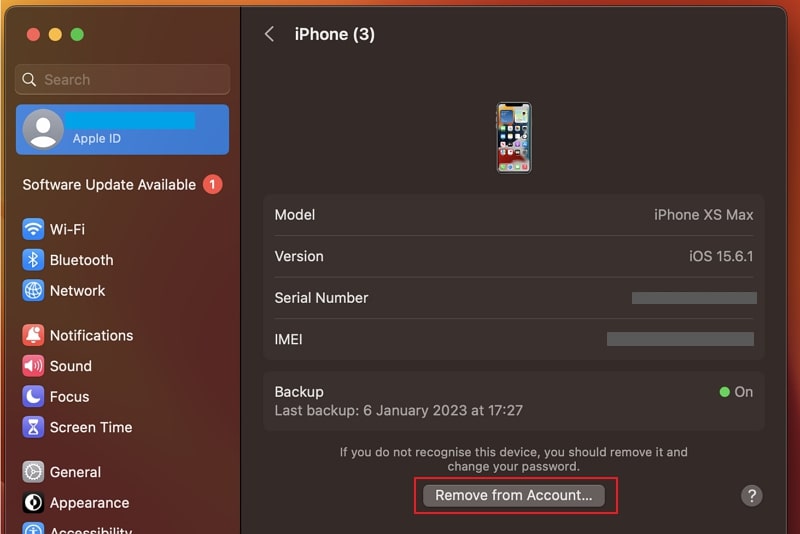
Step 3: Once you continue to the next screen, find the “Remove from Account” button on the bottom of the options and lead to the following prompt. You will have to tap on “Remove” to execute the process.
Method 3: Using the Apple ID Account Page on the Web
This process can also be performed using the Apple ID account page from the web browser. For that, you will have to access the webpage from this link .
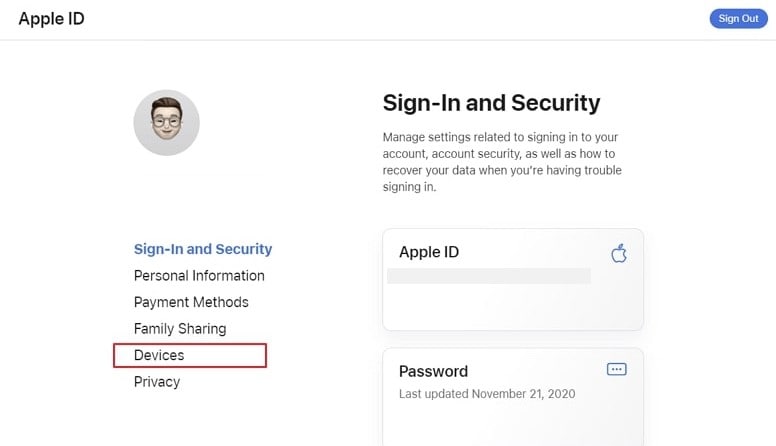
Step 1: As you access the webpage and log into it with your Apple ID, continue to the homepage. Lead to the “Devices” section on the left panel to open a new screen.
Step 2: Following this, select the Apple iPhone 8 Plus device that you want to remove from the Apple ID. As a new window opens, select “Remove from Account” and continue to execute this process.
Method 4: Using the iCloud
iCloud can be another source to remove devices from Apple ID. To know how this method can be used to remove the Apple iPhone 8 Plus device from Apple ID, look into the provided steps:
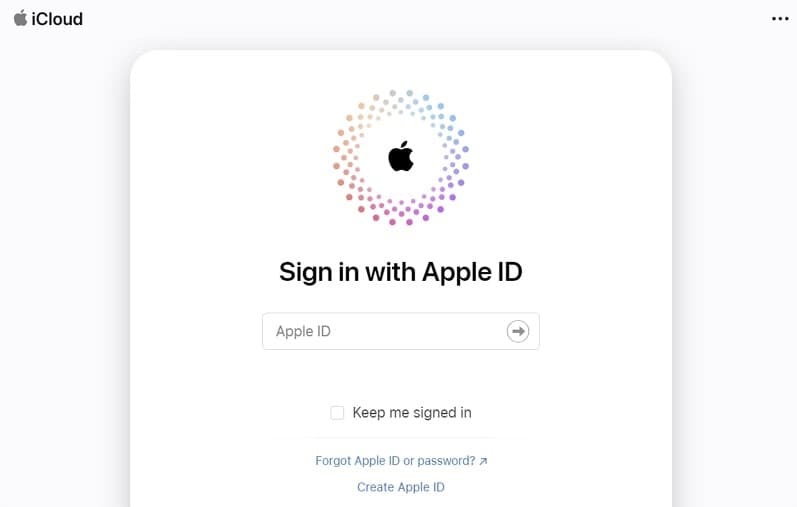
Step 1: Launch iCloud.com on your computer from a web browser and continue to log in with your Apple ID.
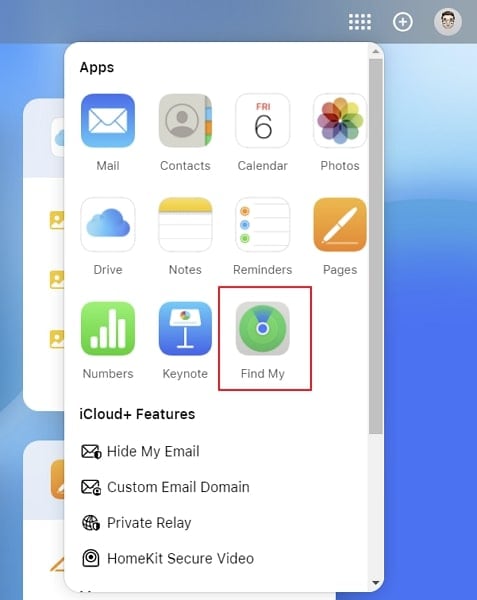
Step 2: As you get into the homepage of your iCloud, select the “Thumbnail” button on the top-right of the screen. After that, choose the “Find My” feature from the available options in the list.
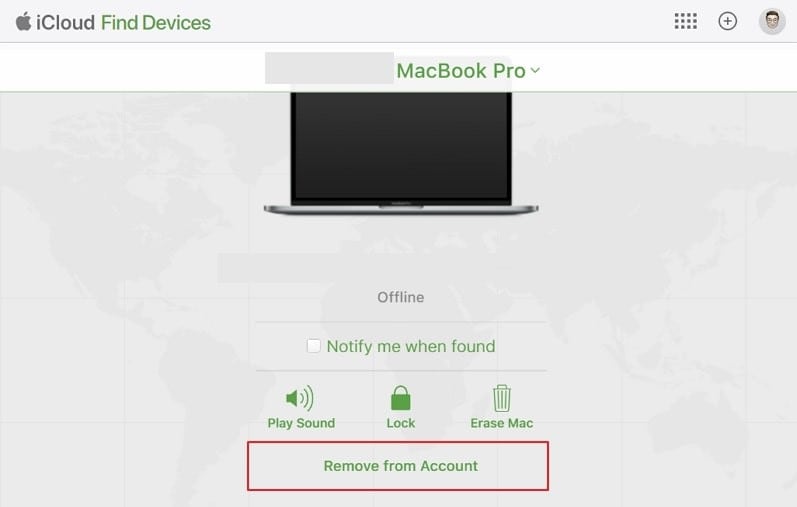
Step 3: You will find yourselves on a new screen where you have to click the “All Devices” option. Select the Apple iPhone 8 Plus device that you wish to remove to open a new screen. Select the “Remove from Account” option to remove the Apple iPhone 8 Plus device from the Apple ID.
Part 3: Bonus Tips: Forgot Your Apple ID Password? Here’s What To Do
While you can remove a device from the Apple ID, you might come into re-using it again for some purpose. If it comes to such a condition and you have forgotten your Apple ID password, the Apple iPhone 8 Plus device would be useless. The best thing to do in such a situation is to go with Dr.Fone - Screen Unlock (iOS) for unlocking your device.
Dr.Fone - Screen Unlock (iOS) is designed to provide confused iOS users with a proper direction to easily unlock their locked Apple devices. The tool is built to provide solutions in situations where you can bypass Activation Lock or easily unlock your Apple ID. It is an excellent tool serving Apple users with the option of removing all kinds of locks.
Key Features of Having Dr.Fone - Screen Unlock (iOS)
It is great to learn more about the tool to process the method perfectly. For that, look into the features presented next for a better understanding of Dr.Fone - Screen Unlock (iOS):
- It provides support for the latest iOS version and Apple devices.
- The tool supports removing all kinds of locks, including Face ID, Touch ID, screen time passcode, etc.
- It can also remove Apple ID from the Apple iPhone 8 Plus device without requiring iTunes.
Steps For Unlocking Apple ID From Apple Device with Dr.Fone - Screen Unlock (iOS)
We will now shift to knowing more about how to bypass Apple ID from a device whose password is forgotten:
Step 1: Launch Dr.Fone and Open Screen Unlock
To start the process, it is best to download and install the latest version of Wondershare Dr.Fone on your computer. As it launches, continue to select “Screen Unlock” from the options.
Step 2: Proceed to Remove the Apple ID
You will have to continue to the option of “Remove Apple ID” from the list to unlock the Apple ID.

Step 3: Trust Computer and Start Unlocking
Turn on your Apple device and continue to trust the Apple iPhone 8 Plus device it is connected to. After tapping on “Trust,” you can continue with the process. On your computer’s screen, click on “Unlock Now” to proceed next.

Step 4: Enter Recovery Mode and Start
Put your Apple device into the Recovery Mode by following the on-screen instructions on the computer’s screen. As it is done, the unlocking process starts automatically. The process will be completed in a few seconds, and the prompt will display the completion of the method.

Part 4: FAQs about Apple ID
- How to create a new Apple ID on an iPhone?
Open the “App Store” and click the “Profile” icon on the top-right. You must continue clicking on the “Create New Apple ID” button after you have signed out of iCloud of your previous ID. Provide all required details for creating the Apple ID and confirm the process.
- How do I add a device to My Apple ID?
To add a device to your Apple ID, you have to configure it first and log in with your existing ID from there. This is how it can be added to the Apple ID list of devices.
- How many devices can I add to My Apple ID?
Apple ID allows you to connect ten devices under the same account. In these ten devices, there cannot be more than five computers associated with the Apple ID.
- Why can’t I create a new Apple ID?
If you are unable to create a new Apple ID, it is possible that you would have exceeded the maximum number of Apple IDs that can be set up with iCloud on one device.
- How can I Find My Apple ID password?
There is no way to find your Apple ID password on your devices. If that is the case, you will have to reset the password or remember it so that you can use it for a purpose.
Conclusion
You have learned proper techniques for removing devices from your Apple ID in this article. With all these methods, you can remove any device from Apple ID without requiring additional tasks. This article has also helped you with a tool to help you in situations where you have forgotten your Apple ID password. Dr.Fone - Screen Unlock (iOS) is an excellent option for removing security locks from iOS devices.
Your Account Has Been Disabled in the App Store and iTunes On Apple iPhone 8 Plus?
You may see the error message, “Your account has been disabled in the App Store and iTunes” when you try to log in. This is often an indication that for some reason your Apple ID is not working as it should. When you consider that you will not be able to download or update apps or even make a purchase using Apple Pay without your Apple ID, it is easy to see why this error message can be a problem.
Why is my account disabled in the App store? Here, we take a look at the reasons why you may see the error messages and what you can do to fix them.
Part 1. Why has my account been disabled in the App Store and iTunes?
The following are some reasons why you may see this error message popup on your screen:
- Entering the incorrect Apple ID and password multiple times
- Not using your Apple ID for an extended period of time
- Any billing issues such as unpaid iTunes and App Store orders
- Safety and security reasons like when Apple suspects your account may be hacked
- When there are charging disputes on your credit card
Part 2. How to fix “Your account has been disabled in App store and iTunes”?
There are numerous methods to tackle this issue and regain access to your device. For a quick and concise understanding, you can watch our informative video tutorial. If you prefer a more in-depth, step-by-step explanation, continue reading this article for detailed instructions on each method.
Tips: Did you forget your Apple ID password or are you struggling to remove your Apple ID account? Worry not, as Dr.Fone is here to help you remove your Apple ID without password in a matter of seconds. By logging into a new account, you can fully restore access to all your iCloud services and Apple ID features, ensuring a seamless user experience.
Method 1. Wait 24 hours and Try Again
This method will prove useful to you if you have entered the wrong password several times. If this is the reason your account has been disabled, leave it alone for about 24 hours. When the time has elapsed, try entering the correct password to see if this fixes the issue.
If you just forget the password and cannot remember it, you can follow the steps below to reset the password on your own iOS device:
- Step 1: Open Settings.
- Step 2: Tap [your name] on top of the screen> Password & Security > Change Password.
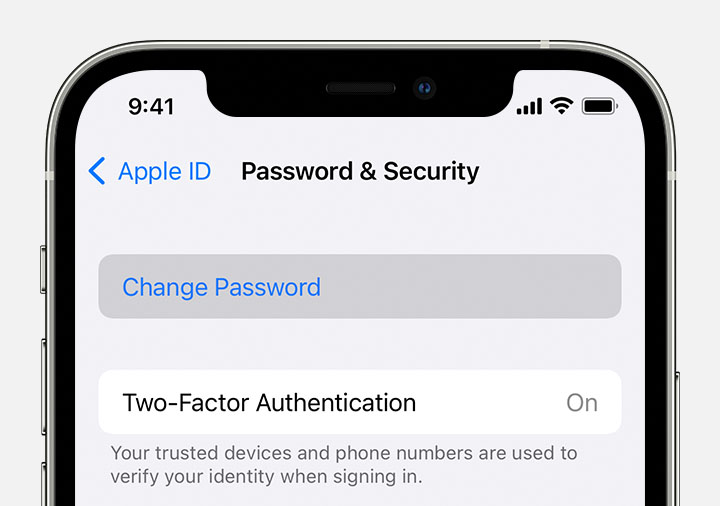
- Step 3: Enter the passcode for your device.
- Step 4: Follow the onscreen steps to reset your password.
If the above steps were unable to change or reset the password, follow the steps below:
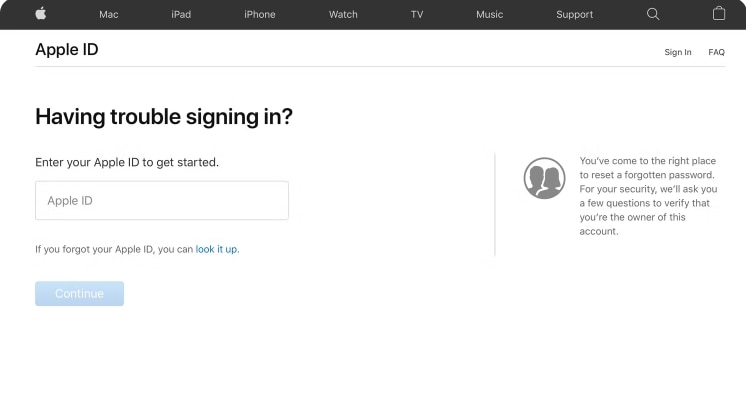
- Step 1: Go to https://iforgot.apple.com/ .
- Step 2: Put your Apple ID (email) in the box and click “Continue”.
- Step 3 Enter the phone number that you use with your Apple ID.
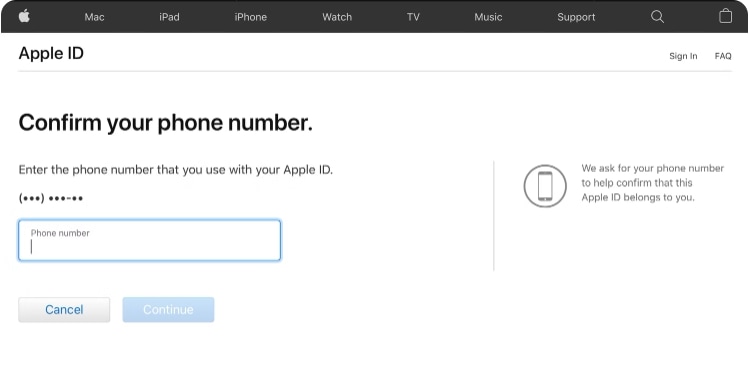
- Step 4: Look for the notification on iPhone, Mac, or iPad and follow the instructions to reset the password.

Note that if you are changing your Apple ID password on an iPhone or iPad, you will need to enter your device’s six-digit passcode, then reset a new password.
Forgetting the password is particularly troublesome, but there is good news. That is, you can use Password Manager to find your passwords on your Apple iPhone 8 Plus/iPad without spending too much time remembering them!
Dr.Fone - Password Manager (iOS)
Recover and keep all your passwords in one place
- Unlock and manage various passcodes, PINs, Face IDs, Apple ID, WhatsApp password reset, and touch ID without limitations.
- To find your password on an iOS device, it effectively functions without harming or leaking your information.
- Ease your job by finding any strong password across various platforms to manage multiple email accounts.
- The installation of Dr.Fone on your device won’t take much space, without any disturbing ads.
3981454 people have downloaded it
Method 2. View Your Payment Methods and Update Them
If you think that your account has been disabled because of a payment issue, it is necessary to check your payment methods and update them. Follow these simple steps to do it:
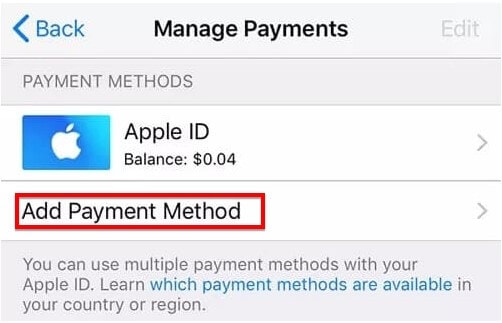
- Step 1: Open the Settings and then tap on your name at the top.
- Step 2: Select “iTunes & App Store” and then choose your Apple ID.
- Step 3: Tap “View Apple ID” and then select “Manage Payments”.
- Step 4: Tap “Add Payment Method” to add a new payment method.
If the payment method was the issue, your account will be re-enabled after these steps.
Method 3. Settle Any Unpaid Charges
Do you have any unpaid purchases or subscriptions?
It is important to keep track of any purchases or subscriptions that you have signed up for and ensure that you pay for them on time. This not only helps you avoid late fees and penalties, but it also ensures that your account remains active and accessible. If you do have any unpaid charges, it is recommended that you settle them as soon as possible in order to reinstate your account and prevent any further issues. Keep a record of all your expenses and regularly review your bills to avoid missing any payments and keep your accounts in good standing.
Method 4. Sign Out and Sign in Again
Signing out of your account and then signing back in may help if this issue is caused by a software glitch.
- On your iOS device, go to Settings > [Your Name] > iTunes & App Store and Sign Out. Then sign in again.
- On your Mac, open the App Store (Store > Sign Out) and iTunes (Account > Sign Out. Then sign in again.
Method 5. Try Contacting Apple Support Directly
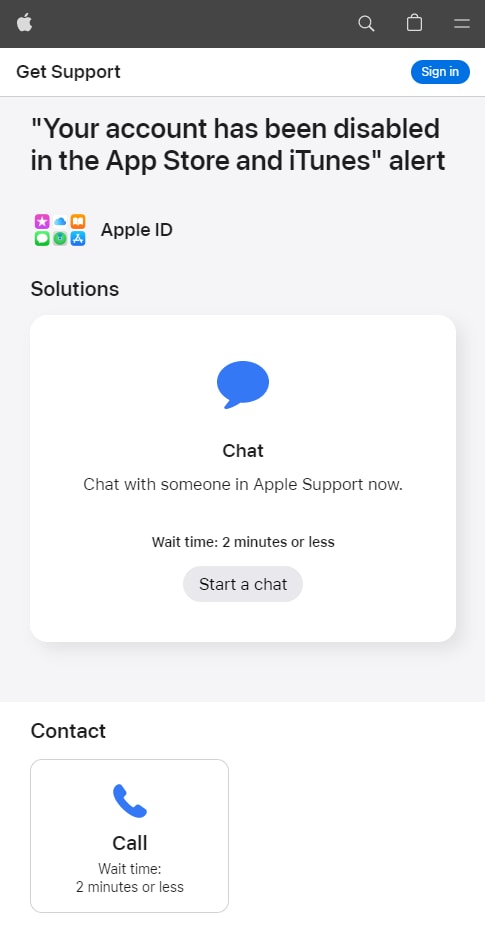
If you see a message that says, “Your account has been disabled in the App Store and iTunes,” contact Apple Support for help. You can follow these simple steps to contact Apple support:
- Step 1: Go to https://getsupport.apple.com/solutions .
- Step 2: Then click “Start a chat” to chat with someone in Apple Support now.
- Step 3: Or schedule a call with Apple Support, and they should be able to help you fix your account disabled in App store.
Part 3. What does it influence when “Your account has been disabled in the App Store and iTunes”?
When you see the error message “Your account has been disabled in the App Store and iTunes” it often means the following:
- You cannot access Apple Books, App Store purchases, and even iTunes purchases.
- You may not have access to your iCloud account or any of the data stored in the account until you fix the problem.
- Furthermore, you may not be able to access Apple services and any Apple Store orders and repairs may need to be rescheduled.
- Until you can fix the issue, you will not be able to receive iMessage, FaceTime, and iCloud Mail.
Part 4. Is “Your account has been disabled in the App Store and iTunes” the same as “Apple ID disabled”?
No. The error message “Your account has been disabled in the App Store and iTunes” differs from “Apple ID disabled”. You will primarily see the “Your account has been disabled in the App Store and iTunes” when you try to access content in the App Store. On the other hand, you may see the message “Apple ID disabled” when you enter the Apple ID and password to bypass the iCloud Activation Lock screen .
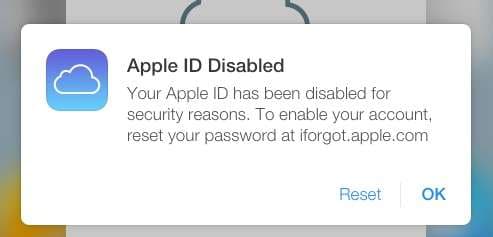
After you see these errors, you will not be able to access some of the features and apps that require your Apple ID for access.
Part 5. How to fix Apple ID disabled by removing Apple ID?
Sometimes the only way to fix “Apple ID Disabled” is to remove the Apple ID from the Apple iPhone 8 Plus device. This may become a viable solution if you lost or forgot the Apple ID password or ID and you have no way to recover them. It is also one of the best solutions when you purchased a second-hand device, and you don’t know the Apple ID password for the account associated with the Apple iPhone 8 Plus device.
One of the best ways to remove the Apple ID from an iOS device is to use Dr.Fone - Screen Unlock (iOS) . This third-party unlocking software is designed to easily and effectively remove the Apple ID password from any device. The following are some things it can do;
Dr.Fone - Screen Unlock (iOS)
Remove iCloud Account without Password in Minutes
- Remove Apple ID/iCloud Account efficiently.
- Save your Apple iPhone 8 Plus quickly from the disabled state.
- Free your sim out of any carrier worldwide.
- Bypass iCloud activation lock and enjoy all iCloud services.

- Works for all models of iPhone, iPad, and iPod touch.

4,008,669 people have downloaded it
Here’s how to use Dr.Fone Screen Unlock to remove the Apple ID from the Apple iPhone 8 Plus device;
- Step 1: Install the Program
To begin, download the Dr.Fone Toolkit from the program’s main website. Install the toolkit onto your computer. Open it after successful installation and then choose “Screen Unlock” from the main screen.
- Step 2: Choose to Remove Apple ID
On the next screen, you should see three options. Choose “Remove Apple ID” since we want to remove the Apple ID from the Apple iPhone 8 Plus device.

- Step 3: Connect the iOS Device
Connect the iOS device to the computer using its lightning cable. Then enter the Apple iPhone 8 Plus device’s passcode and, when prompted, tap “Trust” to allow the computer to detect the Apple iPhone 8 Plus device. The program should detect the Apple iPhone 8 Plus device and display information about it. Then click “Unlock Now”.
- Step 4: Apple ID Removal will Begin
Dr.Fone will immediately begin removing the Apple ID from the Apple iPhone 8 Plus device. You should see a progress bar indicating how long the process will take. Ordinarily, the removal should take just a few seconds. When the process is complete, you will see a notification on the screen letting you know that the Apple ID has been removed.

You should then be able to sign in to another Apple ID or create a new Apple ID and password to use on the Apple iPhone 8 Plus device.
Conclusion
In conclusion, encountering a disabled Apple account in the App Store and iTunes can be a frustrating experience. However, by understanding the reasons behind it, following the recommended steps to resolve the issue, and considering the broader impact on your digital life, you can navigate this situation effectively. Remember, prompt action and patience are key to restoring your account and getting back to enjoying the Apple ecosystem hassle-free.
Also read:
- 2024 Approved Effortless Sound Transformation From YouTube to WAV Format
- 2024 Approved The 30 Marketing Moments That Can Transform Your FB Game
- Apple ID Locked for Security Reasons From iPhone 13 mini? Find the Best Solution Here
- Audience Enchantment Advanced Audacity Crossfading for 2024
- ChatGPT Employment Risks: The Potential Firing Scenarios
- Easy Ways to Manage Your Samsung Galaxy A34 5G Location Settings | Dr.fone
- Guide on How To Remove Apple ID From Apple iPhone 12 Pro
- In 2024, How to Fix when Apple Account Locked From Apple iPhone XS?
- In 2024, Turning Off Two Factor Authentication On Apple iPhone 13 Pro Max? 5 Tips You Must Know
- Seamless Setup: Download Your Intel Dual Band AC 7260 Drivers Today
- Unlock Apple ID without Phone Number From iPhone 11 Pro Max
- Title: A Step-by-Step Guide to Finding Your Apple ID From Your iPhone 8 Plus
- Author: Alma
- Created at : 2025-01-19 16:00:59
- Updated at : 2025-01-24 16:01:07
- Link: https://apple-account.techidaily.com/a-step-by-step-guide-to-finding-your-apple-id-from-your-iphone-8-plus-by-drfone-ios/
- License: This work is licensed under CC BY-NC-SA 4.0.