
Detailed Guide on Removing iPhone XR Activation Lock without Previous Owner?
Detailed Guide on Removing Apple iPhone XR Activation Lock without Previous Owner?
Today, many individuals will purchase a utilized iPad or a recycled iOS phone instead of a fresh, box new one. However, they are often disturbed by the Activation Lock screen showing up on the screen once they buy them. This case will probably happen because the iPad is associated with the past user’s iCloud account and will be an iPad locked to the owner.
It becomes a difficult issue as removing a connected iCloud account without the past user is almost difficult. However, sit back and relax. We’ve discovered a few potential ways. This guide will show you the iPad locked to owner bypass. Furthermore, you can use our expert tool, i.e., Dr.Fone-Screen Unlock, to bypass the lock.
After reading this guide, you will understand how to erase the Activation Lock without a past user. How about we get everything started?
Method 1. Dr.Fone - Screen Unlock
Rather than making our readers wait about how to remove Activation Lock without Apple ID or past user, we suggest you with Wondershare Dr.Fone-Screen Unlock.
It is an expert iCloud activation lock bypass program that can remove the activation lock on your iPad. It is the best possible solution when you fail to remember your Mac ID or password. Download the application on your Windows or Macintosh and follow the steps to remove the activation lock without a previous user.
Steps to Follow:
Step 1. Install and launch the Dr.Fone program and choose the Screen Unlock tool.
Step 2. Pick the “iCloud Activation Lock Removal” option.

Step 3. Now you can start to bypass the lock.

Step 4. Begin to remove and wait briefly. The phone will be in a typical state with practically no lock after removing the activation lock.
Step 5. The program will remove the activation lock like a flash. Your iPad will begin with no activation lock. You can access and utilize the iPad now. However, you must know that you can’t call or use cellular data and iCloud of your new Apple ID after bypassing the lock.

Method 2. Remove it from iCloud
If you cannot reach the past user but rather you are still in contact with them, they can unlock your iPad. Here are the step-by-step guidelines on eliminating the iPad activation lock through the iCloud web:
- Open the iCloud site in a browser.
- Sign in to the current iCloud account being used with the locked iPhone.
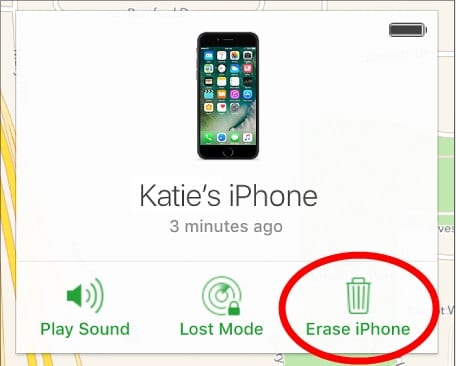
- When you sign in, click on the choice that says Find iPhone.
- Presently, you can remotely perform activities on your phone.
- Click on the drop-down named All Gadgets and pick your iPad.
- Click on Erase iPhone.
Method 3. Use DNS bypass
Bypassing DNS Server is one more way for you if you’re searching for simple methods for eliminating Activation Lock without the past user. Note that this DNS strategy can bypass the iCloud lock for a brief time. Here’s how:
Step 1. Open your iPad and explore the “Choose a Wi-Fi Network” page.
Step 2. Presently, press the Home button and select Wi-Fi settings. Presently, tap the “I” symbol right behind your Wi-Fi network. It will show the properties of the Wi-Fi.
Step 3. Select “Configure DNS” and set it as indicated by your region:
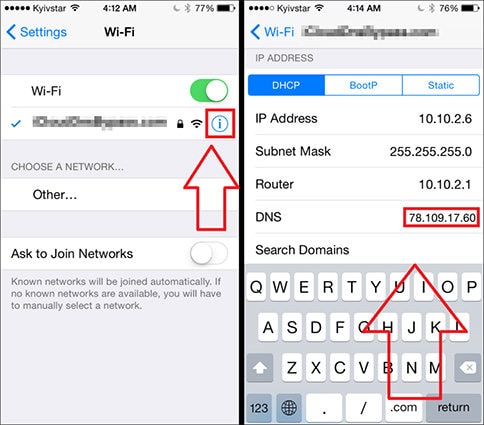
- USA: 104.154.51.7
- South America: 35.199.88.219
- Europe: 104.155.28.90
- Asia: 104.155.220.58
- Australia and Oceania: 35.189.47.23
- Other Continents: 78.100.17.60
Step 4. From that point forward, return to the Wi-Fi page.
Step 5. Presently, click over and again on “Next” and “Back” and hold on until the iPad connects with your area’s iCloud DNS bypass server.
Method 4. Local Apple Support
Following the techniques above, you can try reaching Apple’s local service when you can’t remove the Activation Lock. However, you need to provide the following things:
- iPad serial number
- Buying receipt
When they confirm you own the iOS iPad legitimately, they will help you further by unlocking your iPad.
Part 2: How to Reset iPad without Passcode?
1. Reset iPad by Computer
- Connect your iPad to a computer. Press and hold the Power button + Home button (if your iPad has a Home button). Otherwise, press and hold the Power button + either Volume button (if your iPad doesn’t have a Home button) until you see the Recovery Mode screen.
- On your Macintosh, find the connected iPad.
- Tap Restore and trust that the process will end.
- Set up your iPad and restore the factory default settings without a password.
2. Reset it by Find My
- Go to iCloud.com, and sign in with your Apple ID and password.
- Click on the Find [device] symbol in the menu.
- Select your iPad from the list of all the connected devices.
- Select Erase iPad.
- Follow the prompts for iPad locked to owner reset.
3. Reset with iTunes
- Open the iTunes application or website.
- Connect your iPad to your PC with a connector. Enter your password whenever required.
- Click on the iPad symbol in the upper-left corner.
- Select Summary in the left section.
- Click Restore iPad and then click the Restore button to confirm and reset the iPad locked to the owner.
Conclusion
This iPad locked to owner bypass guide explains how to remove the activation lock. We have mentioned a list of helpful methods to remove the lock from your device. However, if you are still looking for a quick and efficient answer, we suggest you install Dr.Fone - Screen Unlock (iOS) . Dr.Fone is a safe and effective tool for all your unlocking needs.
The Easy Way to Remove an Apple ID from Your MacBook For your Apple iPhone XR
Apple has a great ecosystem of devices and services that can be controlled using a single key, your Apple ID. It can be used to login into every Apple service, from Apple Music to FaceTime. However, there are many reasons which can force you to remove your Apple ID from devices like MacBook, iPhone, etc. That makes it important for you to learn how to remove Apple ID from your MacBook safely.
Suppose you need to remove your Apple ID from your Mac but don’t know to do this, then this article is for you. You will also learn to remove Apple ID from iOS devices without a password.

Part 1: Why Delete Apple ID and iCloud Account?
There are as many reasons to leave the Apple ecosystem as why you should join it. Apple devices are known for security, but it also means that you have less control over their settings. It is also a closed ecosystem that forces you to limit yourself to a specific set of apps and services. Some of the reasons why people might want to remove their Apple ID from their MacBook are the following:
- Switching Platforms: If you intend to leave Apple devices and move to another platform like Android, it makes sense to delete the Apple ID. Deleting the ID will make it safer for you to sell your old Apple device to others.
- Privacy Concerns: While Apple is comparatively secure, your data is still stored on Apple servers. It means the company can still access your data. It will require deleting your Apple ID if you want to delete all personal data from Apple servers.
- Changing Account: Getting a new Apple ID means you need to delete your old Apple ID. It will save you the trouble of managing two different IDs with multiple accounts associated with each one.
- Shared Apple ID: It is possible that you were sharing your account with your partner or another family member and now want to get your own account. Removing the old account completely and using a new one can be the safest way.
Part 2: If I Delete Apple ID, Will I Lose Everything?
Deleting your Apple ID is not insignificant because it is your key to the Apple ecosystem, as mentioned above. Though it won’t affect your data storage in local device. However, you will no longer be able to access your data store across multiple Apple services like iCloud, Apple Music, FaceTime, iMessage, or other services that require an Apple ID can no longer be used.
You won’t be able to purchase or access purchased items from the App Store, iTunes Store, or other Apple services. Remember, deleting your Apple ID is a permanent action and cannot be undone.
Part 3: How to Remove Apple ID/iCloud Account from Mac with Password?
The process of removing Apple ID from a Mac is easy and quick. Before removing the Apple ID, you need to remember that all the services that require Apple ID will no longer work. To remove the Apple ID from your MacBook, follow these steps:
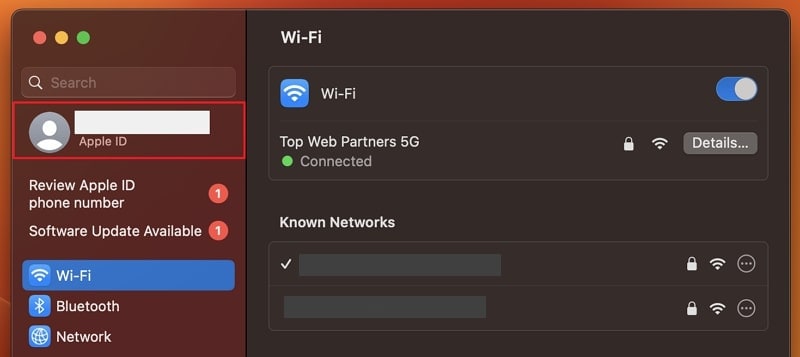
Step 1: Open your Mac and access the “System Settings” from the “Apple Logo” icon. Here, click on your Apple ID name from the top of the left sidebar. Scroll to the bottom of the Apple ID tab to locate the “Sign Out” button.
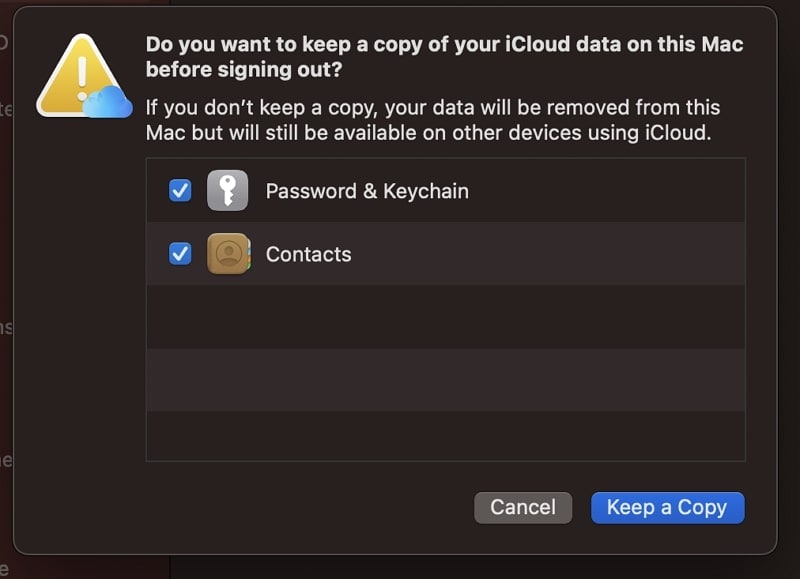
Step 2: Press the “Sign Out” button to remove your Apple ID from the Mac. A prompt will appear asking if you want to keep a copy of your passwords and contacts on your laptop. Select them according to your needs.
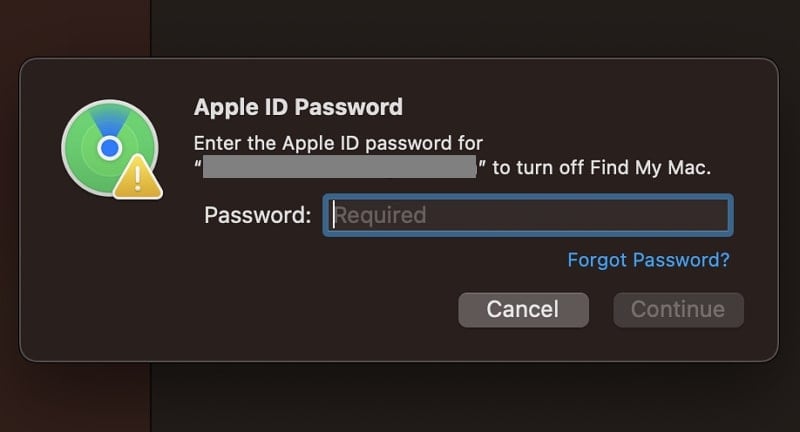
Step 3: On the next window, it will ask you to provide your Apple ID password. Provide the password to complete the process of removing your Apple ID from your Mac.
Bonus Tip: How to Remove Apple ID from iPhone/iPad Without Knowing the Password?
Forgetting your Apple ID credentials is also a common reason for wanting to remove your Apple ID from your Apple iPhone XR. Another such case is buying a second-hand iPhone with a logged-in Apple ID without knowing the password. You need a specialized tool like Dr.Fone - Screen Unlock (iOS) to remove Apple ID in these cases.
With Dr.Fone - Screen Unlock (iOS), you can remove the Apple ID from your Apple iPhone XR or iPad and regain access to the Apple iPhone XR device. This software can also remove the iCloud activation lock on an iOS device if you don’t know the login credentials of the previous owner. It is the best tool if your Apple iPhone XR has become locked or disabled due to a forgotten passcode or other issues.
Key Features of Dr.Fone - Screen Unlock (iOS)
- Dr.Fone - Screen Unlock (iOS) can remove passcodes, pattern locks, fingerprint locks, and other types of locks from iOS devices.
- With the help of this tool, you can remove the encryption of your iTunes backup. It will also help you restore your iTunes backup to your new iPhone even if you changed your Apple ID.
- If you have forgotten the username or password of your Apple iPhone XR MDM, this tool allows you to bypass or remove MDM to access the Apple iPhone XR device.
- It can also unlock SM Lock or Carrier Lock on your Apple iPhone XR. That allows you to use your Apple iPhone XR freely if you want to travel internationally.
Steps to use Dr.Fone - Screen Unlock (iOS) for Removing Apple ID
Dr.Fone - Screen Unlock (iOS) has a straightforward interface and provides clear instructions for removing Apple ID from your Apple iPhone XR. Your Apple iPhone XR will be reset during the process, and you will lose the data. It is advised you create a backup before starting the procedure. To start the process of removing Apple ID from your Apple iPhone XR, follow the steps given below:
Step 1: Establish the Connection between iPhone and the Apple iPhone XR device
Use a USB cable to connect your Apple iPhone XR to your computer and launch Dr.Fone. Next, proceed with the “Screen Unlock” tool from the main interface and “Remove Apple ID” on the next screen. Now move to the iPhone, unlock it, and select “Trust” in the “Trust this Computer” pop-up.

Step 2: Put Your Apple iPhone XR into the Recovery Mode
You are required to put your Apple iPhone XR into Recovery Mode before you can remove the Apple ID. Follow the on-screen instructions to the letter to put your Apple iPhone XR into Recovery Mode. Once the Apple iPhone XR has entered the recovery mode, it will reset and restart. After restarting, the process of removal of the Apple ID will begin.

Step 3: Remove Your Apple ID from the iPhone
Wait for the program to complete the process of removing your Apple ID from your phone. Once it is completed, check if the old Apple ID is removed, and you can enter your new Apple ID. Otherwise, you can select “Try Again” to restart the process.

Conclusion
The answer to how to remove Apple ID from MacBook is a straightforward process that can be completed in just a few steps. By following the instructions outlined in this article, you can easily sign out of your account and remove it from your Mac.
Removing the Apple ID with forgotten credentials is complex, but Dr.Fone - Screen Unlock (iOS) has also made it easier. It is an excellent and must-have toolbox to deal with all password-related iPhone problems.
How to Fix when Apple Account Locked On Apple iPhone XR?
You pick up your phone to perform a routine task, and your Apple iPhone XR gives you a surprise that you have gotten your Apple account locked. It will remain this way, and you will not be able to use the phone unless you follow the proper steps.
Several Apple device users face this problem, and one of these messages might be on your screen:
- “This Apple ID has been disabled for security reasons.”
- “You can’t sign in because your account was disabled for security reasons.”
- “This Apple ID has been locked for security reasons.”
Getting your Apple account locked can be frustrating and might hinder the performance of your phone. In this article, we will discuss the various tips to solve the Apple account locked issue.

Part 1. Why is Apple Account Locked?
Although annoying, Apple locks your Apple Account for a good reason. There might be various reasons, but the most common one is that your account’s integrity was in danger. Apple locks your account when it sees an “unusual activity” surrounding your account or device. It generally happens when some unauthorized person attempts to access your account.
Your activity can also lock your account. If you fail to log in to your Apple ID several times, Apple might lock it. Moreover, your account can even get locked when you answer the security questions incorrectly more than once. Furthermore, Apple tries to keep your ID dedicated to a few devices. Besides, it could shut it down when you aimlessly try to open the account on multiple Apple devices.
Part 2. 3 Tips to Unlock Apple Account
Well, now you know the reasons behind the Apple Account getting locked. The next step is to learn the best tips to unlock it. Here, we will share various tricks that will open the Apple account in no time. So let’s dive in!
Tip 1. Use Dr.Fone to Unlock Apple Account (without Password)
Wondershare’s Dr.Fone comes with a complete set of tools to help with a range of different and challenging problems related to your Android or iPhone. The software has an intuitive interface, making unlocking Apple account a lot easier than its competitors. The application Dr. Fone - Screen Unlock (iOS) has robust versions for both Windows and macOS.
Some of the top and vital features of Dr.Fone are as follows:
- It can repair the system of both Android and iOS devices.
- It can backup data available on your device.
- You can transfer WhatsApp, Line, and Kik chat history from one phone to another.
Download the tool on your respective system, and follow the guidelines stated below to unlock Apple account without the password:
Step 1: Run the Application
Once the download is complete, get your USB cable and connect your Apple iPhone XR/iPad to your computer.
Select the “Screen Unlock” tool, and a new interface will greet you. Select the “Unlock Apple ID” option to begin the process to unlock your Apple Account.

Step 2: Reset your Apple iPhone XR using Dr.Fone
Dr.Fone will present you with detailed on-screen instructions that show precisely how to reset your Apple iPhone XR Settings. Dr.Fone must unlock your Apple iPhone XR/iPad.
Step 3: Unlock the Phone
When your Apple device has been reset, Dr.Fone will get to work and will give you your unlocked iPhone/iPad in a matter of seconds.
When the process finishes, a pop-up message will notify you. It will point out that you can now unplug your Apple iPhone XR from the PC and check if the operation was successful.
Tip 2. Use iTunes to Unlock Apple Account
Apple also offers the services of its built-in utilities such as iTunes to unlock Apple account. Here before doing anything else, you will need to get your Apple iPhone XR into recovery mode. For added convenience, we have listed how to get into recovery mode with iPhone so you can smoothly proceed with the process.
Step 1. Power off your device.
Step 2. Once it’s powered off, press the side button and keep holding it while connecting your Apple iPhone XR to your computer.
Step 3. Once the recovery mode logo appears, leave the button.
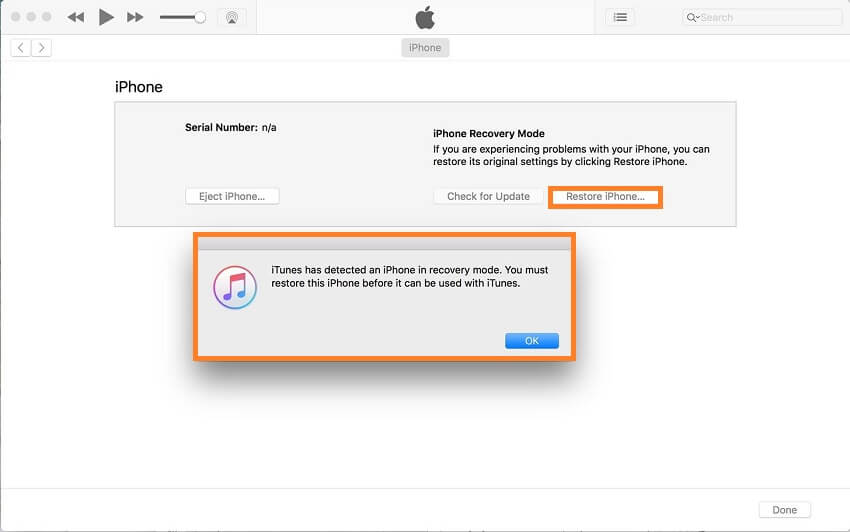
Now that you have entered into recovery mode, the next step is to restore the iPhone. The process is simple. You can learn it quickly by going through the steps listed below:
Step 1. After successfully getting your Apple iPhone XR into recovery mode, select the Restore or Update option from iTunes.
Step 2. iTunes will download the necessary files to restore your phone, which can take some time.
Step 3. After the download, you can press shift while clicking restore, which will let you select the firmware file.
Step 4. Wait for the firmware update to finish, and then you are done!
Step 5. Access your Apple iPhone XR, and you will find that the Apple account will be disabled.
Tip 3. Recover Your Apple ID via Apple (Reset Password)
If you have forgotten your Apple device’s password, it’s recommended not to input your password more than one time. It would lead to a 24-hour shutdown. It cannot be lifted even if you know your password, so proceed wisely. The recommended solution instead is to reset your password.
Here are the steps to reset the password for any of your Apple devices, provided they are in your trusted devices’ list.
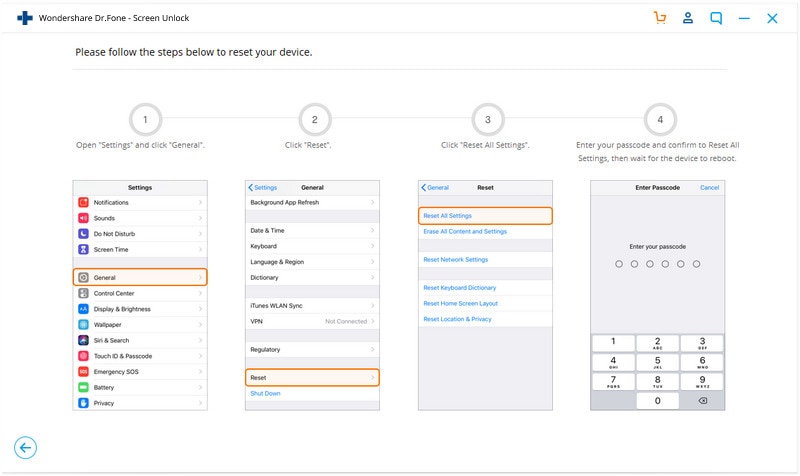
Step 1. Go to Settings on your Apple device and tap your name.
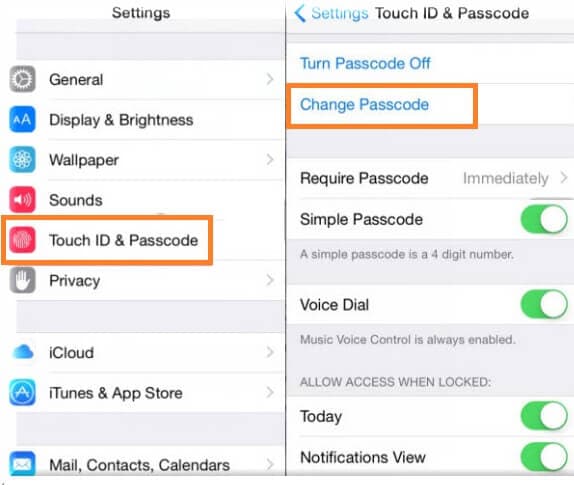
Step 2. Now, go to Password & Security and then Change passcode.
Step 3. If your Apple device is signed in to iCloud, you will be required to enter a password.
Step 4. Enter the iCloud password and then set a new code for your device.
Part 3. How to Change Apple ID on an iPhone?
If you have purchased a refurbished iPhone and the previous owner’s Apple ID added to it, it is wise to change the Apple ID. You can add your own or add the ID of someone you know. Apple provides simple steps for you to change your account on iPhone.
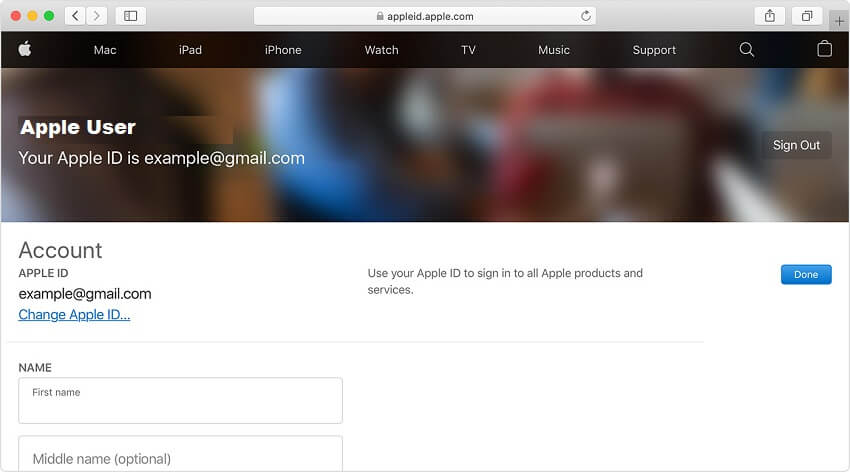
Step 1. Visit the relevant site of Apple to remove the ID and sign in with your account.
Step 2. Navigate to the Account section and choose Edit. From there, you will see a new list of options.
Step 3. Select Change Apple ID.
Step 4. Update your email address and click continue.
Step 5. That’s it!
Conclusion
Getting your Apple account can ruin your day and hinder your work. Luckily, there are suitable methods to fix the Apple Account Locked issue quickly and without any damage. Here, we have discussed the top techniques to unlock the Apple account. Hopefully, these tips have helped you can access the contents of your Apple iPhone XR.
Also read:
- [New] Mastering In-Stream Ads on Facebook Configuration & Analysis Guide for 2024
- [Updated] Best On-the-Move DVD Player Selections for You for 2024
- [Updated] In 2024, AJay The Creative Content Creator's Profitable Venture on YouTube
- 2024 Approved Prime Top 5 Virtual Reality Drones
- Detailed Guide on Removing iPhone 13 Pro Max Activation Lock without Previous Owner?
- In 2024, A Step-by-Step Guide to Finding Your Apple ID From Your Apple iPhone 7 Plus
- In 2024, How To Change Your iPhone 6s Plus Apple ID on MacBook
- In 2024, How To Remove the Two Factor Authentication From Apple iPhone 12 Pro Max
- In 2024, Your Account Has Been Disabled in the App Store and iTunes From Apple iPhone 12 mini?
- Real-Time Voice to Action, No Price Tag for 2024
- Reconnecting Ethernet on Windows OS
- Top-Notch Solutions for Disabled Apple ID On Apple iPhone 15 Making It Possible
- Transformative Tech Effortlessly Turning Phones Into VR Gear
- Title: Detailed Guide on Removing iPhone XR Activation Lock without Previous Owner?
- Author: Alma
- Created at : 2024-12-31 16:20:36
- Updated at : 2025-01-05 22:27:52
- Link: https://apple-account.techidaily.com/detailed-guide-on-removing-iphone-xr-activation-lock-without-previous-owner-by-drfone-ios/
- License: This work is licensed under CC BY-NC-SA 4.0.