
How To Delete iCloud Account Remove Your Apple ID Permanently From iPhone X
How To Delete iCloud Account: Remove Your Apple ID Permanently On Apple iPhone X
Searching “How to delete iCloud account?” If you want to delete an iCloud account, you must delete an Apple ID account. And before you take this irreversible step, it’s crucial to understand the implications. Deleting your Apple ID account means permanently erasing all contents stored in your iCloud, such as media and documents. You’ll also lose access to essential Apple services such as the App Store, iMessage, and iTunes.
Deleting your Apple ID is a significant decision that should not be taken lightly. Proceeding with Apple ID deletion is a final decision. Once initiated, there’s no turning back. If you’re certain about it, refer to this article for a step-by-step guide on how to delete iCloud account and explore alternative options if you need it.

Part 1: Deleting iCloud Account? Essential Preparations Before You Proceed
Before you learn the steps on “how to delete icloud account,” take steps to ensure a smooth transition and prevent the loss of valuable data. Before you permanently remove an iCloud account, ensure you’ve completed the following:
Backup Your Data
Create a local copy of your files, photos, videos, and documents on your computer or an external hard drive. You can use cloud storage services or third-party apps like Wondershare Dr.Fone to selectively restore it later.
Request a Copy of Your Data
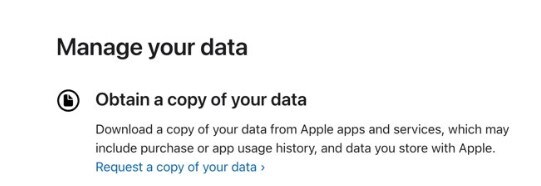
Apple provides a service on selected regions that allows you to request a copy of data associated with your Apple ID before deleting your account. It includes records of your sign-in, account details, iCloud contents, and Apple retail store transactions. Having a copy of this data can be useful if you need to access it in the future.
To request a copy of your data, go to Privacy Apple on your web browser. Under the Obtain a copy of your data section, click Request a copy of your data. Next, select the data you need and click Continue.
Review Your Active Subscriptions
Also, to “delete iCloud account,” first review any active subscriptions you may have, such as Apple Music, Apple TV+, or iCloud+ storage. If you don’t want to continue these subscriptions, cancel them before deleting your account.

Download Backups of Your Apps, Games, Music, Movies, TV Shows, Books, and Audiobooks
Your iCloud account may contain backups of your apps, games, and media purchases. Before deleting your Apple ID account, download them to your device or a computer to ensure you don’t lose access to your favorite content.
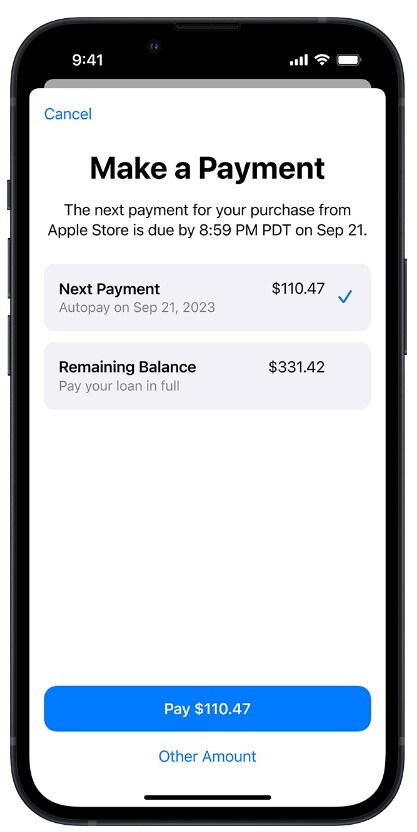
Pay Loan Installments You Have With Apple Pay Later
If you have an outstanding loan with Apple Pay Later, pay off any remaining installments before you delete your iCloud account. Otherwise, you may incur late fees or other penalties.
Sign Out of Your Devices and Web Browser
Before deleting your iCloud account, ensure you sign out of your account on all devices, including iPhones, iPads, Macs, and web browsers. Failure to sign out of an account can lead to several potential risks and inconveniences, including:
- Restricted device access
- App malfunctioning
- Constant Sign-in errors
- Web browsers retain your Apple ID information
Part 2: Remove iCloud Account Without Deleting: Maintaining Your Apple ID
Removing an iCloud account from your device doesn’t necessarily mean deleting the account itself. It simply means signing out of your iCloud account on that device. Your iCloud data remains intact and accessible from other devices.
However, when you sign out of iCloud on your device, you will be signed out of all Apple services that use your iCloud account. It includes Apple Pay, Find My, iCloud Mail, Siri Shortcuts, and others. You need to sign in with your Apple ID to use these services again.
Remove iCloud Account on iPhone
Here’s “how to remove iCloud account“ from your Apple iPhone X without deleting the account:
- Step 1: Open the Settings app, then tap the Apple ID at the top of the Apple iPhone X screen.
- Step 2: Scroll down, tap on Sign Out, enter your Apple ID password, and tap on Turn Off.
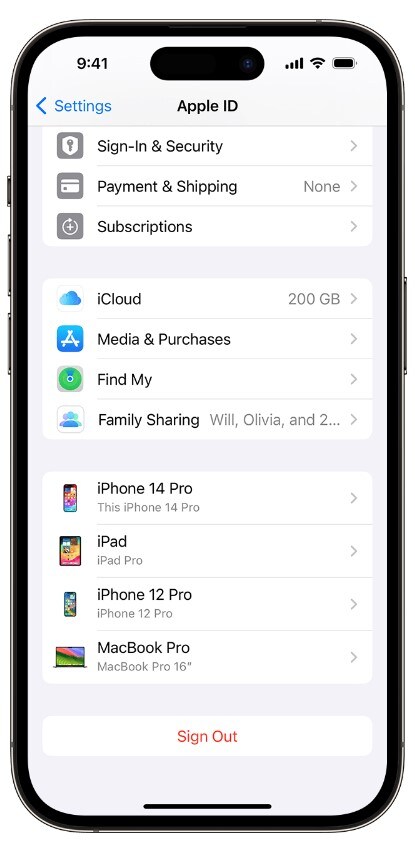
- Step 3: Tap on Sign Out to verify.
Remove iCloud Account on Mac Device
Follow these steps below to remove an iCloud account from your macOS Ventura or later:
- Step 1: Click on the Apple logo in the top left corner of your screen, then choose System Settings.
- Step 2: Click on the Apple ID icon and click Sign Out.
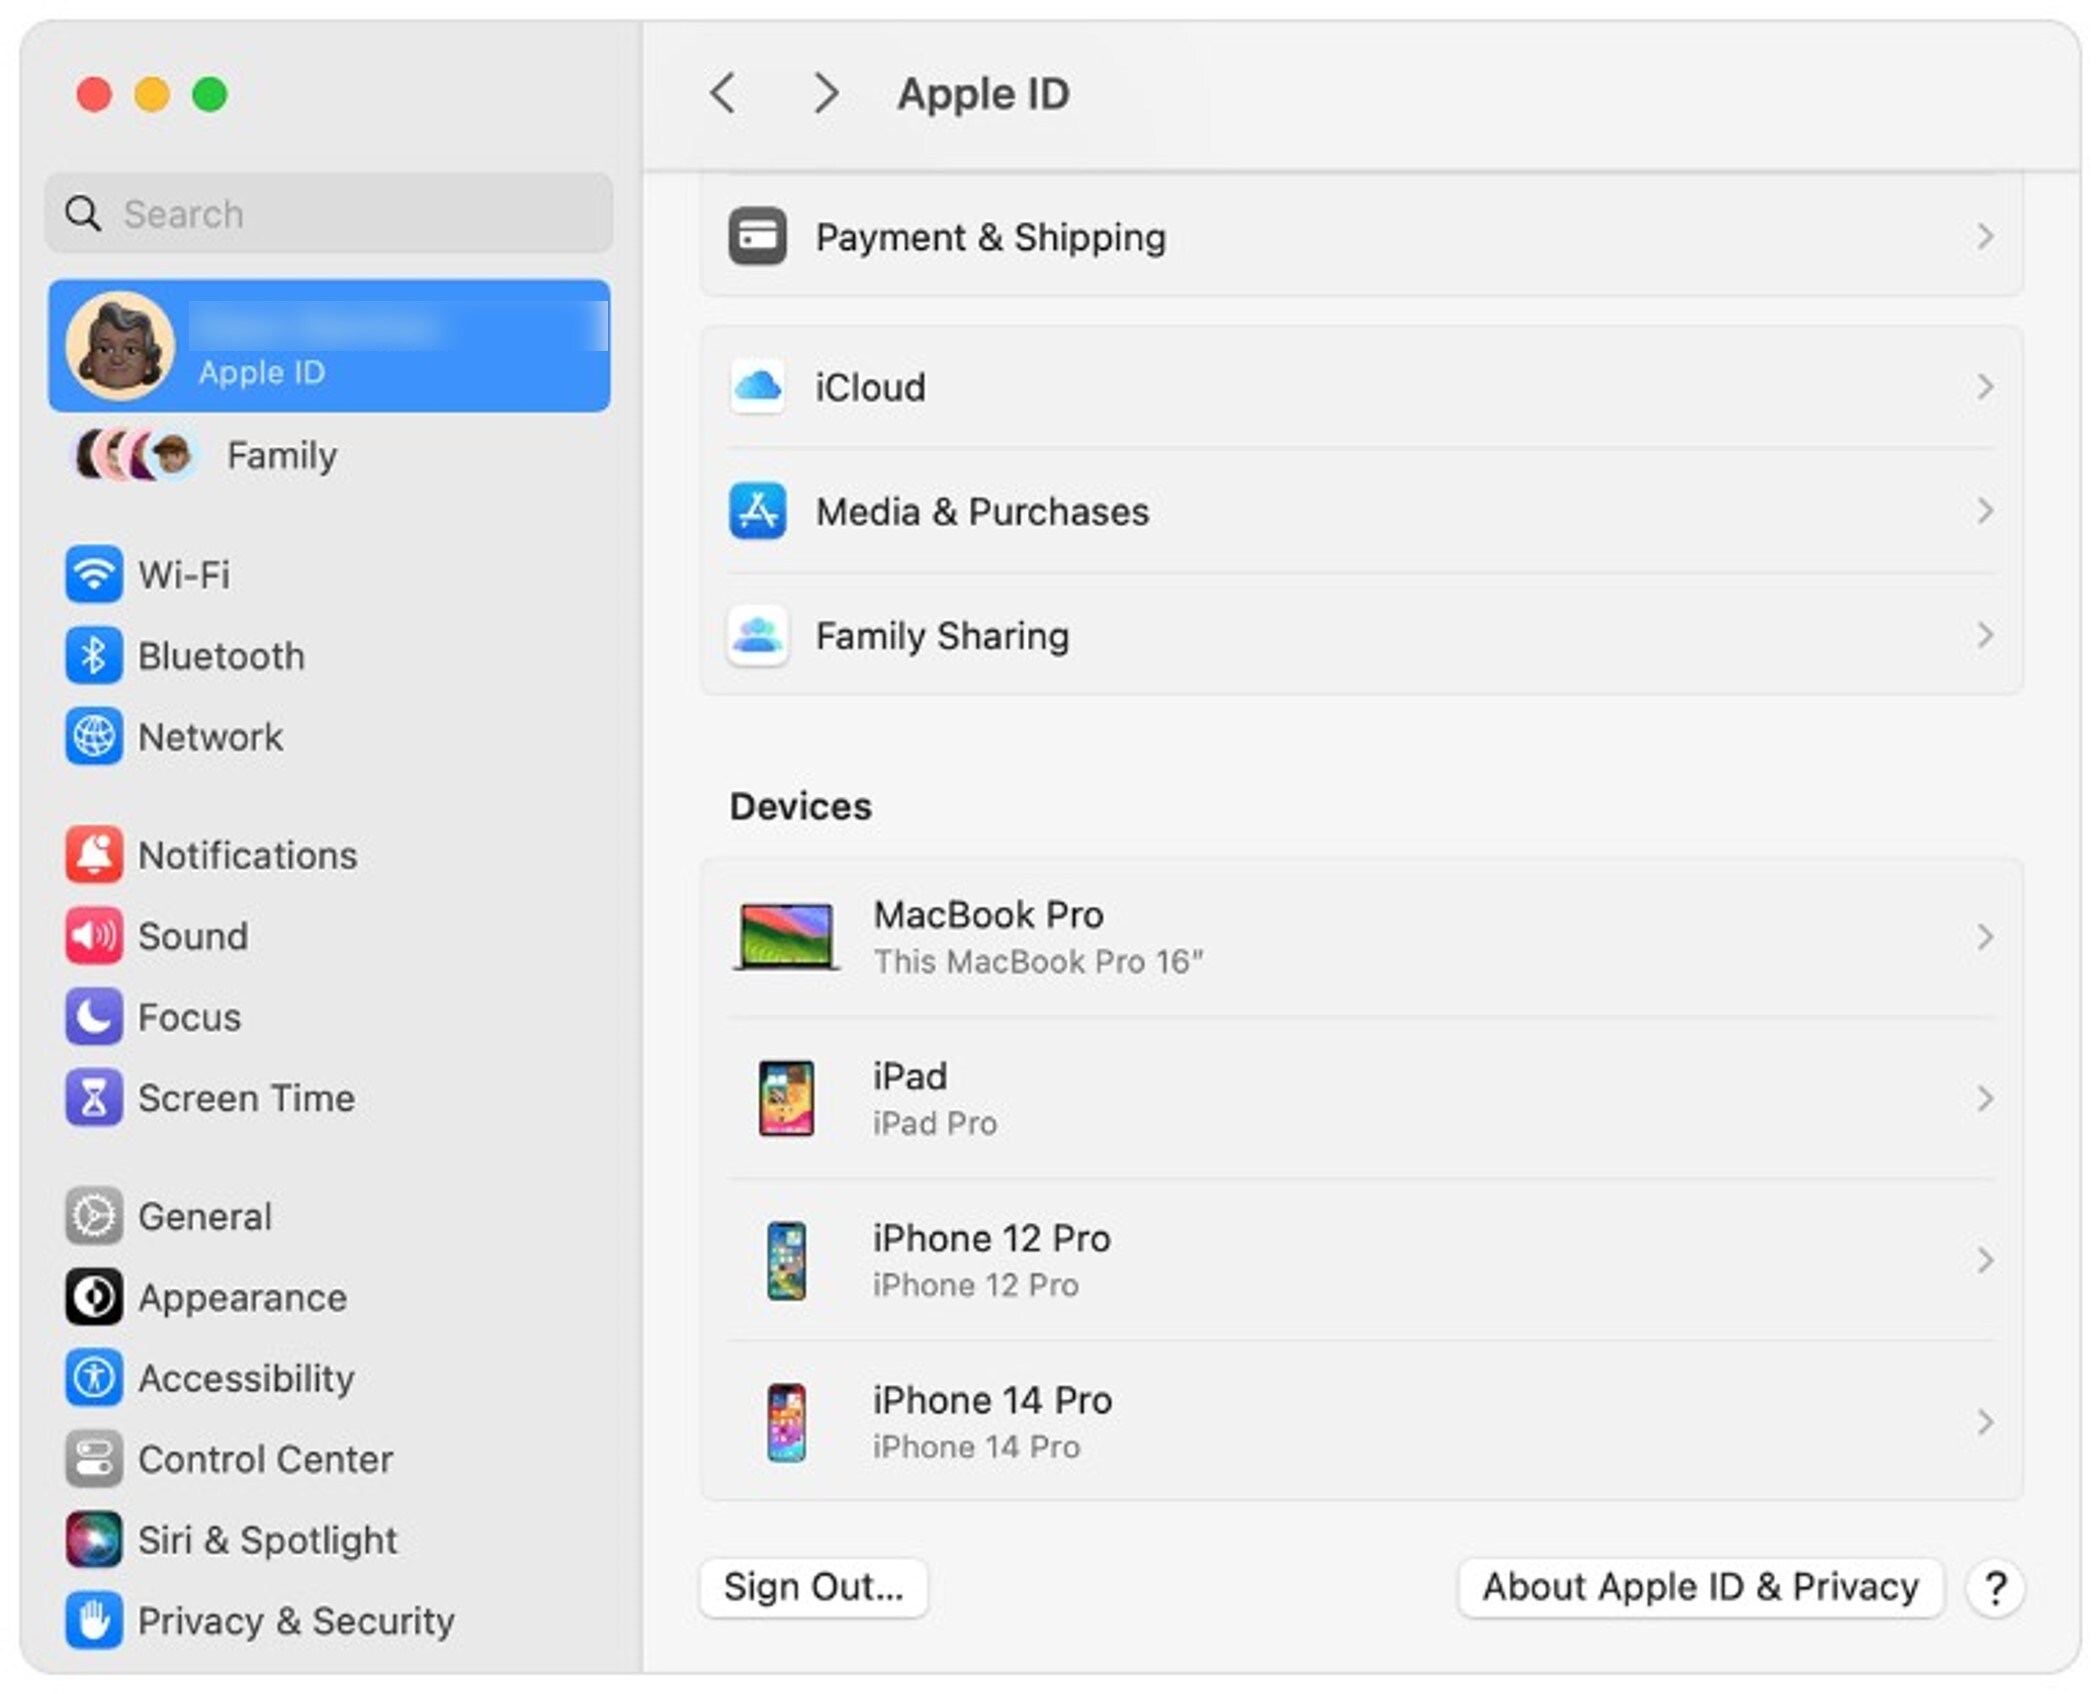
- Step 3: Select the data files you want to save, then click Keep a Copy.
Part 3: How To Delete iCloud Account Permanently?
Deleting your Apple ID has effects beyond the loss of data and services. These include:
- Apple will not be able to recover your Apple ID or any associated data once deleted.
- After deleting your iCloud account, any messages sent to you via iCloud Mail or iMessage will not be delivered.
- If you have any unused credit balance in your iCloud account, you cannot redeem or refund it upon deletion.
- The email address associated with your deleted Apple ID becomes unavailable for creating a new Apple ID.
If you are sure of your decision and have prepared for the consequences, here’s how to permanently delete your iCloud account:
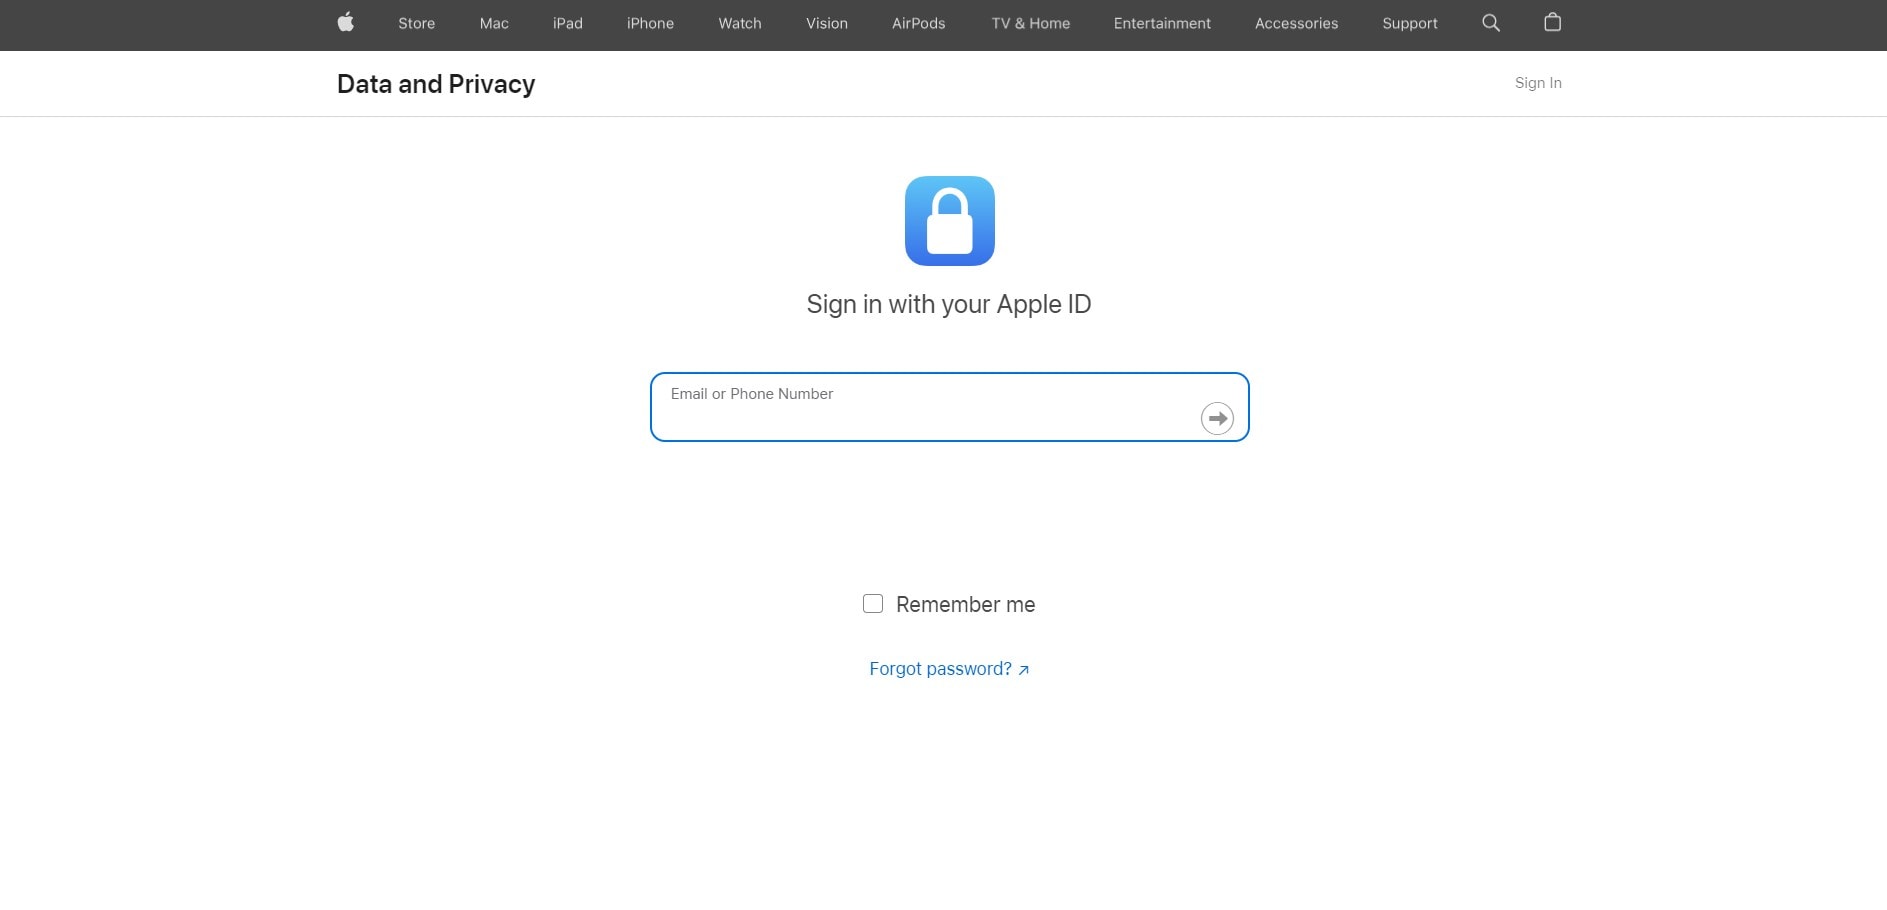
- Step 1: Open a web browser and visit Apple’s privacy website: privacy.apple.com. Sign in using the Apple ID associated with the iCloud account you want to delete.
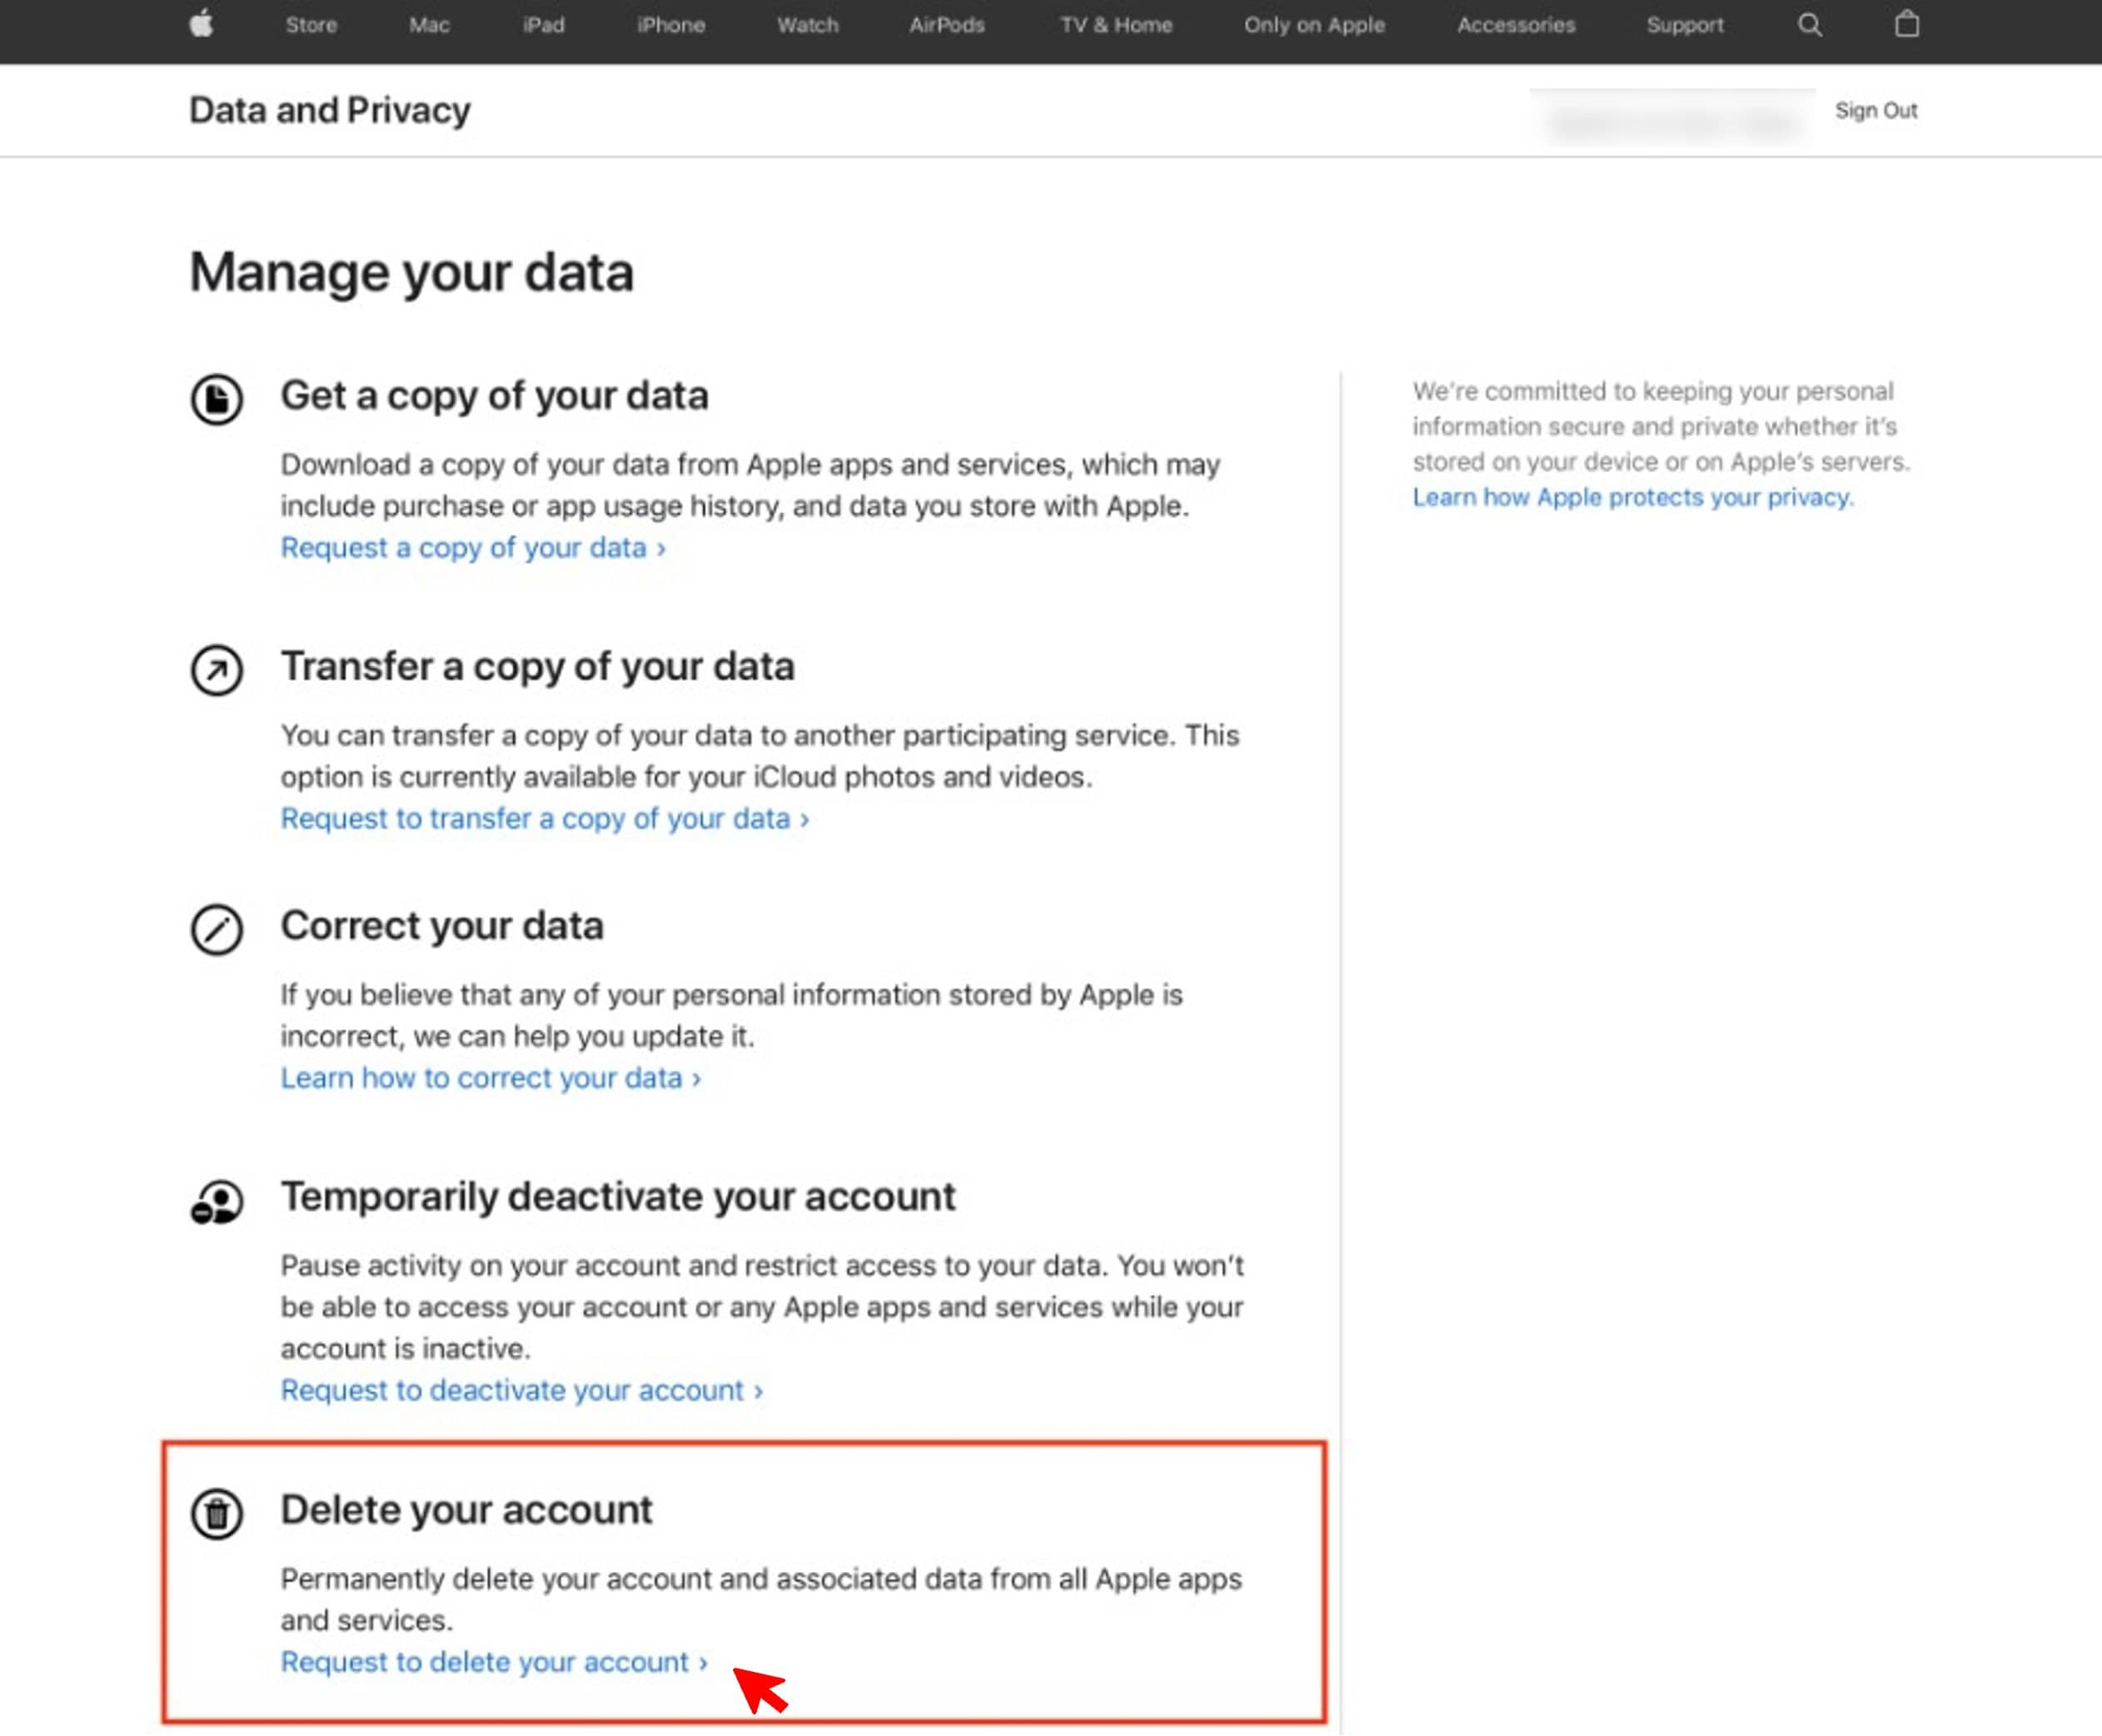
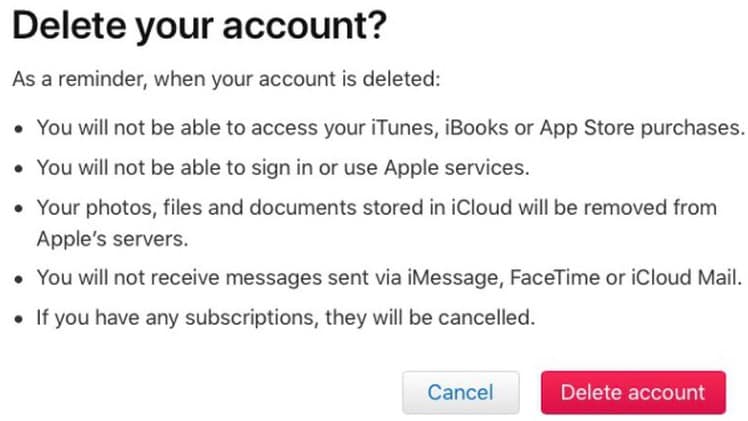
- Step 2: From Delete your account section, click Request to delete your account.
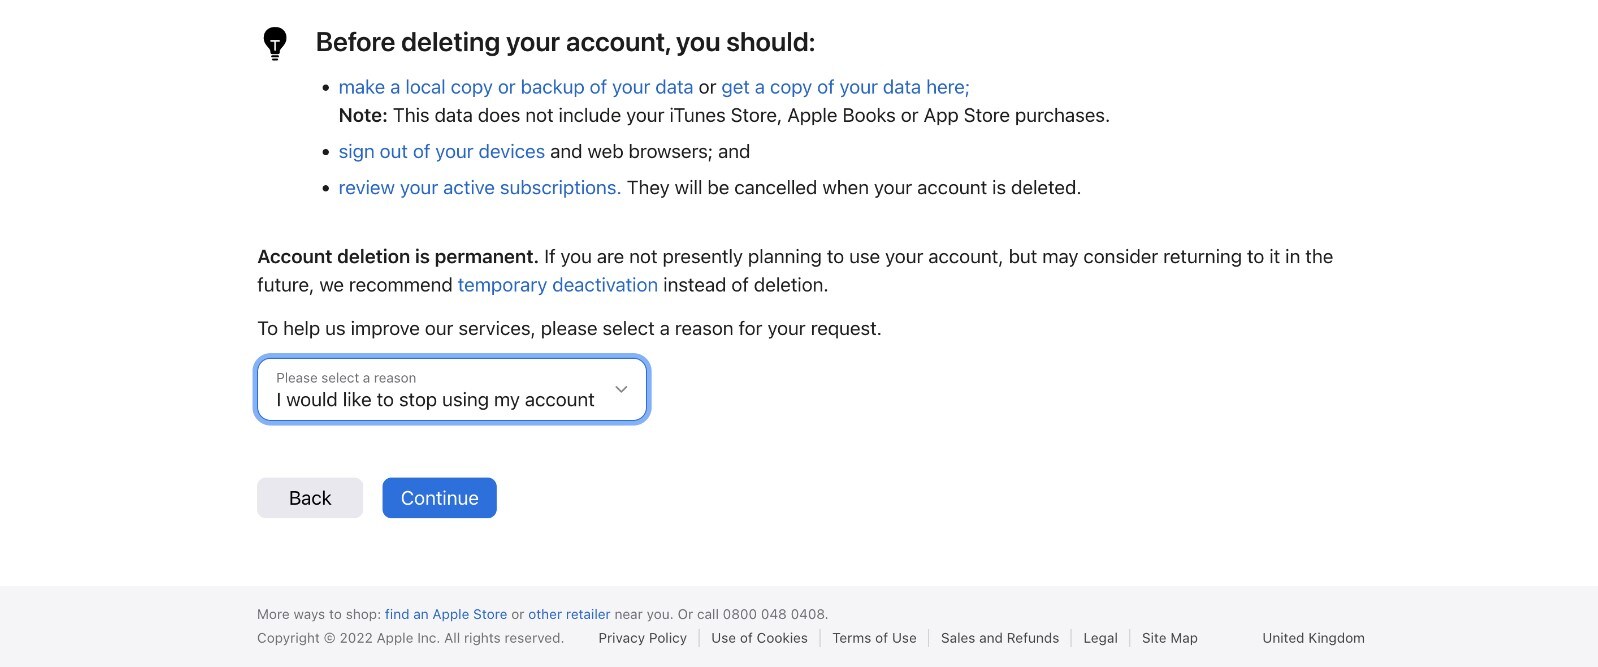
- Step 3: Choose a reason from the provided options in the drop-down menu for deleting your iCloud account, then click Continue.
- Step 4: Review the information displayed, ensuring you want to proceed with deleting your iCloud account. Click Continue.
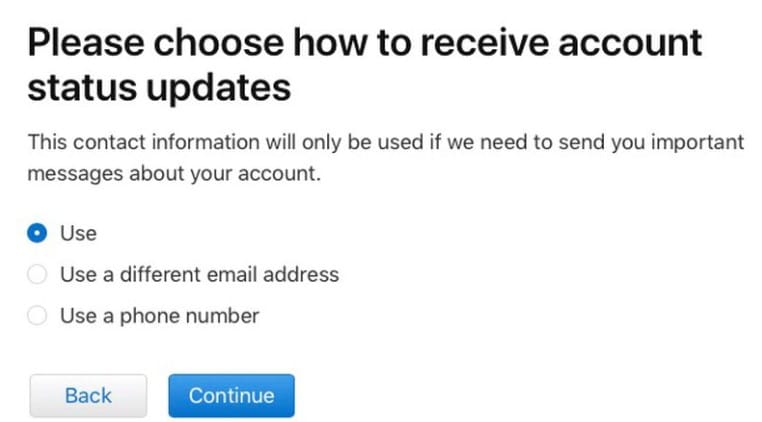
- Step 5: Choose where Apple can send you updates regarding your deletion request. Click Continue.
- Step 6: Follow the instructions provided to verify your identity. It may involve entering a code sent to your trusted device or answering security questions.

- Step 7: Review the summary of your deletion request, ensuring all details are accurate. Next, click Delete Account to finalize the deletion process.
Part 4: How To Remove an iCloud Account Without a Password?
You’re not alone if you’ve forgotten your Apple ID password or bought a used iPhone with the previous owner’s Apple ID still on it. Many people find themselves in this situation, and it can be frustrating not being able to remove the iCloud account without the password. Fortunately, there is a way to do this using Dr. Fone’s iOS Screen Unlock tool:
- Compatible with all versions of iOS, including the latest iOS 17.
- Unlock different iPhone locks, such as screen locks and SIM locks.
- Bypass iCloud Activation lock
- Remove Apple ID even if the iOS device has enabled Find My service
Here’s a step-by-step guide on how to use Dr.Fone to remove an iCloud account without a password:
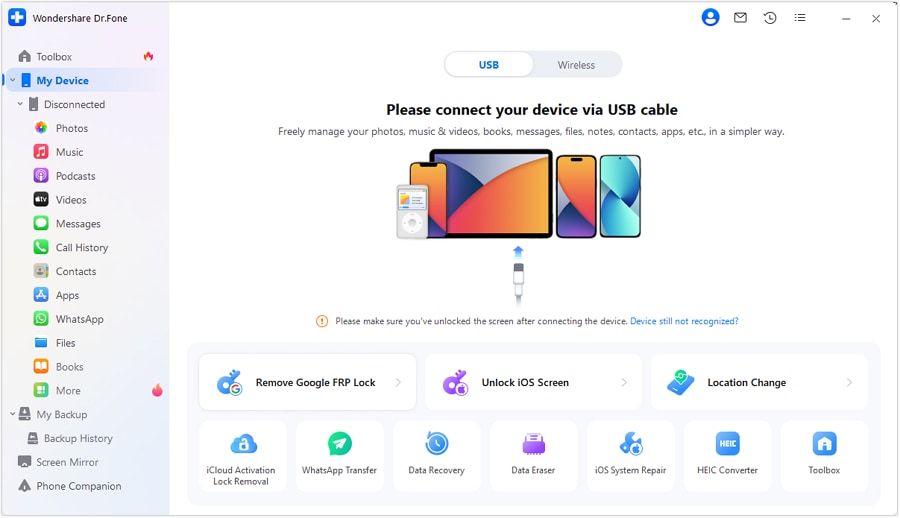
Step 1: Download and install Dr.Fone on your desktop.
Step 2: Launch the software and go to My Device. Follow the in-app instructions to connect your Apple iPhone X to your computer using a USB cable.
Image name: how-to-delete-icloud-account-13.png
- Step 3: Go to Toolbox from the left navigation pane and select Screen Unlock > iOS.

- Step 4: Select Remove AppleID on the next window.

- Step 5: Click Unlock Now to proceed.

Note:
If you continue to “remove iCloud account“, this will erase all data from your Apple iPhone X.
- Step 6: Click Yes if you have set up a screen lock.

- Step 7: Click Yes if you have already enabled Two-Factor Authentication on your Apple iPhone X.

- Step 8: Follow the on-screen instructions to put your device into Recovery Mode.

- Step 9: Dr.Fone will recognize your device in the Device Model. Choose an option from the System Version drop-down list and click Start.

- Step 10: The latest iOS firmware is being downloaded.

- Step 11: Click Unlock Now to proceed.

- Step 12: Enter the code given in the dialogue box and click Unlock to continue.

- Step 13: Dr.Fone will then begin removing the iCloud account. Do not disconnect or use your device while the process is ongoing to avoid device issues.

- Step 14: To finalize the Apple ID removal process, please check your device and click Done once you’ve verified it.

Part 5: How To Remove an iCloud Account Without Deleting an Apple ID Account?
Deciding to permanently “delete iCloud account“ or Apple ID is a significant step. If you’re unsure about this irreversible action, consider deactivating your account. Deactivating your Apple ID temporarily suspends it. However, this feature may depend on your location.
Once you deactivate your Apple ID, you can no longer use it to sign into any Apple services, including iCloud, the App Store, iTunes, Apple Books, FaceTime, and Apple Pay. Even so, deactivating your Apple ID does not delete your account. You can reactivate your account anytime to regain access to all your Apple services and data.
Here’s how to temporarily deactivate your Apple ID account:
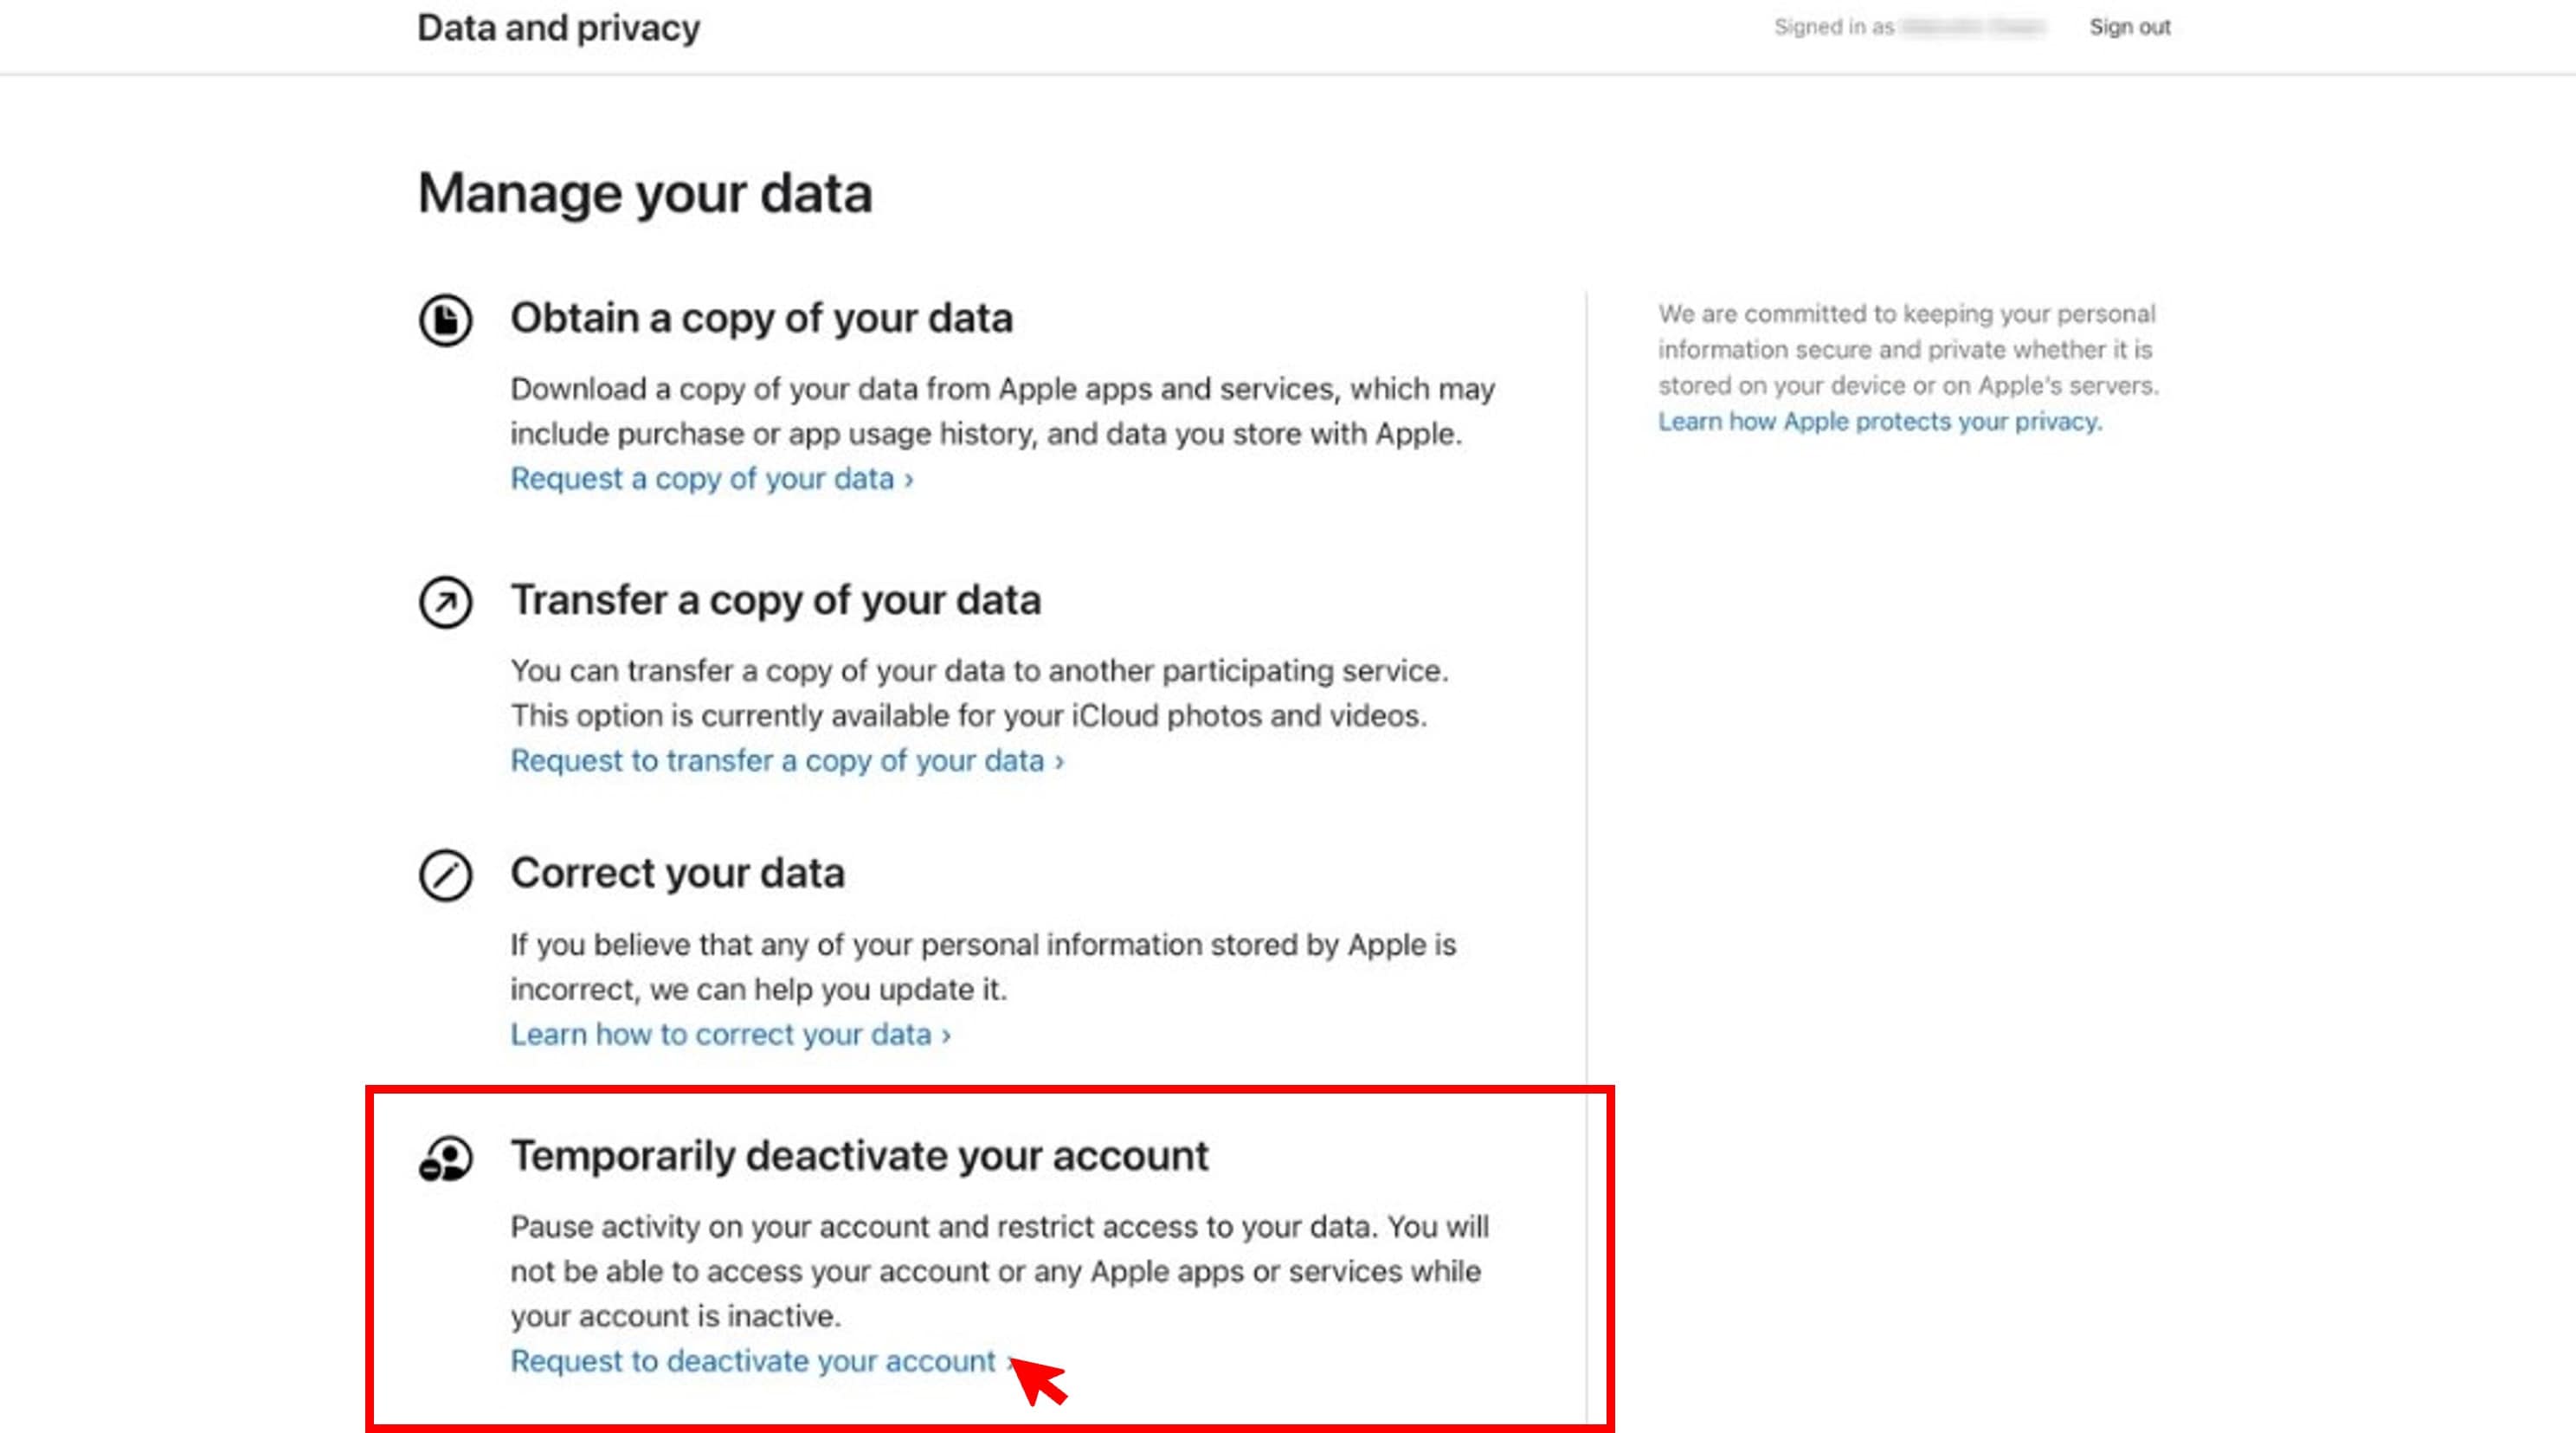
- Step 1: Go to Apple’s Data and Privacy website. Sign in using your Apple ID.
- Step 2: Scroll down to the Temporarily deactivate your account section and click Request to deactivate your account.
- Step 3: Select a reason for deactivating your account from the drop-down menu, then click Continue.
- Step 4: Review the information and follow the on-screen instructions to complete deactivation.
Note:
Keep the unique alphanumeric access code you’ll receive. You’ll need it to reactivate your Apple ID account.
More Article About iCloud Account:
Ways to Restore from iCloud Backup Without Reset
3 Ways to Recover iCloud Password
iOS 16: Best Ways to Bypass iCloud Activation Lock on iPhone/iPad
Conclusion
As you’ve learned, deleting an iCloud account is a permanent decision you cannot reverse. Once deleted, your account and all associated data will be permanently erased from Apple’s servers. Thus, it’s crucial to back up your data before proceeding.
Apps like Dr.Fone provide a comprehensive solution for backing up your data and removing an iCloud account without a password. Its user-friendly interface and streamlined processes make it an ideal choice for those seeking a quick and hassle-free experience. Whether you’re looking for an answer on “how to delete iCloud account“ or “remove iCloud account,” Dr.Fone is the ultimate tool to guide you through the process.
Why Apple Account Disabled On your Apple iPhone X? How to Fix
Apple is one of the leading smartphone developing enterprises that has introduced the world to a contemporary set of features that are not common among other leading smartphone companies. One of the major distinguishing characteristics of Apple has been displayed in its present security protocols. Apple Account is regarded as one of the most significant credentials of the Apple iPhone X and iPad that is responsible for connecting and holding the applications and the assorted data. Many users have generally reported unusual situations that got their Apple Account disabled. There are several reasons that can be associated with the Apple account getting disabled. The major repercussion that is associated with it is unnecessary data loss following the suspension of all products that have been bought with the account over time. This article provides you an impressive overview of the major reasons that lead to your Apple Account getting disabled, followed by the associated mechanisms that can be tested to secure the account.
Part 1. Why is the Apple account disabled?
Apple iPhone, iPad, and other devices operate over a single Operating System, with its own protocols and unique mechanisms that distinguish it from other smartphone models in the market. Apple believes in securing the data and identification of its users with its state-of-the-art security measures. Under such circumstances, it usually gets possible for the user to have his Apple account disabled unnecessarily. Whenever you encounter such a situation, there are several messages that might be displayed on your device to prompt you over the disabling of the account. These messages usually appear in situations where you intend to sign in to some platform with your associated Apple ID. The most common messages that appear on the screen are:
- “This Apple ID has been disabled for security reasons.”
- “You can’t sign in because your account was disabled for security reasons.”
- “This Apple ID has been locked for security reasons.”
The messages that have been stated above are usually depicting a security anomaly that led to the disabling of the associated Apple ID. However, there can be several reasons that would have led to such circumstances, which are described as follows.
- There might be incorrect forced logging in into your Apple ID for multiple tries.
- Any user would have entered incorrect security questions multiple times.
- The other information associated with the Apple ID would have been entered incorrectly numerous times.
Part 2. Is “Your account has been disabled in the App Store and iTunes” the same as “This Apple ID has been disabled for security reasons”?
There are several instances where you encounter such prompt messages where you are restricted in using the App Store and iTunes. These messages can come in the form of “Your account has been disabled in the App Store and iTunes.” Over observing this prompt message, it has been discovered that the assorted message is not related to the other common message of “This Apple ID has been disabled for security reasons.” The dynamics of getting restricted from using the App Store and iTunes are related to remaining balances that have stuck around for a while over your Apple account. Normally, you may have some billing issues that are prevailing over an unpaid iTunes or App Store order. This problem can be countered through simplistic methods under such conditions where you are having access to the account information and can check for the basic billing information or update the payment method following other settings that are associated with paying bills. Over failure in accessing your account, you are required to contact Apple Support and look for the billing and payment statements to clear up all the remaining dues. Apple has considered covering all the security protocols to perfection, where you have any prevailing Apple charges on your connected credit card that would lead to direct disabling of your Apple Account.
Even though Apple accounts can be generally disabled overpayment issues, there are several security reasons that might restrict you in discovering and buying different products across the App Store and iTunes. It is necessary for you, as an Apple user, to remain prompt of all the issues that are relating to your Apple Account.
Part 3. 2 tips to Unlock Disabled Apple Account
As this article provides you a detailed overview of the reasons that lead to your Apple Account getting disabled, this article also considers providing you a few tips and tricks that would guide you in efficiently unlocking your Apple Account and use it with ease.
Unlock disabled Apple account with Dr. Fone
The first remedy that can be effectively tested across such situations that involve disabled Apple accounts is relating a third-party platform. Dedicated third-party tools are quite common in the market and provide users with adequate services that allow them to unlock their devices with ease. Out of this uncountable list of platforms, this article introduces you to a specific platform that offers you unique features with a user-interface that can be easily apprehended. Dr. Fone – Screen Unlock (iOS) offers you the perfect environment that would lead you in reversing the disabling of your Apple Account easily. There are several reasons that make this platform the first choice of users all around the globe, which are declared as follows:
- You can easily unlock your Apple iPhone X if you accidentally forget the password at any time.
- The platform protects the Apple iPhone X or iPad from the disabled state.
- It can work for any iPhone, iPad, or iPod Touch model.
- The platform is compatible across the latest iOS versions.
- You are not required to have iTunes for unlocking your device.
- A very user-friendly platform with no requirements of technical expertise.
While you understand the basic reasons that lead you to the fact that Dr. Fone is the most appropriate choice to unlock your disabled Apple Account, the following steps explain the guide that would help you in unlocking your device with ease.
Step 1: Connect Devices and Launch
Initially, it is significant to download the platform and install it by following all the on-screen instructions effectively. Following this, you need to launch the platform and connect your Apple device via a USB connection.
Step 2: Select Screen Unlock
With the home window on your front, you are required to tap on the ‘Screen Unlock’ tool from the list of options to open a new screen. On the new screen, you are required to select the last option of “Unlock Apple ID” to initiate the process.
Step 3: Trust the Computer and Access Device Settings
Over the Apple Device, you need to select the option of “Trust” over the prompt that is received on the phone. Following this, you need to open the “Settings” of your device and initiate a reboot of your Apple device.

Step 4: Device Unlocks
The unlocking process immediately starts, and the platform executes the complete process automatically. A prompt message appears on the desktop showing the completion of the task. The device is now unlocked successfully.
Unlock disabled Apple account using Apple’s verification
The other method that can be effectively tested is Apple’s verification that would allow us to easily topple off all barriers that are involved in the process. To effectively unlock your disabled Apple Account using Apple’s verification process, you need to follow the steps described in detail.
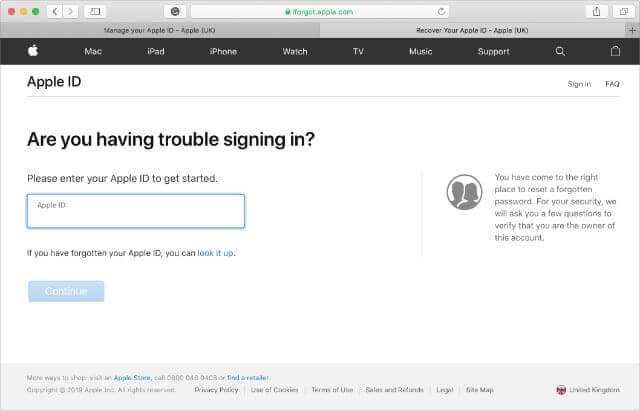
Step 1: Open iForgot Website
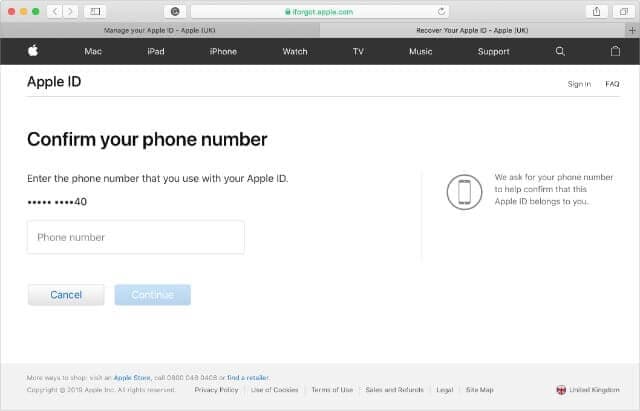
You need to open the iForgot website to test the verification process. As you open the platform, provide the appropriate credentials over which your Apple device is operating. This is referred to as your Apple ID that has been used for the Apple iPhone X device.
Step 2: Provide Personal Details
As you proceed with the verification, there are several personal details that are used to check the authenticity of the user. You are required to answer all security questions, provide all numbers if asked.
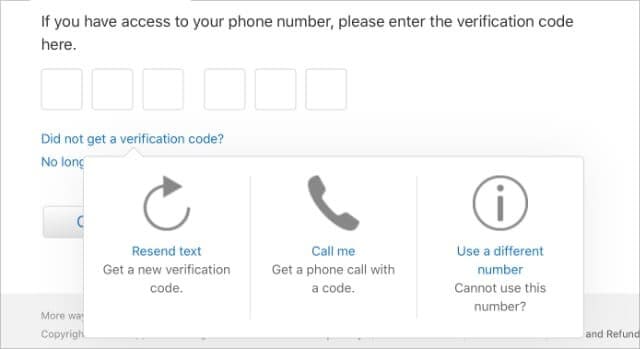
Step 3: Use the Verification Code
The platform will send a verification code that would allow you to unlock your device with the Recovery Key that is offered. Tap on “Unable to access your [device]“? to allow the platform to send a six-digit verification to the phone number that is attached to the Apple ID. You can simply use it along with the Apple ID password to unlock your account.
Conclusion
This article has provided you a detailed guide over the existing reasons that would have your Apple account disabled, followed by different tips that can be followed to cover your assorted problems efficiently.
How To Remove Phone Number From Your Apple ID on Your Apple iPhone X?
After getting a new device, iPhone users must prepare a unique identification term for their Apple ID. Creating and setting up this ID is not different each time. Not to mention, one can use this one registered ID to access multiple Apple-based features like podcast subscriptions, apps, etc.
While the code is essential, it can become inactive if your registered phone number is no longer available or your change your number. You must remove the phone number from your Apple ID and add a new one.
Unsure about the steps, though? This post covers that, so read ahead.
Part 1. What is the Purpose of a Phone Number for Apple ID?
Typically, the email is not linked with Apple ID since the function is linked with phone numbers. Apple services-based communication is passed through the Messages app on the iPad, iPhone, iPod Touch, and the Apple ID.
Registering the phone number to Apple ID will allow you to get the necessary account-related messages on your device smoothly. If you do not sign in to iCloud with a SIM card, using Messages or the FaceTime app will become challenging. So, you need to know how to remove your phone number from iCloud or Apple ID when your registered number is inactive.
Part 2. Can You Remove the Trusted Phone Number from Apple ID?
If you want to learn how to remove the number from Apple ID and if possible, the answer is yes and quite quickly. Apple allows users switching to another carrier to remove their already authorized and linked phone number from the Apple ID. This is helpful for two-factor authentication phases so that the Apple iPhone X user can avoid getting fully locked out from the account.
Part 3. 3 Ways to Remove a Phone Number from Your Apple ID
If you are wondering about the steps for how to remove an old phone number from Apple ID, there are different styles available. Here are the main processes you can utilize.
Method 1. Remove Phone Number via iPhone/iPad’s Settings
In the matter of how to remove a phone number from an Apple ID, the most effortless process is to go into the Settings app and delete it from there. This is possible if you have your registered phone with you and the Apple ID. Simple access and remove the number.
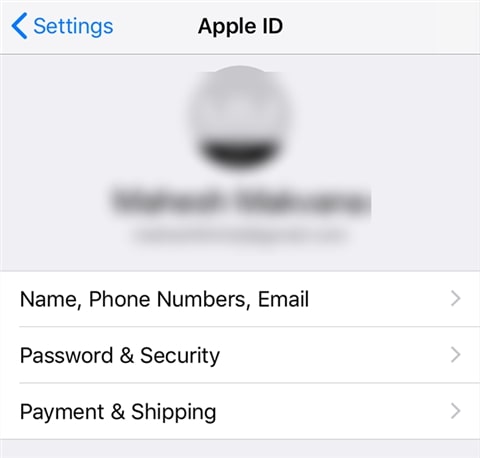
Step 1: Access the Settings option on your iPad or iPhone device.
Step 2: Tap on the Apple account ID.
Step 3: Reach the Password & Security section.

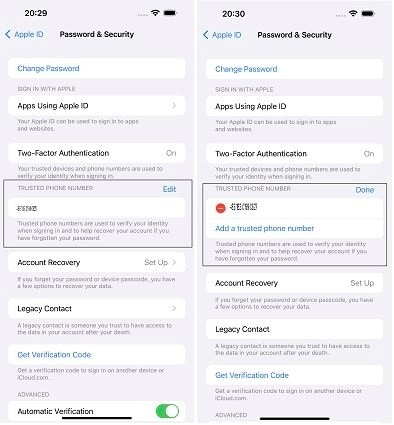
Step 4: You will see the Edit icon on the right-hand side. Click on it and then tap on the “Add a Trusted Phone Number” option.
Step 5: Add the Apple iPhone X Passcode > new phone number.
Step 6: Select Edit again to delete the old phone number. Press Done.
Method 2. Remove the Phone Number Using a Mac
Users can turn the phone number OFF that they registered to Apple ID through their Mac device. In this context, accessing the FaceTime or Messages app is essential in the context of how to remove phone number from Apple ID via Mac steps.
Step 1: Access the FaceTime or Messages app. Sign in using the same Apple ID you use for the apps on your Apple iPhone X.
Step 2: Go to Messages and tap on the Settings option. Then, choose the iMessage selection.
For Facetime, click on the FaceTime option and go to Preferences > General.
Step 3: From the list, choose the tickmark beside the phone number to uncheck it. That will deactivate the phone number for your account.

Method 3: Remove Phone Number via Change Apple ID Password
It is possible to change the password for Apple ID in the matter of how to remove a phone number from Apple ID. Adjusting the phone number is the natural next step when you carry out this step, so you can remove the number and use another at this stage.
Step 1: On your iPad and iPhone, tap on the Settings menu.
Step 2: Tap on the icon with your name and click on the Password & Security option.
Step 3: Select the Change Password option.

Step 4: The prompt to add the current Apple ID password, or the passcode, will appear. Add it to confirm, and then insert your new password.
Step 5: Hit the Change Password button.
Step 6: You will get logged out of the account. Sign in with the new password, and the phone number will get removed.
Part 4. How to Remove Apple ID without Password?
All the methods mentioned help remove phone numbers associated with the Apple ID but still require you to access the Apple iPhone X device. What if the Apple iPhone X device is locked and the necessary details are unavailable, like the password? You can use Dr.Fone - Screen Unlock (iOS) to remove the Apple ID by bypassing the passcode.
It is possible to remove phone number from Apple ID by accessing the Apple iPhone X device with simple taps through this app. You have to make the Find My iPhone feature active, and the app will bypass the Apple ID password within seconds.
Best Features:
- Supported on various iOS and iPadOS devices.
- Remove all types of lock screens, like Apple ID, Face ID, Touch ID, Screen Time Passcode, etc.
- Fast process of screen and password bypassing.
How to use it?
Step 1: Download/install/launch the app on Mac/Windows. Select Screen Unlock when the app opens on the interface.
Step 2: Choose the “Remove Apple ID” option and add the passcode, as instructed. Allow the system to trust the Apple iPhone X device for authentication through the following prompt.
Step 3: Put the Apple iPhone X device into recovery mode following the on-screen instructions. Then, restart the Apple iPhone X device. This will automatically kickstart the unlocking process and will take some seconds.
Step 4: Finally, see that Apple ID’s device has been unlocked on the next page.
Video Guide: How to Remove Apple ID without Password?
Part 5. FAQs about Apple ID Phone Number
- How to Add a Trusted Phone Number to Your Apple ID?
The steps for adding the trusted phone number to Apple ID are accessible through Settings > Apple ID icon/name > Password & Security > Edit icon beside the phone number already in use. Click on the “Add a trusted phone number” option and insert the new one. Confirm with your device passcode at the end.
- Why Isn’t My Apple ID Accepting My Apple iPhone X Number?
Apple ID accepts phone numbers for linking for two-factor authentication. The local number in the region is needed for pairing the number and Apple ID.
- Does Changing Apple ID affect Phone Number?
No, the Apple ID and phone number are not connected as features or codes. So, adjusting the Apple ID will not affect your device’s phone number.
Conclusion
Indeed, there are multiple methods you can take to remove the phone number registered to your Apple ID successfully. They are accessible in multiple ways through Mac, iPad, or iPhone settings. If you forgot the Apple ID, you could even remove it using Dr.Fone - Screen Unlock (iOS) . Ultimately, choose the process to trust based on your specific needs.
Also read:
- [New] Free Yourself with Top 4 Applications for YouTube-to-WAV Conversion for 2024
- 6 Ways To Transfer Contacts From Realme C51 to iPhone | Dr.fone
- Cultivating a Community The Key to Surpassing 1000 Views for 2024
- Enabling the Next Generation of Conversational AI: How to Use ChatGPT's Beta Browsing Tools with Extensions
- From Novice to Expert Setting up a Sports Channel on Mac for 2024
- Guide on How To Remove Apple ID From iPhone 6s
- How To Create an Apple Developer Account From iPhone 14 Pro
- How To Delete iCloud Account Remove Your Apple ID Permanently On Apple iPhone 11 Pro
- How to Erase an iPhone 6 Plus without Apple ID?
- How To Fix Apple ID Verification Code Not Working From Apple iPhone 13 Pro
- In 2024, 3 Ways of How to Get Someones Apple ID Off Apple iPhone 14 without Password
- In 2024, Can I Remove the Apple Watch Activation Lock By Apple iPhone 6 without the Previous Owner?
- In 2024, Metavision Uncovered Analyzing 6 Compelling Metaverse Cases
- In 2024, Top-Notch Solutions for Disabled Apple ID On iPhone 13 mini Making It Possible
- In 2024, Update Short-Form Video Coverage
- Quick Fixes for When Your NVIDIA Control Panel Won't Open or Crashes
- Tips and Tricks for Apple ID Locked Issue On iPhone 11 Pro
- Ultimate Guide to Choosing Your Perfect AirTag Wallet in 202E: Expert Opinions & Ratings | ZDNet
- What Does Enter PUK Code Mean And Why Did The Sim Get PUK Blocked On Nokia Device
- Title: How To Delete iCloud Account Remove Your Apple ID Permanently From iPhone X
- Author: Alma
- Created at : 2025-01-28 22:12:11
- Updated at : 2025-01-31 21:46:41
- Link: https://apple-account.techidaily.com/how-to-delete-icloud-account-remove-your-apple-id-permanently-from-iphone-x-by-drfone-ios/
- License: This work is licensed under CC BY-NC-SA 4.0.