
How To Fix Apple ID Verification Code Not Working From Apple iPhone X
How To Fix Apple ID Verification Code Not Working On Apple iPhone X
In smartphones, the Apple ID stands out as a cornerstone of security for iPhone users and the broader iOS ecosystem. Its robust verification features are a key reason why many people choose iPhones. Thus, its heightened security is highly valued. However, even extremely reliable systems can encounter hiccups.
Sometimes, you might need help with the issue of the Apple ID verification code not working. This leads to frustration, especially if you need to remember your Apple iPhone X ID details. This 2024 guide will delve into practical solutions to fix issues with Apple ID verification codes, helping you regain access to Apple ID and peace of mind.

Part 1: When Does the Apple Verification ID Failed Prompt Appear?
Before diving into solutions, it’s essential to understand the various scenarios that can trigger the “Apple Verification ID Failed” prompt. Recognizing the cause of the problem is the first step toward the right fix. Let’s explore the common reasons you might encounter this issue:
Wrong Password Input
One of the most straightforward reasons for a failed verification is entering the wrong password. This could be a simple typing error or misremembering your password. Repeated wrong attempts can also lead to your account being temporarily disabled as a security measure.
Apple Server Issues
At times, the problem may not be on your end. Apple’s servers can experience downtime or technical glitches like any other online service. During such instances, verification processes might fail, as the server cannot authenticate your credentials.

Slow Internet or Intermittent Connection
A stable and reliable internet connection is improtant for the verification process. If your internet is slow or experiencing intermittent connectivity, it can disrupt the communication between your device and Apple’s servers, leading to verification failure.
Two-Factor Authentication (2FA) Issues
Apple’s two-factor authentication provides an extra layer of security. However, it can also be a source of problems. If there’s a delay in receiving the 2FA code or if 2FA fails to work, you won’t be able to complete the verification process. This could be due to network issues or, sometimes, glitches within the 2FA system itself.
Suspicious Activity
Apple takes your security seriously. If there’s any unusual activity detected on your account, such as login attempts from unfamiliar locations or devices, Apple might lock your account as a precaution. This can trigger the verification failed prompt as the system seeks to protect your account from potential unauthorized access.
By understanding these scenarios, you can diagnose better why you’re facing the issue of Apple verification ID not working. In the following sections, we will explore solutions tailored to these specific problems, helping you regain access to your account efficiently.
Part 2: How To Fix Apple ID Verification Failed
Encountering an “Apple ID Verification Failed” error can be frustrating. Here are some practical solutions that correspond to the common reasons for this issue. These steps should help you regain access to your Apple ID.
Method 1: Connecting to a Stabler Internet Connection
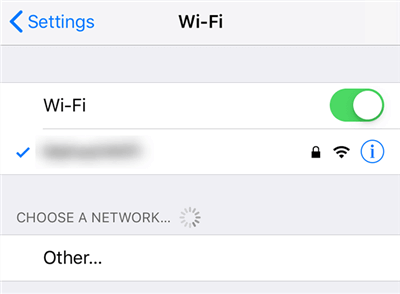
A stable internet connection is crucial. If you’re encountering issues, switch to a more reliable Wi-Fi network. Alternatively, toggling your Wi-Fi or mobile data off and back on can refresh your connection.
Method 2: Changing Password/2FA Device Using Apple ID Account
If you’re facing troubles due to password errors or 2FA issues, resetting your password or updating 2FA settings may help. Visit Settings > Apple ID account page > Sign In & Security and follow the instructions to Change Password or update your Two-Factor Authentication settings.

Method 3: Check iPhone’s Date & Time Settings
Incorrect date and time settings can influence Apple ID verification. Go to Settings, select General, and tap on Date & Time. Ensure Set Automatically is enabled, allowing your Apple iPhone X to adjust these settings according to your time zone.

Method 4: Signing Out/In Your Apple ID
Sometimes, simply signing out and back into your Apple ID can resolve verification issues. Navigate to Settings, tap your name at the top, scroll down, and select Sign Out. After signing out, sign back in and check if the issue persists.
Method 5: Disabling VPN
If you’re using a VPN, it can sometimes cause issues with Apple ID verification. Try disabling your VPN from the Settings or the VPN app you’re using, and then attempt the verification process again.
Method 6: Updating to the Latest iOS
Running an outdated iOS version can cause compatibility issues. Go to Settings, select General, and tap on Software Update. If an update is available, download and install it to ensure your device is up-to-date.
Method 7: Checking Apple Server Status and Trying Again Later
Sometimes, the problem is on Apple’s end. Check the Apple System Status page to see if there are any issues with their servers. If there are, it’s best to wait and try the verification process later.
By following these methods, you should be able to resolve the “Apple ID Verification Failed” issue and regain full access to your Apple ID functionalities.
Part 3: How To Remove Apple ID Account From iOS Device
If the above fixes have proven unsuccessful, it might be time to consider removing the Apple ID directly from your device using a third-party tool. This can often resolve the failed verification of Apple ID on new or old phones when other methods fail.
Thankfully, Wondershare Dr.Fone offers a solution with its Screen Unlock (iOS) feature, which includes a Remove Apple ID/iCloud account removal function. It’s a very handy tool for reviewing verification requirements, especially when you forget your Apple ID credentials.
Removing Apple ID Account With Dr.Fone - Screen Unlock (iOS)
Here’s how to use powerful Dr.Fone’s - Screen Unlock (iOS) to remove Apple ID.
Step 1: Download, install, and launch Wondershare Dr.Fone.
Step 2: Go to Toolbox > Screen Unlock > iOS.

- Step 3: Select Remove Apple ID to proceed.

- Step 4: Choose Unlock Now once the connectivity status is confirmed.

- Step 5: Ensure you have a screen lock and the two-factor authentication enabled. Follow the on-screen instructions.

- Step 6: Put your device into Recovery Mode or DFU Mode by following the on-screen instructions. Then, confirm the correct system version of your device.

- Step 7: Wait for the download to finish on your software.

- Step 8: After the firmware is confirmed, click Unlock Now. Then, type in “000000” on the appearing text box and click Unlock.

- Step 9: After the process is completed, click Done. If it still doesn’t work, then click Try again.

Conclusion
Navigating the Apple ID Verification Code not working issue can be a source of significant frustration. This guide aimed to alleviate that by detailing common triggers, such as password errors, server issues, and connectivity problems, and providing targeted solutions like ensuring stable internet, updating iOS, and checking server status.
For those rare instances where conventional methods fall short, Dr.Fone emerges as a reliable ally. Its Screen Unlock feature effectively addresses Apple ID-related hurdles. Whether you’re grappling with verification failures or other phone-related challenges, Dr.Fone - Screen Unlock (iOS) stands out as a dependable tool, ready to assist in simplifying your digital life.
Tips: Are you searching for a powerful Screen Unlock tool? No worries as Dr.Fone is here to help you. Download it and start a seamless unlock experience!
How to Erase an Apple iPhone X without Apple ID?
Our generation is all about high-performance gadgets and, a phone is one of the most important of it all. But with the concept of a smartphone, things have changed. iPhone/iPad has emerged as an important fashion quotient for a long now.
We often end up buying second-hand iPhones/iPads or sell our old version of the phones/pads to an unknown person and buy a new version of other brands, like Samsung S22. At times, be it after-sale/purchase or old iPhone, or if you may have yourself forgotten the password to your Apple ID, we often come across a big challenge, and that is how to erase an iPhone without an Apple ID password. Well, if that’s the case with you, then you’ve reached the right place. We’re about to discuss the most effective ways to erase an iPhone without an Apple ID password. Let’s discover them.
Part 1. How to erase an iPhone without Apple ID and iTunes
When it comes to taking care of all your Apple iPhone X recovery solutions, Dr. Fone has effectively managed to make a mark in the field. Especially when it comes to erasing an iPhone without an Apple ID password, the Dr.Fone – Screen Unlock (iOS) can help you get it done without a hitch. Not only can you erase an iPhone without an Apple ID password, but you can also get the Apple ID/iCloud lock removed too with much ease. With over 5 million-plus users, the tool is the most recommended in the market, serving every customer to their content.
Key Features:
The key features of Dr.Fone – Screen Unlock (iOS) are –
- It can unlock an iPhone/iPad by erasing an iPhone without an Apple ID password.
- Even when your screen is damaged and you cannot enter a passcode, Dr. Fone – Screen Unlock (iOS) can effortlessly get it done.
- If the passcode is wrongly set by your kids or an unknown, this software can help unlock the same.
- Works efficiently with almost all iOS devices and supports even the latest iOS version 14.
Step by Step Tutorial:
Let’s get to understand how to erase an iPhone without an Apple ID password:
Step 1: Connecting the iPhone/iPad
The first thing to do is download and install the Dr.Fone – Screen Unlock (iOS) software on your computer/laptop. Before you move on to any other step, connect your affected iPhone/iPad to your computer or laptop with the help of a USB.
Step 2: Select the correct Mode.
After the installation is done completely, launch the tool and select the “Screen Unlock” option on the software’s home interface. A new screen interface will appear, you will have three different options. You need to select the “Unlock iOS Screen” option and, this will start the entire process of unlocking.

Step 3: Boot your device into Recovery/DFU Mode
You now have to boot your Apple iPhone X or iPad device into Recovery mode or DFU mode so that the software can recognize your device for further process. For your convenience, Dr. Fone Screen Unlock (iOS) has a built-in instruction facility that helps you to follow the steps.

Step 4: Confirm the information and download firmware
After a successful reboot into Recovery mode, the tool will automatically detect your device’s information and the most compatible iOS firmware. To start the process of downloading the firmware, you need to hit on “Start” button.

Step 5: Erase an iPhone without an Apple ID password.
Once the download is complete, you can get started with erasing an iPhone without an Apple ID password. Hit the “Unlock Now” button, and voila! In no time, you’ve successfully erased an iPhone without an Apple ID password.

Part 2. Erase an iPhone without Apple ID via iTunes
Sometimes your phone might ask for an Apple ID and password to confirm your authority. In such cases, you may get stuck as either you have forgotten the password to it, or you don’t remember the Apple ID in the first place. For that matter, where it needs immediate help, we have listed down a set of steps that can help you erase an iPhone without Apple ID via iTunes –
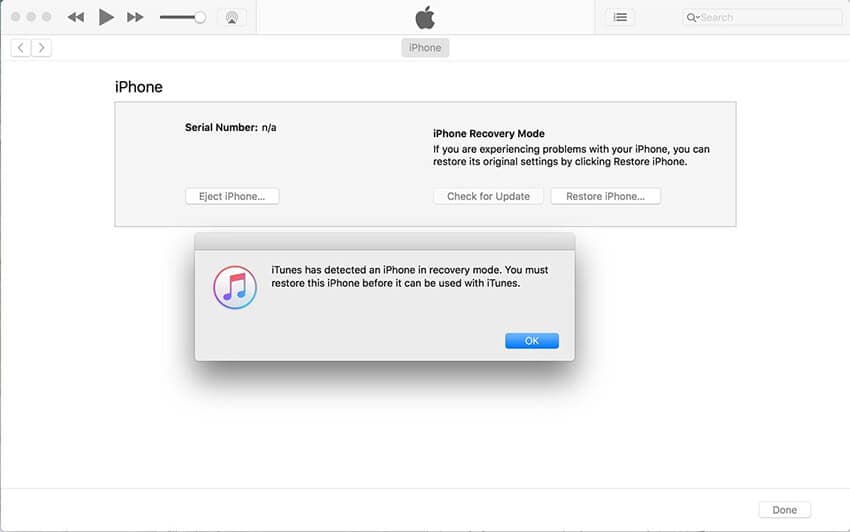
Step 1: Connect your Apple iPhone X to the computer with the help of a USB and then open your iTunes.
Step 2: The best way to start the process is to move your phone to recovery mode. For this, you need to:
In iPhone 8 or later: Tap the Volume Up, then quickly tap Volume Down and hold down the Power key afterward.

In the case of iPhone 7/7Plus: Press the “Sleep/Power” and “Volume Down” keys together.
Hold down the keys until you see the message on your iTunes screen about “your iPhone has been detected in recovery mode.”
Step 3: Once done, click on “Ok” and choose the “Restore iPhone” option. Confirm your actions, and you’re done.
Part 3. How to erase an iPhone without Apple ID via Settings
Erasing an iPhone without Apple ID becomes necessary when we happen to use a second-hand phone or when we share a phone with someone. It is indeed a hard task to overcome these issues as we constantly strive to change our phone or replace it with a second-hand one. We have jotted a few steps that can help you erase an iPhone without Apple ID via settings for your ease.
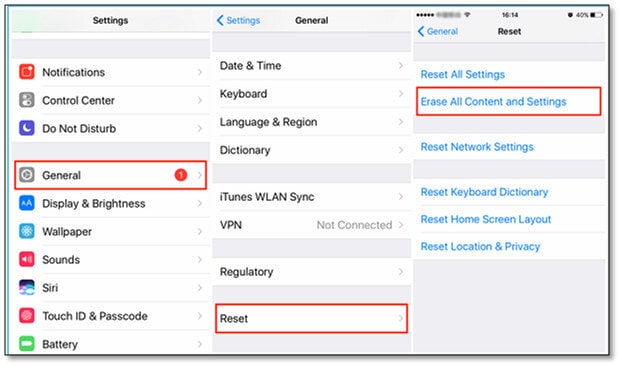
Step 1: On your Apple iPhone X, press the “Settings” icon on your App drawer.
Step 2: Under the Settings, scroll down and click on the “General” option.
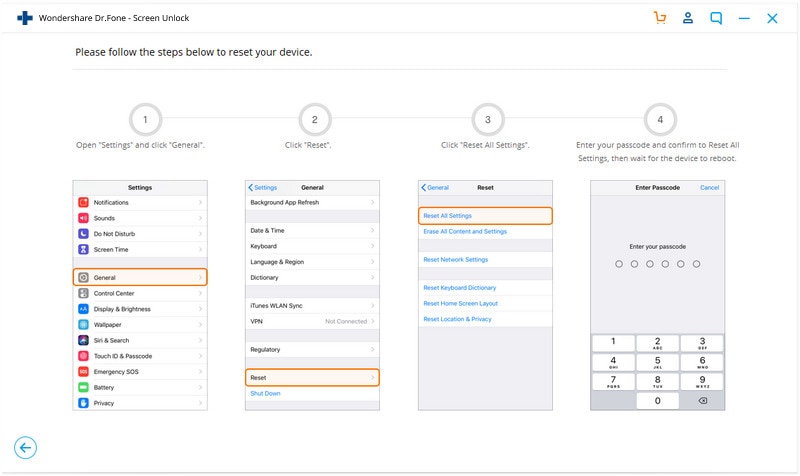
Step 3: Now, you need to scroll all the way down to the “Reset” button and click on it. Then, look for “Erase All Content and Settings” and tap on the same.
Step 4: Enter your passcode to confirm. This action will pop up a screen where you need to select Erase iPhone again, and boom, you are done now.
Part 4. Tip you may need to erase Apple ID
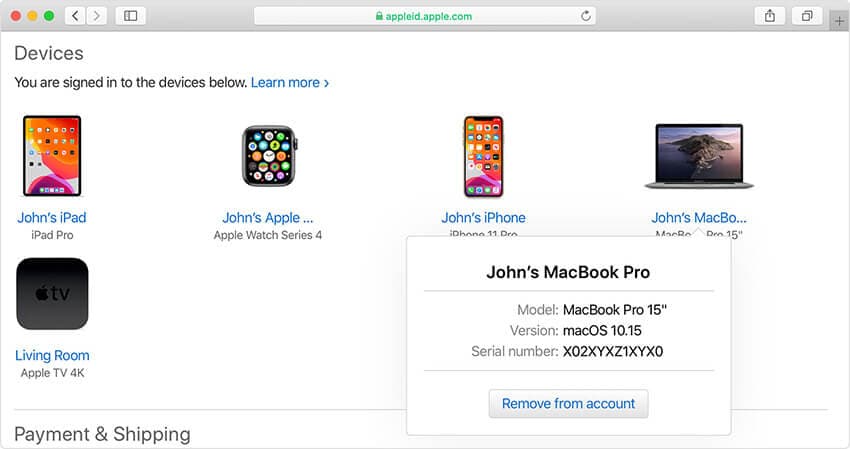
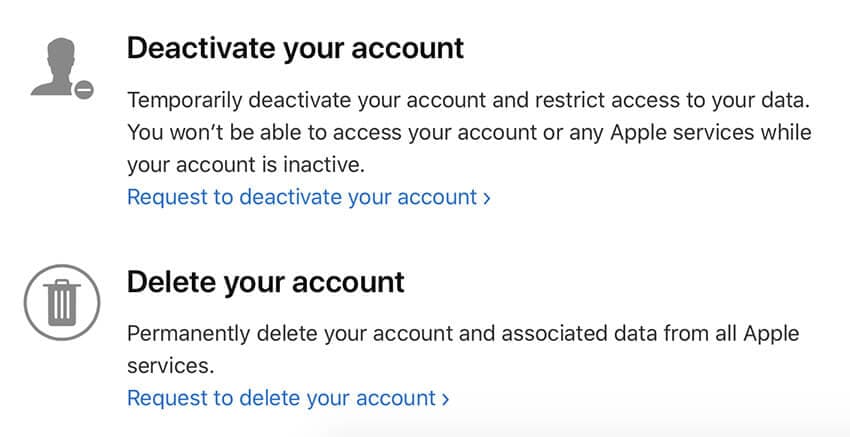
Now, just in case you wish to delete your Apple ID completely, you need to perform a simple practice of removing any devices associated with your Apple ID.
Step 1: One can simply visit appleid.apple.com and log in with the Apple ID credentials already allotted to the user.
Note: You might get a prompt of a two-factor authentication code while being on this page.
Step 2: Once you scroll down the line, choose, and click on the “Device” option.
Step 3: Choose the desired device and click on the “Remove from account” option followed by a “Remove this – Device Name” to confirm the action. Perform this step for all other devices.
How to erase an Apple ID via Apple’s Data and Privacy website
Now let’s get started with erasing an Apple ID via Apple’s Data and Privacy website are simple and, we have mentioned a simple way to take care of the same:
Step 1: Once you’re done removing the Apple iPhone X devices linked to your Apple ID, visit privacy.apple.com and log in with the same Apple ID and password credentials.
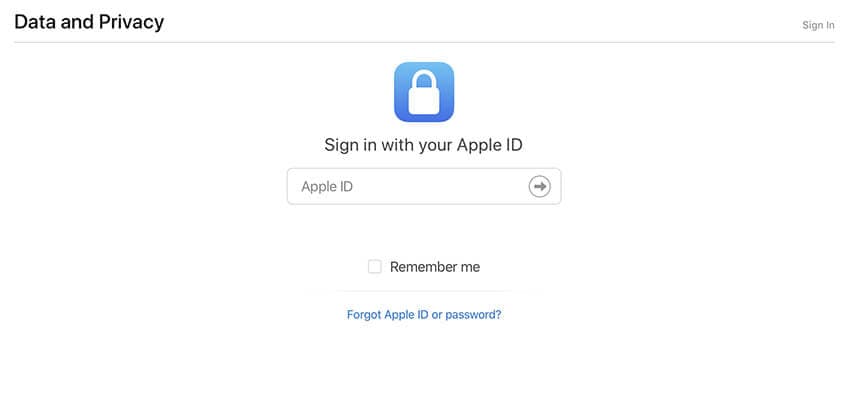
Step 2: Once you authenticate, click on the prompt indicating the option to “Continue.”
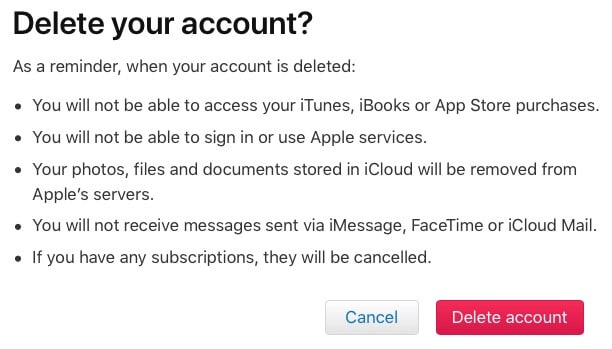
Step 3: Once you click on the “Get started” prompt on the screen, you will get a tab to “Delete your account.” This will prompt you with an Apple message indicating the information regarding the deletion process time.
Step 4: Before everything, make sure you back up your data and follow the instructions steps prompted by Apple’s website. This will lead you to choose a reason for deletion from the click-down option and click “Continue.”
Message – You will get the details of the entire process for a quick review before you can submit for the final deletion of the policies
Step 5: Click on “Delete terms and conditions” by checking the read and agreed on the box. Make sure to provide a good call-back number to finalize the process.
Step 6: This submission will give you your access code which you can later use for clarification and, now you can click on the “Delete Account” option
Conclusion
Coming towards the end of the topic, we now are fully sure that you fully understand how to erase an iPhone without an Apple ID. Just in case you have any doubts, please feel free to comment below. And do remember to share this with your friends and family if you find it useful.
Apple ID Locked or Disabled On Apple iPhone X? 7 Mehtods You Can’t-Miss
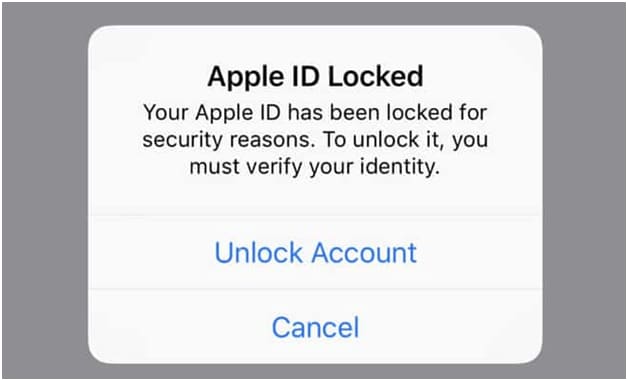
Apple ID refers to the authentication method available for the Apple iPhone X device to compromise users’ personal information and settings. The Apple iPhone X Apple ID will allow you to store and control data available on the Apple iPhone X device; however, you need to re-generate the Apple iPhone X passcode if you have forgotten the Apple iPhone X passcode. Suppose, if you have forgotten the passcode and entered the wrong passcode six times, your Apple iPhone X gets locked or has been disabled. According to your settings, if you have entered the wrong passcode too much time could even make your Apple iPhone X delete all the data available.
This article will discuss how you can unlock Apple ID and remain secure. If you receive a message that you have entered the wrong passcode or forgotten your passcode, you have to follow some steps to regain access to your Apple Id.
Why Is Your Apple ID Locked or Disabled?
Some of the reasons causing your Apple ID locked or disabled are listed below:
- If you have entered the wrong passcode or security question too many times in a row, Apple ID gets locked. (Avoid entering the incorrect password more than 3 times)
- If you haven’t used your Apple ID for an extended period, possibly making your Apple ID disabled or locked. When Apple modifies the requirement for passcode and security questions, you have not updated the information.
If you frequently change your Apple ID or passcode on the Apple iPhone X device, Apple possibly considers that your Apple iPhone X faces a security threat and might lock your Apple ID.
Method 1: Professional iPhone Apple ID Lock Removal Tool [Recommended]
If you have forgotten your Apple ID password, you are suggested not to enter the wrong passcode in a row. That may lead to data loss. You can download the Dr.Fone– Screen Unlock, which is compatible with different lock screens and will unlock Apple ID easily. Dr.Fone - Screen Unlock helps remove almost all sorts of iPhone passwords without the requirement of technical knowledge.
Dr.Fone - Screen Unlock (iOS)
Unlock iPhone ID.
- Remove the screen password, face id, and Touch ID.
- Don’t need to have any technical knowledge.
- Bypass the Apple ID and iCloud activation lock in a quick way.
- Compatible with both Android and iOS devices.
3981454 people have downloaded it
Steps to Follow:
**Step 1:**Click on the “Screen Unlock” module and a new interface will appear.
To unlock your Apple ID, you have to click on the “Unlock Apple ID” option.
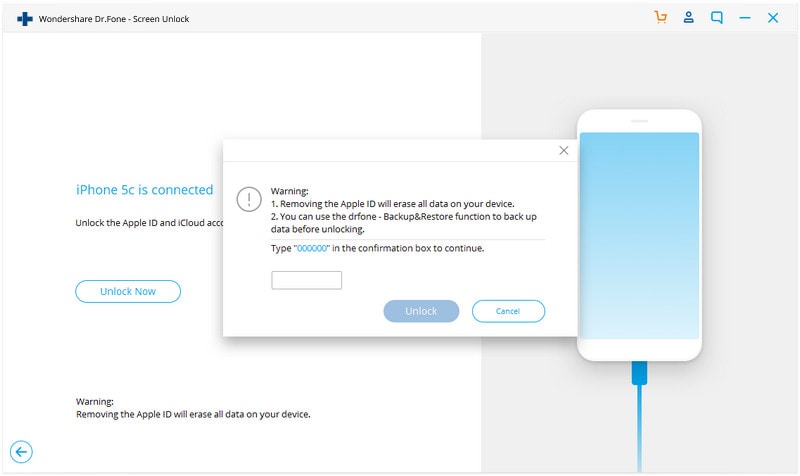
Step 2: You must know the passcode of the Apple iPhone X to unlock the phone screen, which trusts the computer system for scanning the data available in the phone.

Note: This process determines that all data will be erased when you initiate to unlock the Apple ID. (If your device didn’t activate dual authentication, then you can unlock Apple ID without data loss.) It is recommended to create a backup of your data before proceeding to the next step.
Step 3: Before unlocking your Apple ID, you have to reset iPhone settings by following the instruction available on the screen. When you have reset all the settings, restart your device, and the process of unlocking will start automatically.
Step 4: Once the restart process gets completed, Dr. Fone will automatically kick off the unlocking process of Apple ID and get it ended in a few seconds.

Step 5: When the Apple ID is unlocked successfully, the following window will indicate that you have to check if your Apple ID gets unlocked.
Method 2: Reset Password to Unlock Your Apple ID
In order to unlock iPhone 13 Apple ID, you can reset the password to your Apple ID. If you want to do this, you need to follow the below steps.
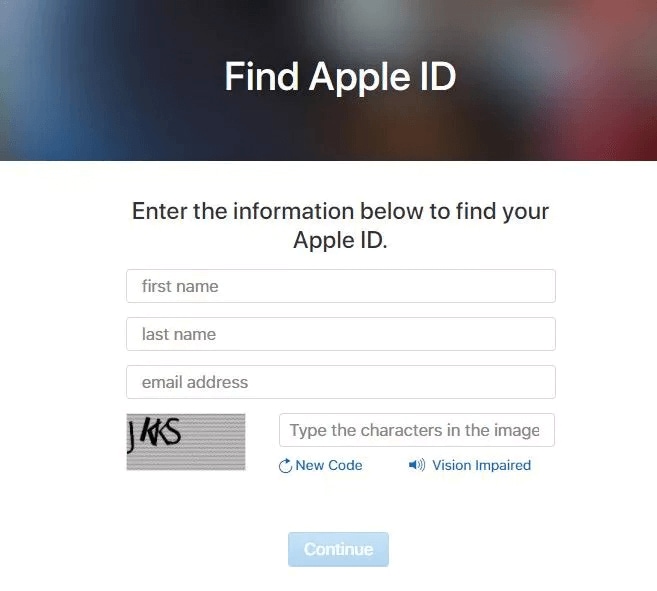
Step 1: Head to the Apple account recovery page and enter the desired details like your first and last name. Also, enter your email address. When done, click on the “Continue” button.
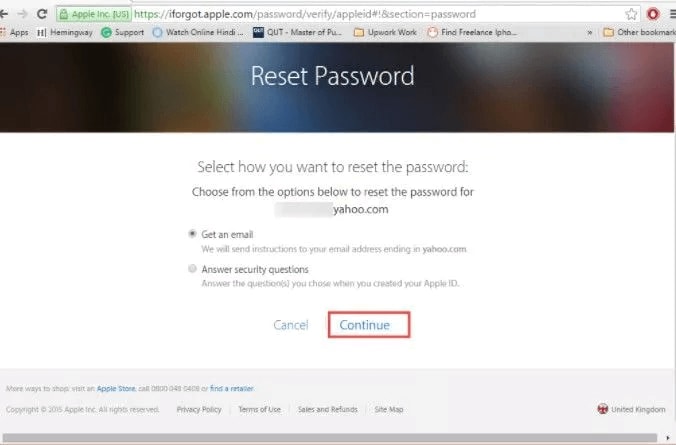
Step 2: When the next screen appears, you will see two options to choose from. Whether you wish to receive a password through email or answer a security question, choose it. Click “Continue”.
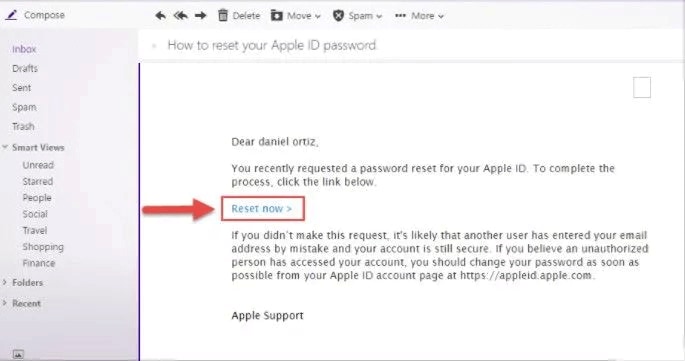
Step 3: Reset the password now. Write down the password and follow the prompts. Your password will be reset now!
Method 3: Fix Apple ID Locked Via iforgot
If your Apple ID is disabled, follow these simple steps listed below:
Step 1: Enter “https://iforgot.apple.com “ in the web browser of your computer, iPhone or Tablet.
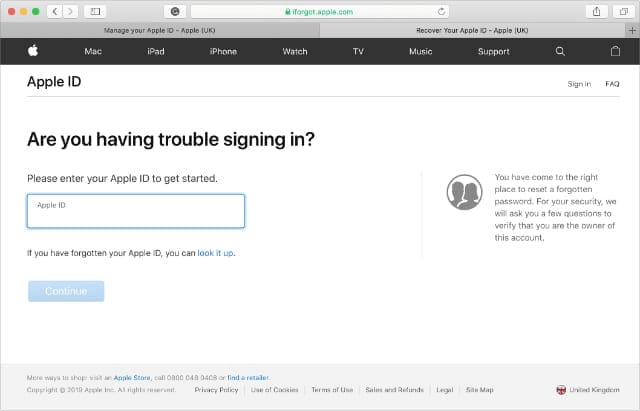
Step 2: You have to enter the registered E-mail address in the box available on the screen.
Step 3: Enter the captcha available on the screen and click on the “Continue “option to proceed further. (If you have set up the two-factor authentication, you will receive a code that you need to enter on your device.)
Step 4: Enter the code you have received on your device and confirm it to unlock your account and allow resetting the password. (You will be asked to answer the security question to confirm your identity).

Step 5: Successfully, you have unlocked your Apple ID.
Method 4: Unlock Apple ID Using Two-Factor Authentication
This next method only works if you’ve already enabled the Two-Factor Authentication before getting locked out of your Apple ID. In case you’ve already enabled it, follow the below-mentioned steps to unlock your Apple ID.
Step 1: Launch the “Settings” App on your Apple iPhone X and then hit “your name” at the top.
Step 2: Now, select the “Password & Security” option, followed by tapping on “Change Password.”
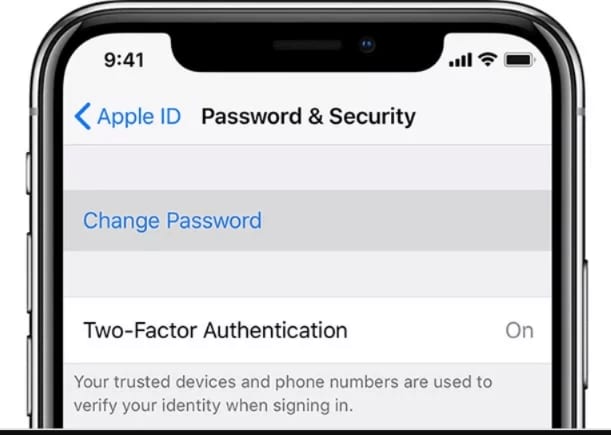
Step 3: Then you need to follow the instructions displayed over your screen carefully.
If you perform the instructions properly, you will eventually get your Apple ID unlocked.
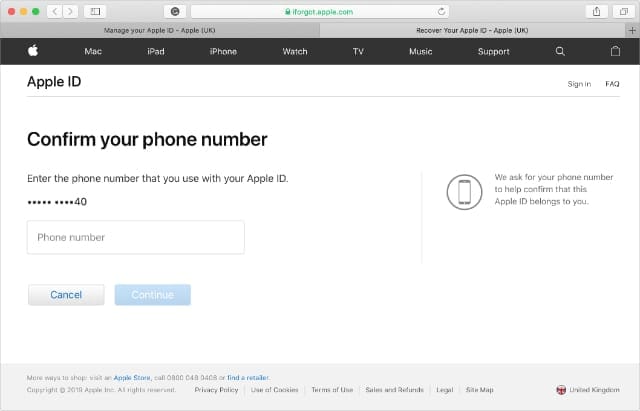
Method 5: Remove Locked Apple ID Using Recovery Key
There are high chances that you might have protected your Apple ID with a Two-Factor Authentication. In such a case, you need to use your Recovery Key to unlock your Apple ID. Here’s how you can get it done.
Step 1: You need to first visit iforgot.apple.com and then punch in your Apple ID in the text field provided.
Step 2: You’ll then be required to enter the Recovery Key, key it in and hit “Continue”.
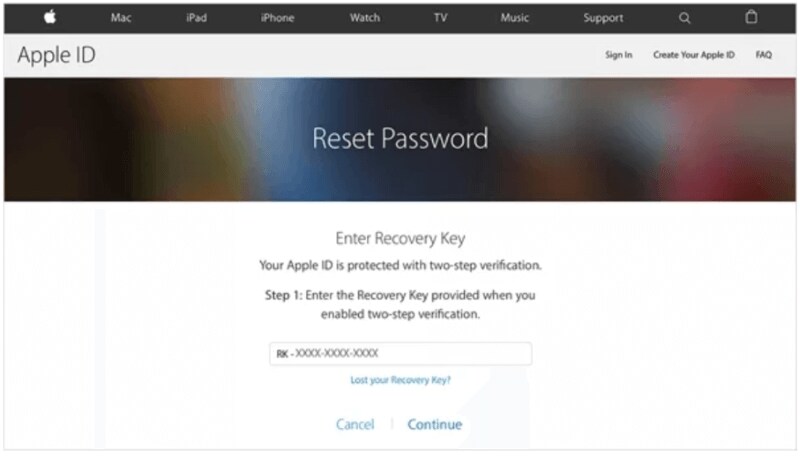
Note: Recovery Key is a security code provided to you when the Two-Factor Authentication is first enabled.
Step 3: Now, one of your trusted devices will receive a verification code. Enter it on your screen and hit “Next”.
Step 4: Upon successful verification, you will be asked to create a new password. Please make a new password now and then make sure to remember it.
That’s it you can now make use of this new password to unlock your Apple ID.
Method 6: A Loophole: DNS Bypass
If you want to unlock iPhone 13 Apple ID and don’t remember the password**,** you can use this DNS bypass method. But to make use of this method, you need to first factory reset your device and gain access to the “Hello” screen. Here’s how you can make use of this method.
Step 1: Firstly, you need to reboot your device into Recovery Mode. Then, launch iTunes and plug it in the computer. Now, iTunes will detect your device in recovery mode. Hit on Restore iPhone and wait for the process to complete.
Step 2: Your device will restart to the “Hello” screen upon completion. From the menu, choose language and country.
Step 3: Tap on “Proceed” to get into the Wi-Fi settings page.
Step 4: Now click on the “i” icon bonded by a circle next to Wi-Fi.
Note: In case, you are already connected to a Wi-Fi network, ensure to click on it first and then tap on “Forget This Network” to have the “i” icon visible.
Step 5: Now, when you tap on the “i” icon next to any Wi-Fi network (not connected), you need to look for the “Configure DNS” server option. Click on it and then select “Manual”, then click “Add Server.”

You have to select the DNS from the option available according to your region.
- USA/North America: 104.154.51.7
- Europe: 104.155.28.90
- Asia: 104.155.220.58
- Other areas: 78.109.17.60
Step 6: Now, save the settings, return to the connection page and connect to your Wi-Fi.
Step 7: You need to wait for your device to get connected with the iCloud DNS bypass server automatically.

Step 8: Once you are connected to the DNS server successfully, you can then use apps and features available on your Apple iPhone X in an alternative way.

Note: This method is just a hack to use your device without the need for Apple ID. This method doesn’t unlock your Apple ID.
Method 7: Ask Apple Support
We are positive that the solutions above will get your issue resolved. However, just in case, if you’re still stuck with the same issue and are unable to unlock Apple ID on iPhone, then we would suggest you get in touch with Apple Customer Support to help you with the best. You can either directly walk into your nearest Apple Support Center or simply visit https://support.apple.com/ to get in touch with one of the customer support executives.
Conclusion
From this article, you can know how to unlock your Apple ID and reset your password. There are different ways available that will resolve your unlock iPhone issue. However, Dr.Fone is the most recommended tool as it provides a screen lock solution and recognizes it as a one-stop solution for all iPhone problems. You can also share the effective methods in this article with your families and friends.
Also read:
- [New] Cutting Edge Notebooks and Tools to Elevate Your Editing Game for 2024
- [New] Hook-Creating Headline Helper
- [New] Interactive Photography Sharing Immersive 360 Photos via Mobile Devices for 2024
- [Updated] In 2024, Max Effects for Vector Files
- [Updated] Navigating Through GoPro Models & Specifications
- Comment Effacer Les Fichiers D'Actualisation Windows 10 : Guide Facile Et Simple Avec Trois Méthodes
- Facebook Messenger Video Downloaders
- Forgot Your Apple ID Password and Email On iPhone 13 mini? Heres the Best Fixes
- How to Erase an Apple iPhone 6s without Apple ID?
- In 2024, Guide on How To Remove Apple ID From Apple iPhone XS
- In 2024, How To Change Your Phone's Ringtone Picking From Viral TikTok Sounds
- In 2024, How To Get the Apple ID Verification Code On iPhone 6s in the Best Ways
- In 2024, How to Reset Apple ID and Apple Password On iPhone 14 Pro Max
- In 2024, How to Unlock Apple ID On your Apple iPhone 6 without Security Questions?
- Timing Your Instagram Posts for Optimal Results
- Tips for Effective YouTube End Screen Usage
- Turning Off Two Factor Authentication On iPhone SE? 5 Tips You Must Know
- Unfreeze and Smooth Your Movies: How To Mend Faulty Films Using These Handy Home-Based Techniques (With Subtitles)
- Why Apple Account Disabled On your iPhone 12 Pro Max? How to Fix
- Title: How To Fix Apple ID Verification Code Not Working From Apple iPhone X
- Author: Alma
- Created at : 2025-01-29 01:15:58
- Updated at : 2025-02-01 00:24:42
- Link: https://apple-account.techidaily.com/how-to-fix-apple-id-verification-code-not-working-from-apple-iphone-x-by-drfone-ios/
- License: This work is licensed under CC BY-NC-SA 4.0.