
How To Remove the Two Factor Authentication From iPhone SE (2022)
How To Remove the Two Factor Authentication On Apple iPhone SE (2022)
Want To Remove the Two Factor Authentication? Check Out This Guide

Continuous technology innovation has introduced many advanced encryption and security methods to protect data from hackers. With these innovations, companies like Apple and Google have introduced the two-factor authentication process to protect user data.
But sometimes, this security method becomes a hassle to access your data daily, due to which many users try to remove it. That is why, in this article, we have discussed how you can remove iCloud two-factor authentication easily.
- Part 1: What Is Two-Factor Authentication and How Helpful It Is
- Part 2: Can You Remove the Two Factor Authentication iCloud at Anytime
- Part 3: How To Remove the Two-Factor Authentication Within 14 Days
- Part 4: iPhone Apple ID Got Locked? Here’s a Reliable Tool To Get It Unlocked Without Passcode

Part 1: What Is Two-Factor Authentication and How Helpful It Is
Protecting users’ devices and online accounts is one of the major responsibilities of tech companies like Apple. Due to this, they have added multiple security features, including two-factor authentication. Thus, if you create an Apple ID, you can see a two-factor authentication option that adds an extra layer of security.
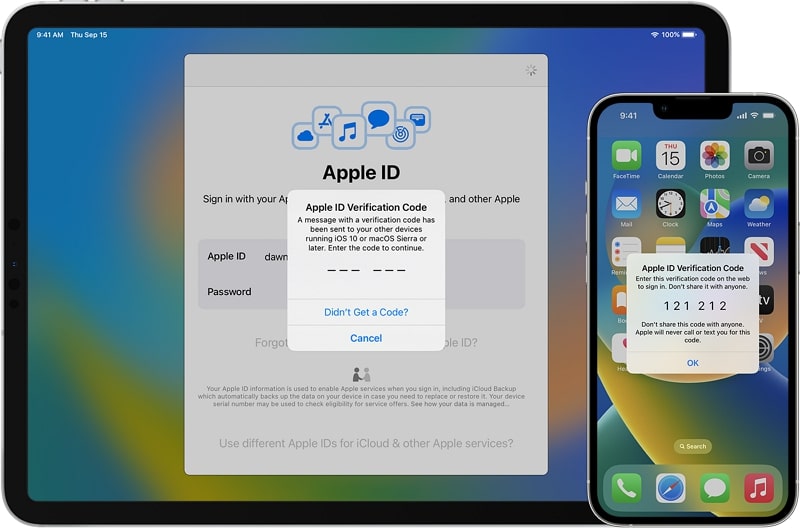
2FA is activated when the user provides the password to log into the Apple ID or software through a new device, and it acts as a second layer for account security. Apple ID or any software containing sensitive data cannot be accessed without it. This method provides a higher security level than single-factor authentication. To understand more benefits of this security system in detail, check the following points:
- Protection From Password Theft: 2FA acts as an additional security level. It protects your accounts and devices in case your password is leaked.
- Migrations of Unauthorized Assets: Online banking applications use 2FA to protect users from unauthorized bank transfers. If someone accesses their app, this is a beneficial security measure.
- Protection on Multiple Services: Platforms, including social media, banks, and cloud storage, use 2FA. It means that 2FA can be used in various digital aspects.
Part 2: Can You Remove the Two Factor Authentication iCloud at Anytime
Many people use 2FA globally to protect their personal information and devices from hackers and unauthorized access. However, in some cases, users may want to remove two-factor authentication iCloud for multiple reasons. This includes scenarios in which their device is lost or damaged or if they have found a better security option than this one.
Moreover, there is one important key point to note: Apple has removed the feature of deactivating 2FA from the Apple ID. It means you need to think twice before activating this feature on your Apple ID because it cannot be reversed. For the following reasons, Apple has taken this initiative:
- Enhanced Security: By removing the deactivation option for 2FA, Apple is trying to strengthen its account security to ensure that no one can access its user’s data.
- Reducing Vulnerabilities: Allowing users to deactivate 2FA could cause vulnerabilities in the Apple ecosystem that can be a weak point for protecting users’ data. That is why Apple has removed the deactivation option to stop malicious actors from taking advantage of this vulnerability.
- Encouraging Security Awareness: To make Apple users more security conscious, Apple has made it difficult on purpose to remove 2FA. It helps users to be more confident in Apple services and products.
- Minimizing Mistakenly Steps: If users mistakenly remove the 2FA, their accounts and devices are at risk of being accessed without proper authentication. To avoid such an issue, the deactivation option of 2FA is removed.
Besides all these reasons, there is still some good news for those who want to remove the two-factor authentication iPhone to use other security options. The good news is that Apple allows users to remove 2FA for a limited time after activation.
Part 3: How To Remove the Two-Factor Authentication Within 14 Days
As explained in the last part, Apple has made removing the 2FA option from Apple ID challenging for several security reasons. Thus, if you want to remove 2FA from your Apple ID, you have only 14 days after activating this feature. To understand how to disable iCloud two-factor authentication within this given time, check the following steps:
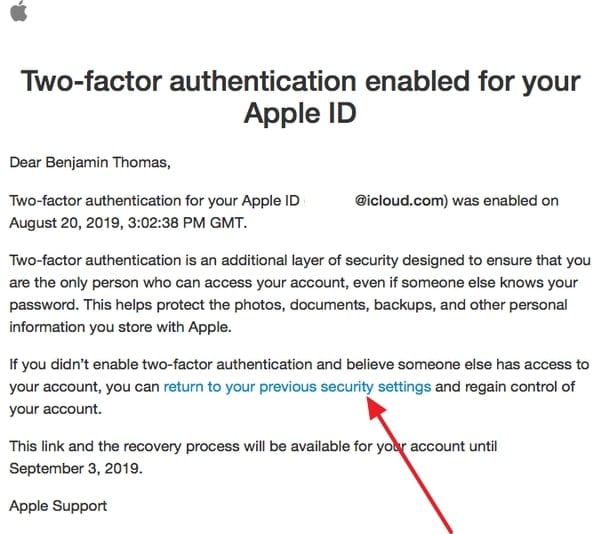
- Step 1. Once you have activated the 2FA feature, your 14-day grace period will start eventually. To deactivate this, open the enrollment email you received from Apple regarding 2FA on your Apple ID.
- Step 2. Scroll to the bottom of this email and select the link or button to return to your account security & settings section. There, follow the on-screen instructions to deactivate the 2FA of your Apple ID.
Part 4: iPhone Apple ID Got Locked? Here’s a Reliable Tool To Get It Unlocked Without Passcode
If you mistakenly got your Apple ID locked due to entering the wrong password multiple times, there is no need to stress it out. It is a common issue that many people forget their Apple ID password and cannot access it. Due to this, we have got you a perfect solution to unlock your Apple ID without a passcode.
This solution is the Wondershare Dr.Fone - Screen Unlock (iOS) tool specially designed to help users remove their iPhone and iPod lock screens. It is compatible with the latest iOS devices and assists in removing various types of lock screens, including Touch ID and Face ID.
Key Features
- This iOS screen unlock tool assists users in bypassing MDM without data loss and other technical errors.
- iCloud activation lock and iTunes backup encryption can be bypassed without a password in just a few steps.
- iPhone 15 and the latest versions of iOS 17/iPadOS 17 are supported by this tool to help users professionally.
Simplified Steps for Unlocking Apple ID With Wondershare Dr.Fone
To help you use this AI-powered screen unlock tool for unlocking the Apple ID without a password, follow the process we have mentioned below for your ease:
- Step 1. Access the Toolbox and Choose the Respective Option
Initiate the process by accessing Wondershare Dr.Fone’s latest version on your computer and tapping on the “Toolbox” option from its left side toolbar. Following this, choose “Screen Unlock” from the list of tools and tap “Remove Apple ID” in the next window.

- Step 2. Make Sure That the Apple iPhone SE (2022) Is Connected to the Computer
Then, connect your Apple iPhone SE (2022) to your computer using a USB cable so that you can see its connectivity status. Once the status is displayed on a new window, hit the “Unlock Now” button to proceed. Answer some questions that are asked by the platform, and with this, ensure that your device’s “Screen Lock” and “Two-Factor Authentication” are enabled or disabled.

- Step 3. Select the System Version and Proceed Ahead
In this step, enable Recovery Mode by following the on-screen instructions. It will help the platform detect the connected device model, with which you will need to select “System Version.” Afterward, you can hit the “Start” button to proceed ahead.

- Step 4. Start the Apple ID Unlocking Process
The respective iOS firmware will download according to the Apple iPhone SE (2022) device model and system version. After it is downloaded, the platform will verify it for you, based on which you can tap the “Unlock Now” option to get your Apple ID unlocked successfully.

Conclusion
With this, we hope you understand how to disable iCloud two-factor authentication. However, remember that doing this is only possible within 14 days of a grace period. If this period is over, you cannot remove 2FA from your Apple ID.
Moreover, if you have locked your Apple ID passcode, using Wondershare Dr.Fone to unlock it can be the perfect option. While using this tool, you also don’t have to worry about screen locks on different iOS devices. This is because the innovative algorithms integrated in this tool make it easier to use for unlocking the Apple ID or screen lock.
How to Remove Apple iPhone SE (2022) Device from iCloud
Apple is known for developing its own unique operating system with its own dedicated operations and functions. They have developed an impressive, interconnected model that helps the user keep the data intact across the Apple iPhone SE (2022) device. With unique identification protocols to keep the Apple iPhone SE (2022) device safe from illegal access, Apple provides its user with its own cloud backup platform. iCloud offers Apple users a unique platform with the ability to synchronize and back their data up. This helps the users keep a duplicate in places where they accidentally lose their important data. However, if you have stopped using an Apple device that had an activated iCloud backup system, you may find it necessary to remove the Apple iPhone SE (2022) device from the iCloud account. For such cases, there are a few techniques that can be adapted to cater to the issue at hand. This article introduces and provides you a detailed guide on how to remove a device from iCloud through the implementation of straightforward and notable techniques.

Part 1. What happens if I remove a device from my iCloud?
If you look over the operation of iCloud service for any Apple device, the exemption of the service will lead you into losing access from a service that offers you a backing up feature along with synchronization. Furthermore, this will also affect the Find My service, leading you to make your device theft evasive. The removal of the Find My service makes it possible for thieves to wipe off data of the Apple iPhone SE (2022) device and have it sold across the market, with no chances of retrieval. Despite the removal of the iCloud service from your device, it will function normally; however, the security and tranquility offered by the Apple iPhone SE (2022) device would not remain intact with its exemption. The iCloud account that has been removed will keep the data that has been previously stored in it by the Apple iPhone SE (2022) device backup, but it would not accept any new addition.
Whenever you consider removing the iCloud backup from the Apple iPhone SE (2022) device, it prompts over keeping the data on your device, if necessary. All the data that is not selected by the user will be removed from the iPhone.
Part 2. How to remove a device from iCloud remotely? (iPhone)
iCloud backup is usually important in keeping a synchronized model in effect across a device. However, when the Apple iPhone SE (2022) device that is in use of an iCloud account is not in consumption, it is better to have the Apple iPhone SE (2022) device removed from the iCloud account. For this, you can consider opting for the remote method of removing a device from the iCloud. The following guidelines explain the detailed method on how to remove a device from the iCloud through remote means.
Step 1: You need to turn off the Apple iPhone SE (2022) device and open the iCloud.com website across the web browser.
Step 2: Access the “Find My iPhone” service on the webpage and tap on “All Devices.”
Step 3: This opens up the list of devices that are connected across the account. Select the Apple iPhone SE (2022) device and tap “Remove from Account” to conclude. Proceed to confirmation of the process and have the Apple iPhone SE (2022) device removed successfully from the iCloud account.

Part 3. How to remove a device from iCloud? (Mac)
While you consider a method that provides you a technique of removing a device from the iCloud through an iPhone, there are several other means of operation that can be utilized to remove a device from the iCloud. You can consider removing a device from the iCloud through a Mac, which needs to be concluded through a series of steps provided as follows.
Step 1: Tap on the Apple icon on the top-left of the Mac screen to open up the menu. Select “System Preferences” from the drop-down menu that appears on the screen.
Step 2: In the “System Preferences” window, you need to tap on the “Apple ID” present at the top-right of the screen.

Step 3: Over the new page that opens, scroll down on the left pane of the window, and tap on the Apple iPhone SE (2022) device that you seek to remove. Click on “Remove from Account…” from the list of options and confirm the execution of the process. This successfully removes the Apple iPhone SE (2022) device from the iCloud with the aid of a Mac.

Part 4. How to rescue when I accidentally remove a device from iCloud?
While you get to know a variety of platforms and techniques that can be adapted to remove a device from the iCloud, there are several circumstances where you accidentally remove a wrong device from the iCloud. The process of retrieving it is quite simple and efficient, where the Apple iPhone SE (2022) device would be automatically added back into the iCloud account once it is connected with the Internet. It should be kept in mind that the Apple iPhone SE (2022) device should contain the iCloud username and password under the iCloud Settings to automatically have it updated over a network connection.
Part 5. You may wonder how to remove an iCloud account without a password
The following methods are quite direct and have no issues with the iCloud username and password. Apart from the existing methods, there are several cases where the user usually forgets a specific iCloud credential that makes it impossible for them to execute a procedure that has been mentioned above. In such cases, the necessity of dedicated third-party unlocking tools gets into action. These third-party platforms are unique in setting up such an environment that keeps the Apple iPhone SE (2022) device protected and aids in complete execution of the task with no discrepancy. There are hundreds of tools that are present in the market for removing an iCloud account from a device without a password. However, when it comes to selecting the appropriate platform, it usually gets difficult for the user to specify a unique choice. This leads the article to introduce a very impressive third-party tool known as Dr.Fone – Screen Unlock (iOS) that offers a flawless environment to cover all the requirements of removing an iCloud account from a device without a password. There are various pointers that should be kept in mind while selecting Dr. Fone as your first rated choice in removing an iCloud account without a password.
- You can easily unlock an iPhone or other Apple device if you have forgotten its passcode.
- It protects your Apple device from getting into the disabled state.
- Operates perfectly across all iPhone, iPad, and iPod Touch models.
- Compatible across the latest iOS.
- It does not require iTunes to function properly.
- Very easy to use and implement.
As you get to understand this simplistic platform, the following guide explains to the user how to remove the iCloud account from a device through the steps shown below.
Step 1: Download and Launch
You need to download and install the platform on your desktop to function. After downloading it, you need to connect your Apple iPhone SE (2022) with the desktop and launch the platform. Select the “Screen Unlock” tool from the home window and proceed.
Step 2: Select Appropriate Option
Following this, you need to select the “Unlock Apple ID” option from the next screen that opens on your front.

Step 3: Operating your Device
As soon as the process initiates, you need to take up your device and open it up to “Trust” the computer for proceeding. Open the Settings of your Apple device and initiate a reboot.

Step 4: Execution of the Process
Once the reboot executes, the platform automatically recognizes and initiates the removal of the iCloud account from the Apple iPhone SE (2022) device. With the execution of the process, the user is provided with a detailed prompt screen displaying the completion of the process. The removal of the iCloud account from the Apple iPhone SE (2022) device without a password has been successfully executed.

Conclusion
As you have recognized the importance of iCloud backup across your device, there are several dynamics of operation that are to be understood to keep the system prevalent and intact, in every sense. Where users wish to remove their iCloud service from the Apple device, the article has presented a series of different methods and techniques that can be implemented across various platforms to cover the requirements and successfully remove the iCloud account without any issues. Following this, the article has also looked forward to offering a third-party platform that allows the user to successfully reboot and remove the iCloud account from the Apple iPhone SE (2022) device to make it operable. You need to look over the guide in detail to get more knowledge of the procedures and mechanisms.
Troubleshooting ‘Error Connecting to the Apple ID Server’ On Apple iPhone SE (2022)
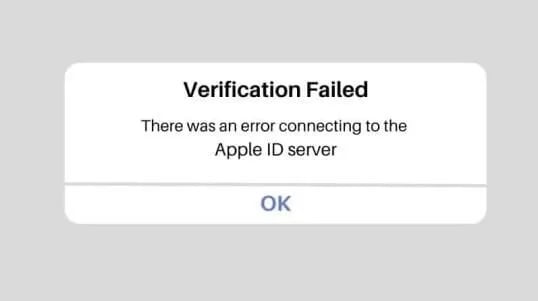
Experiencing an “error connecting to the Apple ID server“ can be a frustrating roadblock for users. Apple owners often face this issue, hindering seamless access to their Apple ID. Fear not; the guide unveils 11 practical solutions to troubleshoot the problem.
The article has everything from verifying your network connection to ensuring the accuracy of your Apple ID credentials. Don’t let the Apple ID verification failed dilemma linger. Explore the page below and navigate through these troubleshooting steps for a seamless connection to the server.
Part 1: What Causes the “Error Connecting to the Apple ID Server” Problem?
Below are the potential culprits if an error is connected to the Apple ID server. Understanding these causes is pivotal for effective troubleshooting.
Temporary Problems With Apple Servers
Periodic disruptions in Apple servers can lead to the “Apple ID verification failed“ issue. These may occur due to routine maintenance or unexpected server outages.
The Internet Connection Is Not Working
The problem may also stem from a disrupted internet connection. You should investigate your Wi-Fi or cellular data to ensure a stable connection. Restarting routers or switching to an alternative network can also help.
Problems With Apple ID
Authentication issues can arise if users input incorrect Apple ID credentials or if their accounts face security concerns. Verifying and correcting these details or resetting the Apple ID password is crucial.
Incorrect Date and Time Settings
The device’s date and time settings must be accurate to establish a secure connection with the Apple ID server. You should check and adjust these settings, enabling automatic updates for synchronization.
Part 2: [10 Quick Solutions] There Was an Error Connecting to the Apple ID Server
The section below provides user-friendly fixes tailored to ease frustration and restore seamless connectivity.
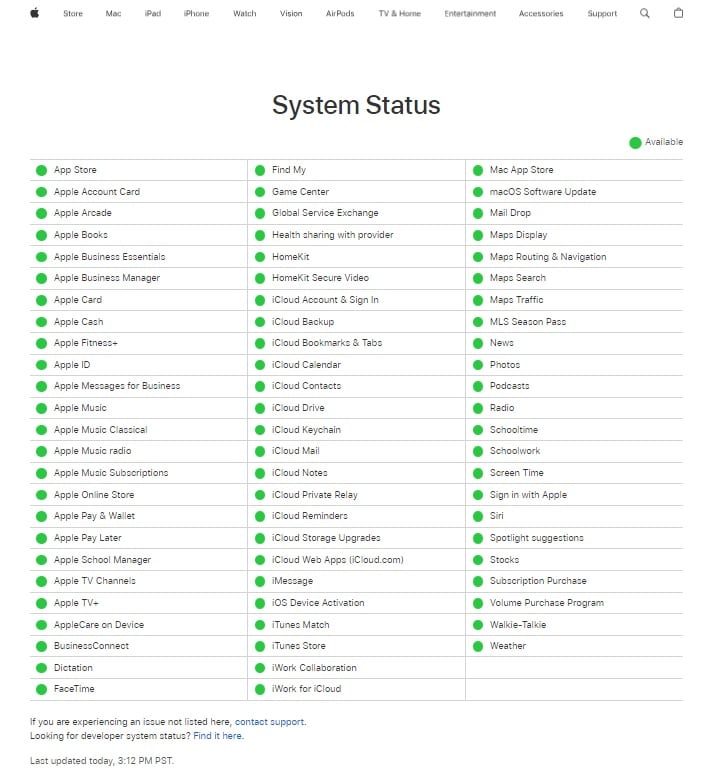
Check Apple’s Servers
The initial step is to investigate the status of Apple’s servers. Server outages or scheduled maintenance can be the culprits behind the connectivity hiccup. Head to Apple’s service status page for real-time updates on server conditions.
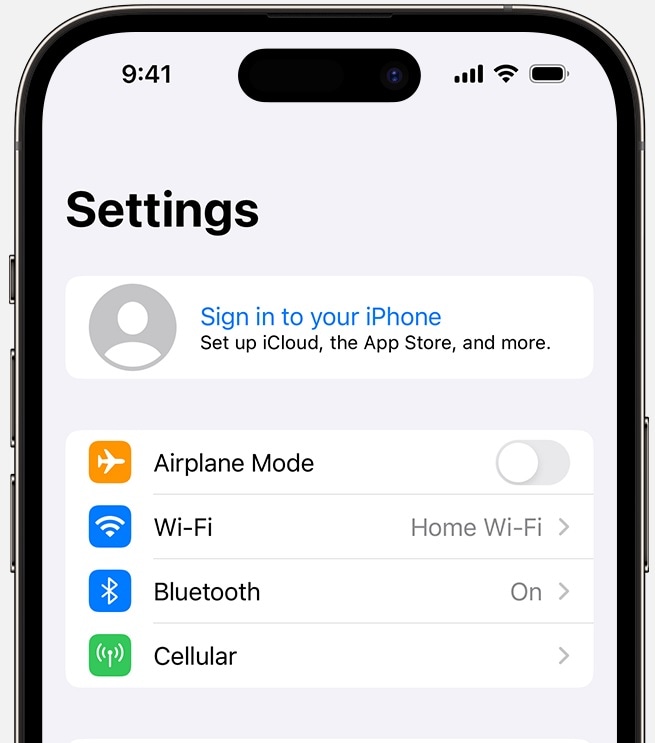
Check Your Network Connection
A fundamental yet crucial solution is to examine your network connection. Instabilities in Wi-Fi or cellular data can impede communication with Apple’s servers. Ensure a stable connection and troubleshoot any disruptions, considering a switch to an alternative network. You can follow this guide to check your network signal.
Set Up Another Admin User Account (for macOS Users)
Creating a new admin user account can serve as a strategic move for macOS users. Here’s how. It helps isolate issues tied to a specific user account. It provides insights into whether the problem is user-specific. Here’s how.
- Step 1: Open System Preferences on your Mac and choose Users & Groups.
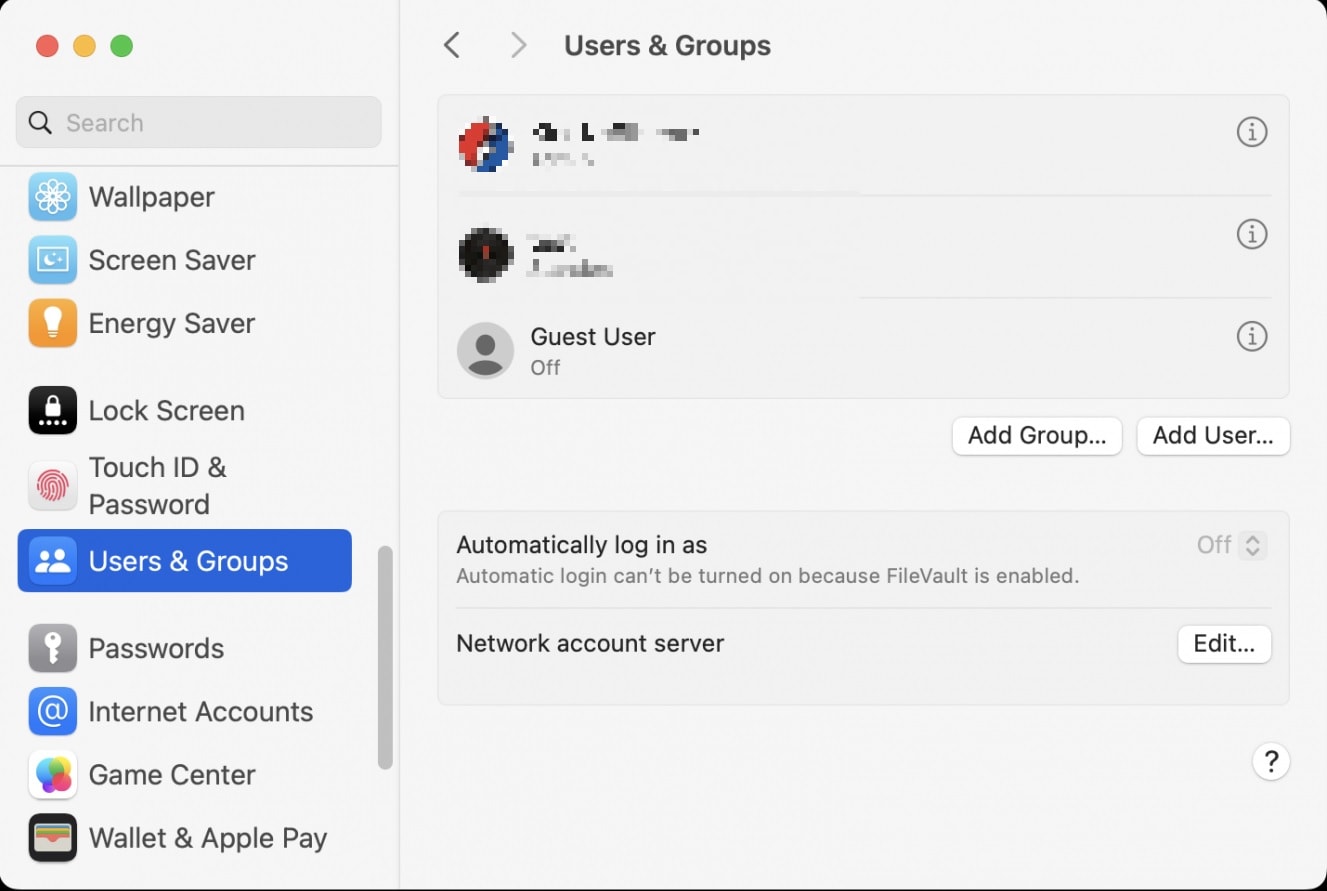
- Step 2: Click the lock icon and enter your admin password. Click the + or Add User… button to add a new user, selecting Administrator as the account type. Log in to the new account and check if the issue persists.
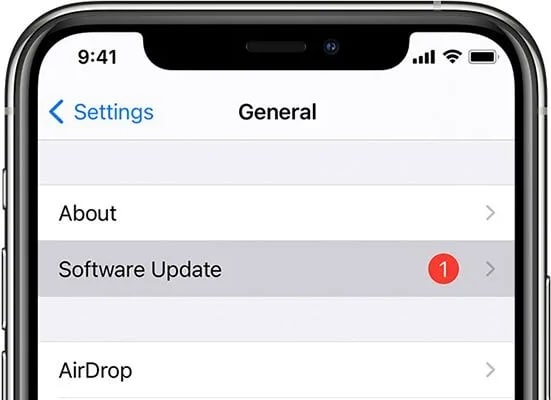
Update Your iOS or macOS Software
Outdated operating systems often contribute to connectivity issues. Ensure your iOS or macOS software is up to date by checking for available updates. Here’s how.
- For iOS: Go to Settings, tap General, and select SoftwareUpdate.
- For macOS: Open SystemPreferences, click on Software Update.
Download and install any available updates.
Boot macOS in Safe Mode
Booting your Mac in Safe Mode is another approach to troubleshooting. The mode disables unnecessary processes, allowing you to identify and resolve potential conflicts causing the connection error. To put your Mac into safe mode, restart it and hold down the Shift key. Release it when the Apple logo appears.

Restart Your Apple Device
A classic yet effective solution is to restart your Apple device. This simple action refreshes system processes and can resolve various connectivity issues. Power off your device and turn it back on to initiate a clean start.
Sign Out and Sign Back Into Your Apple ID Account
Temporarily signing out of your Apple ID account and then signing back in can be a virtual reset. The process refreshes the connection and addresses potential authentication issues, resolving the error.
- On iOS: Go to Settings, tap your Apple ID, and choose SignOut. Sign in again.
- On macOS: Open SystemPreferences, select Apple ID, and click Sign Out. Sign in again.
Reset Your Apple ID Password
Security concerns related to compromised credentials can contribute to the connection problem. If in doubt, initiate a password reset for your Apple ID. It not only enhances account security but also addresses authentication errors. Here’s how.
Disable VPN
If you use a Virtual Private Network (VPN), consider temporarily disabling it. VPNs can sometimes interfere with the connection to Apple’s servers, causing the error. Disabling the VPN allows you to test whether it’s the source of the problem.
Adjust Date and Time Settings Automatically
Inaccurate date and time settings on your device can lead to authentication failures. Ensure your device’s date and time are accurate and set to update automatically. This prevents synchronization issues with the Apple ID server.

If you’ve tried all the above and you’re still getting the error connecting to the Apple ID server, you may want to consider using Wondershare Dr.Fone - Screen Unlock. It is a powerful tool that can help you bypass the Apple ID lock screen on your Apple iPhone SE (2022), iPad, or iPod touch.
Part 3: A More Comprehensive Solution: Use a Professional Third-Party Software
Wondershare Dr.Fone is renowned for its versatile features. The platform’s Screen Unlock function is designed to address Apple ID-related challenges. What’s more, Dr.Fone is compatible with various iOS versions. It ensures its applicability across a broad range of devices. Its user-friendly interface makes it accessible for both novice and experienced users.
Dr.Fone - Screen Unlock (iOS)
Unlock iPhone/iPad Lock Screen Without Hassle.
- Simple, click-through, process.
- Unlock screen passwords from all iPhone and iPad.
- No tech knowledge required, everybody can handle it.
- Supports the latest iOS version fully!

4,395,217 people have downloaded it
Key Features
- **Comprehensive lock screen removal.**Fone excels in eliminating various lock screens on iOS devices, providing an all-encompassing solution to accessibility challenges.
- **iCloud activation lock and Apple ID bypass.**The software stands out by allowing users to bypass the iCloud activation lock and Apple ID without a password. The feature is particularly useful for users facing login complications.
- **MDM bypass without data loss.**Fone goes beyond standard capabilities by enabling users to bypass Mobile Device Management (MDM) without data loss. This function is crucial for corporate settings or individuals managing multiple devices.
- **Effortless process.**Simplifying the user experience, Dr.Fone offers straightforward steps for the unlocking process.
Step-by-Step Guide on Using Dr.Fone - Screen Unlock
Below are the steps to use Dr.Fone - Screen Unlock.
Step 1: Download and Install Dr.Fone - Screen Unlock on your computer. Launch the app afterward,
Step 2: From the main interface, choose the Screen Unlock option. Next, connect your iOS device to the computer using a USB cable. Click on iCloud Activation Lock Removal to initiate the process.

- Step 3: Follow the on-screen instructions and wait for Dr.Fone to detect your device information automatically. From there, the software will provide the necessary firmware package. Click Unlock Now to initiate the process.
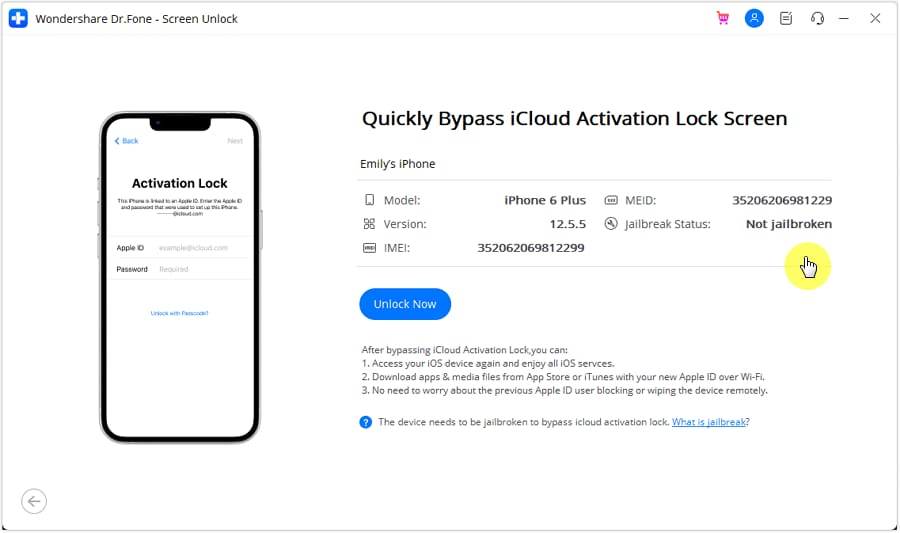
- Step 4: Upon completion of the process, a confirmation message will be displayed on the window. Click the Done button to finalize the unlocking of the Activation Lock.

Conclusion
Don’t lose hope if you still can’t connect to the Apple ID server. Take advantage of the provided solutions for a seamless resolution. However, it would help if you also consider the convenience and effectiveness of Dr.Fone - Screen Unlock for a comprehensive fix.
If the Apple ID verification failed error persists, reaching out to Apple Support remains a reliable avenue for additional assistance with your Apple ID connectivity concerns. Your resolution journey begins with these steps, ensuring a swift return to hassle-free Apple services.
Also read:
- [New] 2024 Approved How to Add Effects to Your Voice? Free Voice Changers Here
- [Updated] 2024 Approved Android's Best YouTube Video Downloaders Reviewed
- [Updated] In 2024, Balancing Frequency & Quality in YouTube Video Uploads
- 2024 Approved Everlasting Impressions Save Instagram Stories Endlessly
- 2024 Ultimate Guide: Resolving 'Grounded' Game Crashes on PC
- How to Delete iCloud Account On Apple iPhone 13 Pro Max without Password?
- How to Fix Locked Apple ID from iPhone 7 Plus
- In 2024, How Do I Stop Someone From Tracking My Xiaomi Redmi 13C 5G? | Dr.fone
- In 2024, How To Remove the Two Factor Authentication On iPhone 15 Pro Max
- In 2024, How To Unlink Your Apple iPhone 13 From Your Apple ID
- In 2024, Turning Off Two Factor Authentication From iPhone 15 Pro Max? 5 Tips You Must Know
- In 2024, Turning Off Two Factor Authentication From iPhone 15 Pro? 5 Tips You Must Know
- Solution Steps for Creative Pebble Speaker Issues – No More Silence!
- The Easiest Methods to Hard Reset Samsung Galaxy A14 4G | Dr.fone
- Unlock Apple ID without Phone Number From Apple iPhone SE (2022)
- Title: How To Remove the Two Factor Authentication From iPhone SE (2022)
- Author: Alma
- Created at : 2024-10-31 04:06:02
- Updated at : 2024-11-07 04:00:00
- Link: https://apple-account.techidaily.com/how-to-remove-the-two-factor-authentication-from-iphone-se-2022-by-drfone-ios/
- License: This work is licensed under CC BY-NC-SA 4.0.