How To Reset the Security Questions of Your Apple ID On Your Apple iPhone 15
How To Reset the Security Questions of Your Apple ID On Your Apple iPhone 15
Your Apple ID serves as the gateway to a multitude of Apple services, encompassing the likes of the App Store, iCloud, iTunes, and beyond. To fortify the safeguarding of your Apple ID, Apple kindly requests that you establish security questions.
These inquiries act as an extra shield, enabling you to regain access to your account should you ever forget your password. However, there are various reasons to explain why people want Apple ID reset security questions, like discussed below. In this ultimate guide, we provide step-by-step instructions on how to reset the security questions of their Apple ID.
Part 1: What Is the Purpose of the Apple ID Security Questions
Before talking about “reset my security questions Apple ID,” let’s talk about what they are. Apple has a reputation for ensuring the high security of its devices and services. The devices have Face ID and Touch ID for security and strong encryption standards. Apple devices are considered among the most secure in the tech industry. Moreover, Apple takes device security seriously. An example is the use of security questions.
When you create an Apple ID or set up a new device, Apple prompts you to choose security questions. These questions are carefully designed to be something only you would know. This explains their role as an extra layer of protection for your account. Typical instances include questions like “What is the name of your first pet?” or “In which city were you born?”
Importance of Apple ID Security Questions
The security questions associated with your Apple ID serve a critical role. They perform a pivotal role in ensuring the security and confidentiality of your digital presence. Numerous modern authentication techniques, such as biometrics, offer a strong layer of safeguarding.
Nonetheless, there might be instances where you require reentry to your account, such as in cases of forgotten passwords. In such scenarios, security questions serve as a vital lifeline, enabling you to authenticate your identity and regain control of your Apple ID.
Purpose of Security Questions
- Account Recovery: Security questions are a valuable tool for account recovery. They provide a means for you to prove your identity to Apple support in case you’re locked out of your account. Thus helping you regain access to your account quickly.
- Additional Layer of Security: Imagine someone manages to get your Apple ID details. Even then, they would still need to answer your security questions to make changes to your account. This extra layer of account protection prevents unauthorized access.
- Privacy Protection: Apple understands the importance of privacy. By setting up security questions, you can choose information that is meaningful to you. At the same time, it is not easily discoverable by others, enhancing the privacy of your account.
Part 2: How To Reset the Apple ID Security Questions Through the Account Settings
As we’ve established, Apple prioritizes security and privacy. There are various reasons why you might want to reset your Apple ID security questions. These range from enhancing security to changing the info associated with your account. Whatever your reason, it’s essential to securely follow the proper procedure for iCloud reset security questions.
Why Reset Your Apple ID Security Questions?
- Enhancing Security: Security is an ever-evolving field. Resetting your security questions periodically can strengthen your account’s defense. It is especially handy against emerging threats and ensures your information remains secure.
- Prevention of Attacks: Do you suspect unauthorized access or believe your security questions may have been compromised? In this scenario, resetting them immediately can protect your account.
- Adhering to Best Practices: Security experts recommend changing passwords and security questions periodically. Regularly updating your security questions is a cautious security practice.
- Making Relevant Changes: Over time, life circumstances change. You might move to a new location, get a new pet, or have different personal experiences. Updating your security questions to reflect these changes can make them more effective.
Guide for Resetting Apple ID Security Questions Through Account Settings
Resetting your Apple ID security questions through your account settings is a straightforward process that enhances the security of your Apple ID. Follow these detailed steps to reset your security questions:
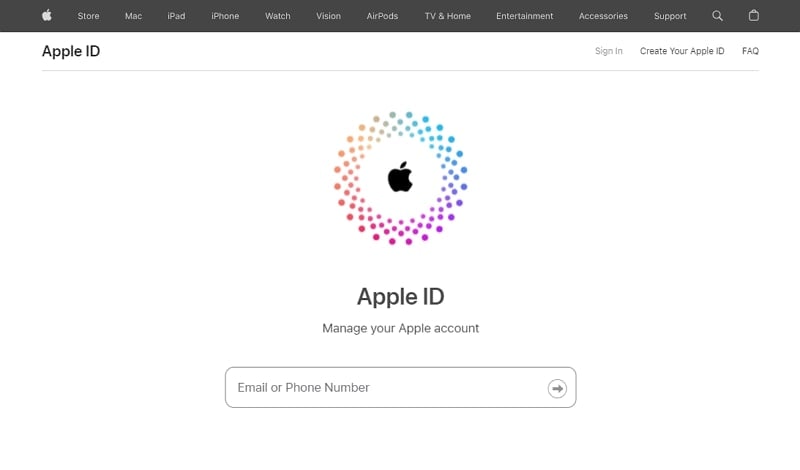
- Step 1. Begin by visiting and signing into the official Apple ID management page at appleid.apple.com. Then, proceed to the “Sign-In and Security” section for changing the security questions.
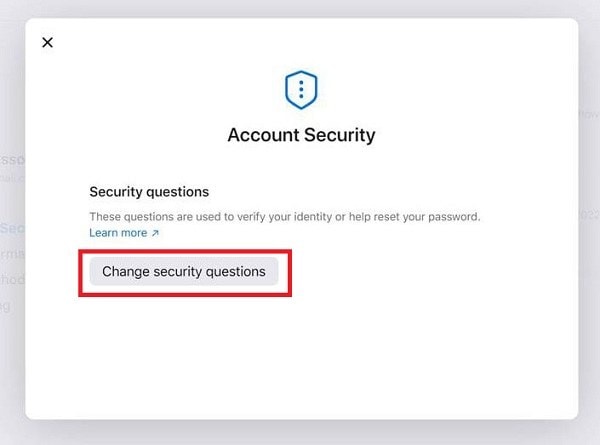
- Step 2. Now, click “Account Security” and follow it by locating “Change security questions.” Click on it to proceed, and you’ll now be prompted to set up new security questions and provide their corresponding answers.
- Step 3. After adding your new security questions and answers, click the “Update” button. To complete the process, you will need to verify your identity by entering your Apple ID password.
Pro Tip: What if Your Apple ID Got Locked? Unlock It With the Best Solution
So, you’ve been following our ultimate guide to reset your Apple ID security questions. However, you hit a roadblock – your Apple ID is locked. It happens many times that people forget their Apple ID passcode or get their Apple ID locked due to various reasons. In such cases, there is no need to panic that you are now unable to unlock the ID and access your important data.
This is because we have an excellent solution that can help you regain access to your Apple ID quickly and efficiently. With the help of the Wondershare Dr.Fone, you can easily get your Apple ID unlocked without a passcode.
Using this tool, users are able to bypass the iCloud activation lock and Apple ID without a password to use it as per their need. Moreover, they can also Bypass MDM and screen time without data loss, which is a plus point of this unique tool.
Key Features of Wondershare Dr.Fone
- This tool is compatible with the latest iPhone 15 models and all iOS versions, including iOS 17.
- No technical skill is required to use this tool because of its easy-to-use interface.
- 6-digit passcode, Touch ID, Face ID, and various screen locks can be removed in no time.
Steps To Unlock Apple ID Without Password via Wondershare Dr.Fone
Following are the simple steps you need to follow to unlock your Apple ID after you have forgotten the passcode:
- Step 1: Initiate the Process by Launching Wondershare Dr.Fone
Begin the unlocking process of Apple ID by installing and launching Dr.Fone’s latest version on your computer. Connect your Apple iPhone 15 to the computer and tap on the “Toolbox” option to access different options, from which you need to select “Screen Unlock.”

- Step 2: Tap on Respective Option and Answer Platform Questions
Afterward, hit the “Remove Apple ID” option and tap the “Unlock Now” button in the next window. Proceeding ahead, the platform will ask you some questions which you will need to answer. However, it is necessary to ensure that your Apple iPhone 15 has “Screen Lock” and “2FA” enabled.

- Step 3: Enable Recovery Mode and Choose System Version
Then, put your device in Recovery Mode so that the platform can detect the “Device Model.” With this, you will need to choose “System Version” in the respective window and tap on the “Start” button. Required firmware will start downloading that is suitable to your device.

- Step 4: Disable Apple ID on Your Device
On its successful completion, you will be notified from the platform, after which you are required to proceed by clicking on the “Unlock Now” button. A prompt will pop up on the screen; type the code in it and hit “Unlock.” This will remove the Apple ID passcode successfully in just a few moments.

Part 3: How To Perform Apple ID Reset Security Questions Using iForgot Website
Apple offers multiple avenues for users to perform essential security protocol changes, one of which is through the iForgot website. This website serves as a valuable resource for Apple device users in various scenarios. These include forgotten passwords, 2FA issues, account recovery, and unlocking Apple IDs. Here is the process of Apple ID reset security questions using the iForgot website:
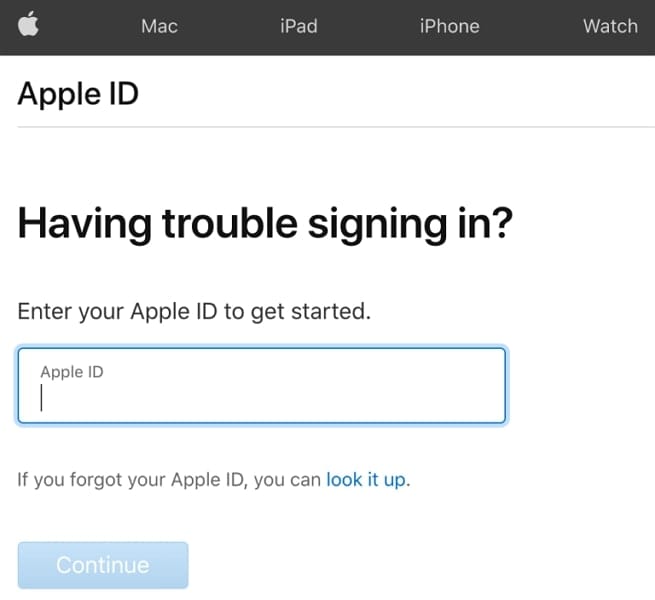
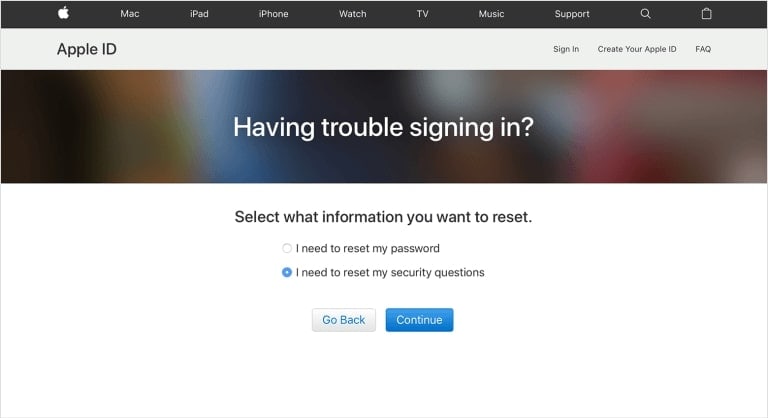
- Step 1. Begin by opening your web browser and navigating to the iForgot website at https://iforgot.apple.com/. You will then be asked to input your Apple ID. After entering your Apple ID, proceed by clicking the “Continue” button.
- Step 2. On the following page, you’ll encounter various options for account recovery. Opt for “I need to reset my security questions” and click “Continue.” For added security measures, Apple will request you to confirm your identity.
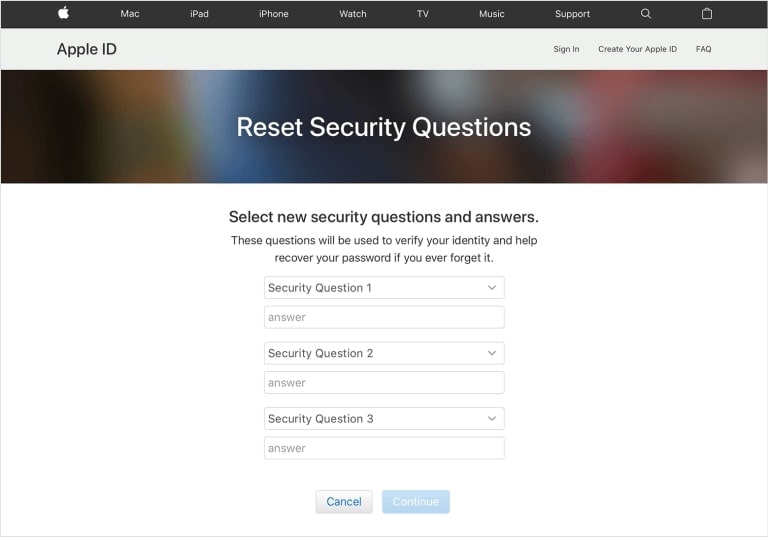
- Step 3. After your identity has been successfully verified, you’ll receive prompts to establish new security questions. Once you’ve created your new security questions, remember to save the changes.
Part 4: How To Reset the Apple ID Questions by Contacting the Customer Support
Contact Apple’s Customer Support if you have failed to reset your Apple ID security questions. They are well-equipped to assist with a wide range of device-related problems. You can use the following guide on how to reset the security questions on Apple ID via Apple Customer Support:
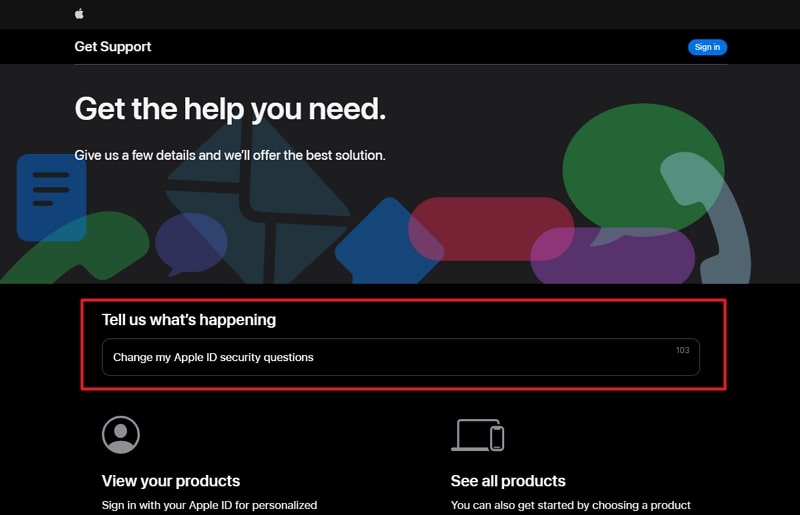
- Step 1: Begin by visiting the Apple Support website located at https://getsupport.apple.com/. Once there, use the search bar to type your issue. In this section, look for and click on “ Change my Apple ID security questions.”
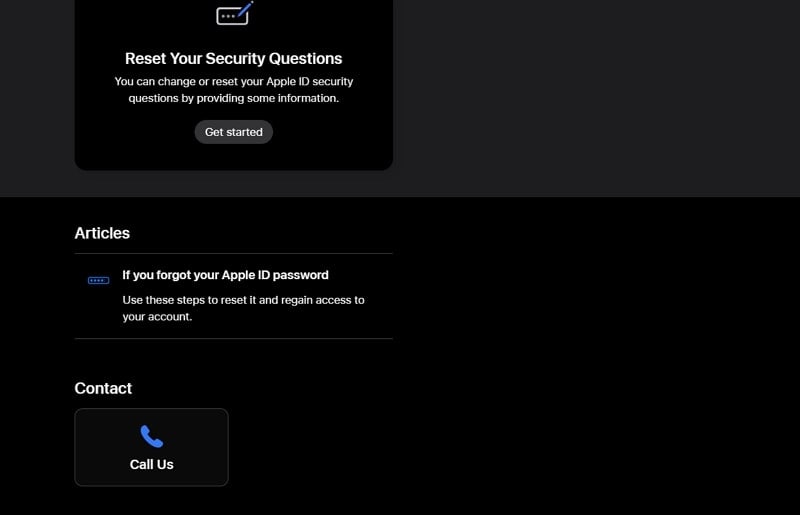
- Step 2: After selecting your issue, you will be presented with various support articles and options. Scroll down and choose the desired option from the “Contact” section. Follow the on-screen instructions to contact Apple support and provide details about your issue.
Conclusion
To summarize, we’ve explored the importance of Apple ID security questions. We provided you with different ways on how to reset the security questions on Apple ID. The article highlighted the significance of security in the Apple ecosystem. It also explained the role security questions play in protecting your account.
We discussed the various reasons why you might want to reset your Apple ID security questions. You learned how to reset your security questions through your Apple ID account settings and via the iForgot website. Additionally, we introduced Wondershare Dr.Fone as a reliable solution for unlocking your Apple ID. Dr.Fone offers a user-friendly interface, a high success rate, and the ability to resolve various iOS device issues.
Detailed Guide on Removing Apple iPhone 15 Activation Lock without Previous Owner?
Today, many individuals will purchase a utilized iPad or a recycled iOS phone instead of a fresh, box new one. However, they are often disturbed by the Activation Lock screen showing up on the screen once they buy them. This case will probably happen because the iPad is associated with the past user’s iCloud account and will be an iPad locked to the owner.
It becomes a difficult issue as removing a connected iCloud account without the past user is almost difficult. However, sit back and relax. We’ve discovered a few potential ways. This guide will show you the iPad locked to owner bypass. Furthermore, you can use our expert tool, i.e., Dr.Fone-Screen Unlock, to bypass the lock.
After reading this guide, you will understand how to erase the Activation Lock without a past user. How about we get everything started?
Method 1. Dr.Fone - Screen Unlock
Rather than making our readers wait about how to remove Activation Lock without Apple ID or past user, we suggest you with Wondershare Dr.Fone-Screen Unlock.
It is an expert iCloud activation lock bypass program that can remove the activation lock on your iPad. It is the best possible solution when you fail to remember your Mac ID or password. Download the application on your Windows or Macintosh and follow the steps to remove the activation lock without a previous user.
Steps to Follow:
Step 1. Install and launch the Dr.Fone program and choose the Screen Unlock tool.
Step 2. Pick the “iCloud Activation Lock Removal” option.

Step 3. Now you can start to bypass the lock.

Step 4. Begin to remove and wait briefly. The phone will be in a typical state with practically no lock after removing the activation lock.
Step 5. The program will remove the activation lock like a flash. Your iPad will begin with no activation lock. You can access and utilize the iPad now. However, you must know that you can’t call or use cellular data and iCloud of your new Apple ID after bypassing the lock.

Method 2. Remove it from iCloud
If you cannot reach the past user but rather you are still in contact with them, they can unlock your iPad. Here are the step-by-step guidelines on eliminating the iPad activation lock through the iCloud web:
- Open the iCloud site in a browser.
- Sign in to the current iCloud account being used with the locked iPhone.
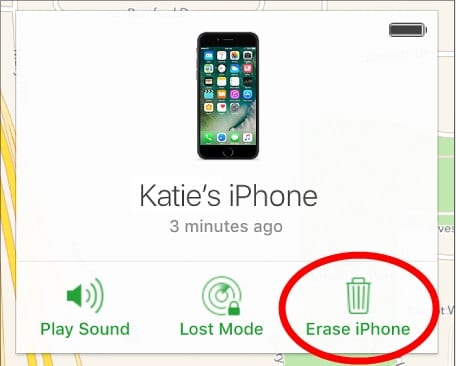
- When you sign in, click on the choice that says Find iPhone.
- Presently, you can remotely perform activities on your phone.
- Click on the drop-down named All Gadgets and pick your iPad.
- Click on Erase iPhone.
Method 3. Use DNS bypass
Bypassing DNS Server is one more way for you if you’re searching for simple methods for eliminating Activation Lock without the past user. Note that this DNS strategy can bypass the iCloud lock for a brief time. Here’s how:
Step 1. Open your iPad and explore the “Choose a Wi-Fi Network” page.
Step 2. Presently, press the Home button and select Wi-Fi settings. Presently, tap the “I” symbol right behind your Wi-Fi network. It will show the properties of the Wi-Fi.
Step 3. Select “Configure DNS” and set it as indicated by your region:
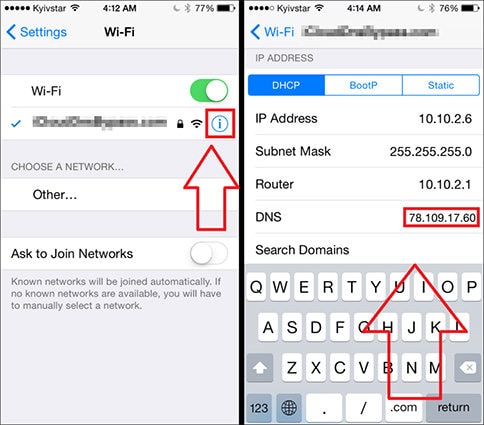
- USA: 104.154.51.7
- South America: 35.199.88.219
- Europe: 104.155.28.90
- Asia: 104.155.220.58
- Australia and Oceania: 35.189.47.23
- Other Continents: 78.100.17.60
Step 4. From that point forward, return to the Wi-Fi page.
Step 5. Presently, click over and again on “Next” and “Back” and hold on until the iPad connects with your area’s iCloud DNS bypass server.
Method 4. Local Apple Support
Following the techniques above, you can try reaching Apple’s local service when you can’t remove the Activation Lock. However, you need to provide the following things:
- iPad serial number
- Buying receipt
When they confirm you own the iOS iPad legitimately, they will help you further by unlocking your iPad.
Part 2: How to Reset iPad without Passcode?
1. Reset iPad by Computer
- Connect your iPad to a computer. Press and hold the Power button + Home button (if your iPad has a Home button). Otherwise, press and hold the Power button + either Volume button (if your iPad doesn’t have a Home button) until you see the Recovery Mode screen.
- On your Macintosh, find the connected iPad.
- Tap Restore and trust that the process will end.
- Set up your iPad and restore the factory default settings without a password.
2. Reset it by Find My
- Go to iCloud.com, and sign in with your Apple ID and password.
- Click on the Find [device] symbol in the menu.
- Select your iPad from the list of all the connected devices.
- Select Erase iPad.
- Follow the prompts for iPad locked to owner reset.
3. Reset with iTunes
- Open the iTunes application or website.
- Connect your iPad to your PC with a connector. Enter your password whenever required.
- Click on the iPad symbol in the upper-left corner.
- Select Summary in the left section.
- Click Restore iPad and then click the Restore button to confirm and reset the iPad locked to the owner.
Conclusion
This iPad locked to owner bypass guide explains how to remove the activation lock. We have mentioned a list of helpful methods to remove the lock from your device. However, if you are still looking for a quick and efficient answer, we suggest you install Dr.Fone - Screen Unlock (iOS) . Dr.Fone is a safe and effective tool for all your unlocking needs.
How To Remove the Two Factor Authentication On Apple iPhone 15
Want To Remove the Two Factor Authentication? Check Out This Guide

Continuous technology innovation has introduced many advanced encryption and security methods to protect data from hackers. With these innovations, companies like Apple and Google have introduced the two-factor authentication process to protect user data.
But sometimes, this security method becomes a hassle to access your data daily, due to which many users try to remove it. That is why, in this article, we have discussed how you can remove iCloud two-factor authentication easily.
- Part 1: What Is Two-Factor Authentication and How Helpful It Is
- Part 2: Can You Remove the Two Factor Authentication iCloud at Anytime
- Part 3: How To Remove the Two-Factor Authentication Within 14 Days
- Part 4: iPhone Apple ID Got Locked? Here’s a Reliable Tool To Get It Unlocked Without Passcode

Part 1: What Is Two-Factor Authentication and How Helpful It Is
Protecting users’ devices and online accounts is one of the major responsibilities of tech companies like Apple. Due to this, they have added multiple security features, including two-factor authentication. Thus, if you create an Apple ID, you can see a two-factor authentication option that adds an extra layer of security.
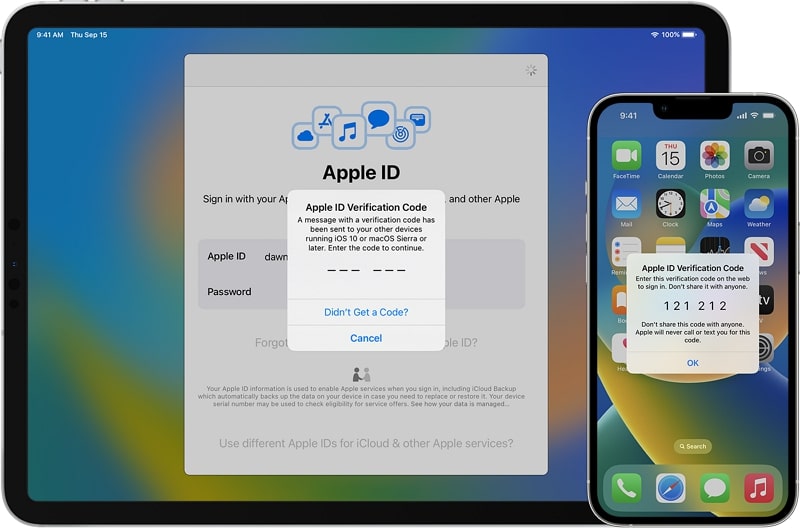
2FA is activated when the user provides the password to log into the Apple ID or software through a new device, and it acts as a second layer for account security. Apple ID or any software containing sensitive data cannot be accessed without it. This method provides a higher security level than single-factor authentication. To understand more benefits of this security system in detail, check the following points:
- Protection From Password Theft: 2FA acts as an additional security level. It protects your accounts and devices in case your password is leaked.
- Migrations of Unauthorized Assets: Online banking applications use 2FA to protect users from unauthorized bank transfers. If someone accesses their app, this is a beneficial security measure.
- Protection on Multiple Services: Platforms, including social media, banks, and cloud storage, use 2FA. It means that 2FA can be used in various digital aspects.
Part 2: Can You Remove the Two Factor Authentication iCloud at Anytime
Many people use 2FA globally to protect their personal information and devices from hackers and unauthorized access. However, in some cases, users may want to remove two-factor authentication iCloud for multiple reasons. This includes scenarios in which their device is lost or damaged or if they have found a better security option than this one.
Moreover, there is one important key point to note: Apple has removed the feature of deactivating 2FA from the Apple ID. It means you need to think twice before activating this feature on your Apple ID because it cannot be reversed. For the following reasons, Apple has taken this initiative:
- Enhanced Security: By removing the deactivation option for 2FA, Apple is trying to strengthen its account security to ensure that no one can access its user’s data.
- Reducing Vulnerabilities: Allowing users to deactivate 2FA could cause vulnerabilities in the Apple ecosystem that can be a weak point for protecting users’ data. That is why Apple has removed the deactivation option to stop malicious actors from taking advantage of this vulnerability.
- Encouraging Security Awareness: To make Apple users more security conscious, Apple has made it difficult on purpose to remove 2FA. It helps users to be more confident in Apple services and products.
- Minimizing Mistakenly Steps: If users mistakenly remove the 2FA, their accounts and devices are at risk of being accessed without proper authentication. To avoid such an issue, the deactivation option of 2FA is removed.
Besides all these reasons, there is still some good news for those who want to remove the two-factor authentication iPhone to use other security options. The good news is that Apple allows users to remove 2FA for a limited time after activation.
Part 3: How To Remove the Two-Factor Authentication Within 14 Days
As explained in the last part, Apple has made removing the 2FA option from Apple ID challenging for several security reasons. Thus, if you want to remove 2FA from your Apple ID, you have only 14 days after activating this feature. To understand how to disable iCloud two-factor authentication within this given time, check the following steps:
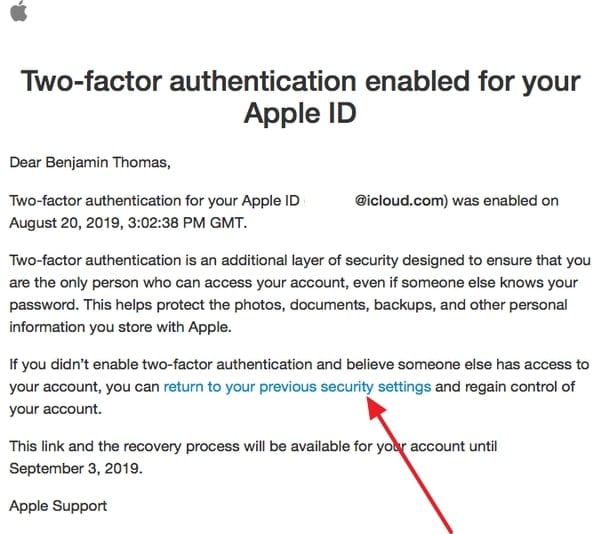
- Step 1. Once you have activated the 2FA feature, your 14-day grace period will start eventually. To deactivate this, open the enrollment email you received from Apple regarding 2FA on your Apple ID.
- Step 2. Scroll to the bottom of this email and select the link or button to return to your account security & settings section. There, follow the on-screen instructions to deactivate the 2FA of your Apple ID.
Part 4: iPhone Apple ID Got Locked? Here’s a Reliable Tool To Get It Unlocked Without Passcode
If you mistakenly got your Apple ID locked due to entering the wrong password multiple times, there is no need to stress it out. It is a common issue that many people forget their Apple ID password and cannot access it. Due to this, we have got you a perfect solution to unlock your Apple ID without a passcode.
This solution is the Wondershare Dr.Fone - Screen Unlock (iOS) tool specially designed to help users remove their iPhone and iPod lock screens. It is compatible with the latest iOS devices and assists in removing various types of lock screens, including Touch ID and Face ID.
Key Features
- This iOS screen unlock tool assists users in bypassing MDM without data loss and other technical errors.
- iCloud activation lock and iTunes backup encryption can be bypassed without a password in just a few steps.
- iPhone 15 and the latest versions of iOS 17/iPadOS 17 are supported by this tool to help users professionally.
Simplified Steps for Unlocking Apple ID With Wondershare Dr.Fone
To help you use this AI-powered screen unlock tool for unlocking the Apple ID without a password, follow the process we have mentioned below for your ease:
- Step 1. Access the Toolbox and Choose the Respective Option
Initiate the process by accessing Wondershare Dr.Fone’s latest version on your computer and tapping on the “Toolbox” option from its left side toolbar. Following this, choose “Screen Unlock” from the list of tools and tap “Remove Apple ID” in the next window.
- Step 2. Make Sure That the Apple iPhone 15 Is Connected to the Computer
Then, connect your Apple iPhone 15 to your computer using a USB cable so that you can see its connectivity status. Once the status is displayed on a new window, hit the “Unlock Now” button to proceed. Answer some questions that are asked by the platform, and with this, ensure that your device’s “Screen Lock” and “Two-Factor Authentication” are enabled or disabled.

- Step 3. Select the System Version and Proceed Ahead
In this step, enable Recovery Mode by following the on-screen instructions. It will help the platform detect the connected device model, with which you will need to select “System Version.” Afterward, you can hit the “Start” button to proceed ahead.
- Step 4. Start the Apple ID Unlocking Process
The respective iOS firmware will download according to the Apple iPhone 15 device model and system version. After it is downloaded, the platform will verify it for you, based on which you can tap the “Unlock Now” option to get your Apple ID unlocked successfully.
Conclusion
With this, we hope you understand how to disable iCloud two-factor authentication. However, remember that doing this is only possible within 14 days of a grace period. If this period is over, you cannot remove 2FA from your Apple ID.
Moreover, if you have locked your Apple ID passcode, using Wondershare Dr.Fone to unlock it can be the perfect option. While using this tool, you also don’t have to worry about screen locks on different iOS devices. This is because the innovative algorithms integrated in this tool make it easier to use for unlocking the Apple ID or screen lock.
Also read:
- [Updated] 2024 Approved Is Your Channel's Income Regular via YouTube?
- [Updated] How to Get YouTube Sponsorship for Small Channels (Easy)
- About Itel P55+ FRP Bypass
- Ace Your Youtube Livestreams Mastering Broadcast Techniques Using WireCast for 2024
- Apple ID is Greyed Out On iPhone SE (2022) How to Bypass?
- Audience Appeal Expert Tips on Post-Production and Editing in GarageBand
- Danish Film Selection: Enhancing Linguistic Competence
- Forgot Your Apple ID Password and Email From iPhone 14 Plus? Heres the Best Fixes
- How to Unlock Apple ID On your iPhone XS Max without Security Questions?
- In 2024, Apple ID Locked for Security Reasons On Apple iPhone 12 Pro Max? Find the Best Solution Here
- In 2024, How To Create an Apple Developer Account On iPhone 14 Plus
- Instagram Spotlight Tactics A 3-Step Guide for 2024
- Logiciels De Sauvegarde Rapide: Les Choix Incontournables Pour Protéger Votre Système
- Title: How To Reset the Security Questions of Your Apple ID On Your Apple iPhone 15
- Author: Alma
- Created at : 2024-10-11 19:48:41
- Updated at : 2024-10-14 22:24:05
- Link: https://apple-account.techidaily.com/how-to-reset-the-security-questions-of-your-apple-id-on-your-apple-iphone-15-by-drfone-ios/
- License: This work is licensed under CC BY-NC-SA 4.0.