
In 2024, How To Create an Apple Developer Account From Apple iPhone X
How To Create an Apple Developer Account On Apple iPhone X
The world of technology undergoes continuous evolution. This emphasizes the crucial need for developers to stay on the cutting edge of innovation. Specifically, the Apple ecosystem continues to assert its significant influence in mobile applications. Are you aiming to make your mark in the thriving iOS and macOS app market? There’s a crucial requirement you must meet, which is obtaining an Apple Developer Account.
This thorough guide is designed to lead you step by step through the process of how to create an Apple Developer account. It aims to equip you with the essential knowledge needed to complete this entire Apple Developer account creation process smoothly.
Part 1: What Is an Apple Developer Account?
In the realm of technology, Apple emerges as an undeniable powerhouse. It is renowned for its pioneering advancements in both software and hardware. From the iconic Apple iPhone X to the powerful Mac computers, Apple has influenced the tech world greatly. It has prompted developers to craft applications that integrate with Apple’s ecosystem. This is why learning how to make an Apple Developer Account is pivotal.
The Apple Developer Account or Apple Developer ID is the gateway to the Apple ecosystem. It is the key that opens the doors to creating, distributing, and managing apps for Apple devices. If you aspire to develop apps for Apple devices, acquiring an Apple Developer account is your crucial initial step. This account is not limited to individual developers.
It is also essential for companies and organizations to develop their software solutions. By obtaining an Apple Developer Account, you unlock many valuable resources. These include the essential SDKs, tools, and documentation. Moreover, it grants you entry into the Apple Developer Program. It is the premium tier of developer membership that offers exclusive benefits. Some benefits are beta software access, advanced app capabilities, and the ability to distribute apps.
Part 2: What Items Are Included in Apple Developer Account
If you are wondering what this membership encompasses, your Apple Developer account isn’t just a card that grants you entry. It is a comprehensive toolkit you need to succeed in the Apple ecosystem. Following are some of the benefits you get after learning how to get an Apple Developer Account:
1. Software Tools
At the heart of your Apple Developer Account lies access to powerful software tools. An essential inclusion is Xcode. It’s a full-fledged integrated development environment (IDE) tailored for Apple’s platforms. With its help, you can streamline the development process. It provides debugging, testing, and design tools, simplifying app creation.
You can build user interfaces with Interface Builder and visualize your app’s flow with Storyboards. Moreover, you will be provided with MapKit JS Dashboard for tracking the use of Apple Maps services on your website and SF Symbols to configure symbols in your iDevice apps. Besides this, it contains many other tools such as Reality Converter, Snapshots Studio (beta), Classroom and Schoolwork, Create ML, and many more.
2. Services and Capabilities
Creating an Apple Developer account grants you access to various services you can embed in your apps to make them easier to use. It enables you to fully leverage Apple’s technology stack. You can leverage services like iCloud or Core ML. These two services and capabilities will help you with data synchronization and integration of machine learning into your apps.
Additionally, you gain access to Apple’s ARKit for augmented reality development. Moreover, you also get SiriKit for voice interaction and Apple Pay for accepting payments for your services, packages, or goods on your developed apps or websites. These services and capabilities don’t end here because you also get HomeKit, CarPlay, CloudKit, PassKit, AirPrint, AirPlay, GameKit, Handoff, etc.
3. Beta Testing and Feedback
As an Apple Developer Program member, you can engage in beta testing. This includes forthcoming releases of iOS, iPadOS, macOS, watchOS, and tvOS. It gives you the privilege of accessing new features and APIs ahead of the general public.
This will help guarantee that your applications remain updated and well-prepared for the latest advancements. Moreover, you can conveniently provide feedback and report bugs directly to Apple. It can also help you test your application on the new beta version so you can fix the bugs on time and give users a smooth experience.
4. Developer Resources and Support
Apple understands that developers are at the core of its ecosystem’s growth. That’s why it provides access to extensive documentation, tutorials, and resources. These cover everything from app design principles to API references.
It also enables you to refine your expertise while staying updated with cutting-edge technologies. Furthermore, it allows you to connect with Apple’s developer community. You can also seek assistance, share your knowledge, and collaborate with fellow developers.
5. App Distribution
Having an Apple Developer account confers a significant benefit. It grants you the capability to distribute your applications to a worldwide audience. This opportunity allows you to debut your apps on the App Store and reach millions of Apple users in 175 regions.
For testing and internal use, you can distribute apps privately to specific individuals. In addition, Ad Hoc distribution allows you to share apps with a limited number of devices. The most significant advantage of an Apple Developer account is that it doesn’t cost any hosting fee for distributing the app.
Part 3: What Are the Enrollment Requirements of Apple Developer Program
Obtaining an Apple Developer account isn’t merely a formality. It involves key steps and criteria to ensure the platform’s integrity. You can register as an individual developer or represent an organization. Here’s a breakdown of what’s needed to join the Apple Developer Program:
Requirements for Individuals
The following are the requirements needed to enroll in the Apple Developer Program as an individual:
- You will need an iPhone, iPad, or Mac equipped with either Touch ID, Face ID, or a passcode. Or a Mac featuring the T2 Security Chip or Apple Silicon will also work. It is essential to use the same device throughout the entire enrollment process.
- Confirm that your Apple ID has two-factor authentication enabled. Moreover, all your Apple ID information is current and precise. This includes your first name (given name), last name (family name), address, phone number, trusted phone number, and trusted devices.
- Ensure you’ve installed the latest version of the Apple Developer app on your device.
- The last requirement you have to ensure is thatyou will need to log in to iCloud on your iDevice.
Requirements for Organizations
To create an Apple developer account as an organization, you need the following information along with the requirements mentioned above for individuals:
- You must provide the entity type, such asnonprofit, educational, or government.
- The legal entity name is required. It is used for the “seller” designation for the apps you distribute.
- Your organization is required to possess a unique nine-digit D‑U‑N‑S Number assigned by Dun & Bradstreet.
- You will need to provide your organization’s headquarters address and contact number.
- Your organization’s website must be publicly accessible. Moreover, the domain name should be linked to your organization.
- Verify that you possess the legal authority to enter into agreements on behalf of your organization.
Part 4: How To Make an Apple Developer Account With the Most Simplified Steps
After completing all the requirements, let’s start the process of how to get an Apple Developer account for free with the help of the following detailed steps:
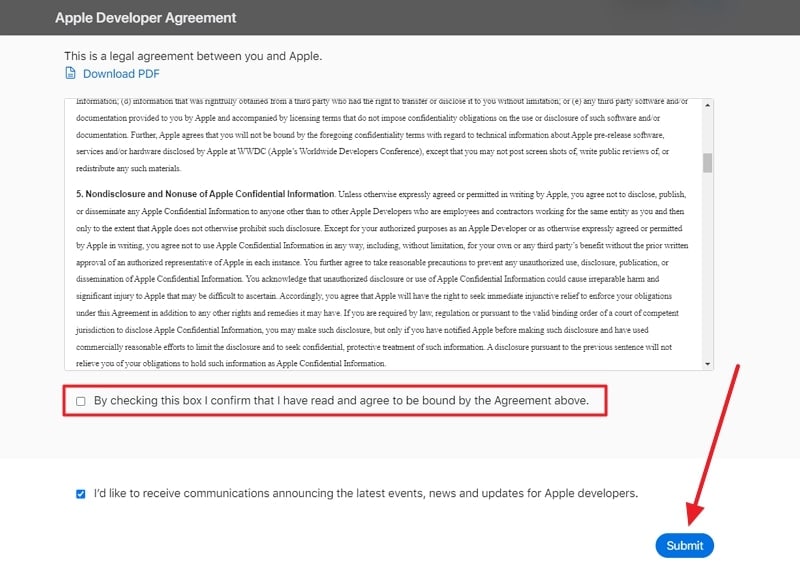
- Step 1. Head towards the Apple Developer official website on your Apple iPhone X, iPad, or Mac browser and tap the “Account” option. This will take you to a new window where you can log in with your Apple ID. After successful login, you will see a page with an agreement between you and Apple. Read the agreement carefully, agree to it, and press the “Submit” button to continue the process.
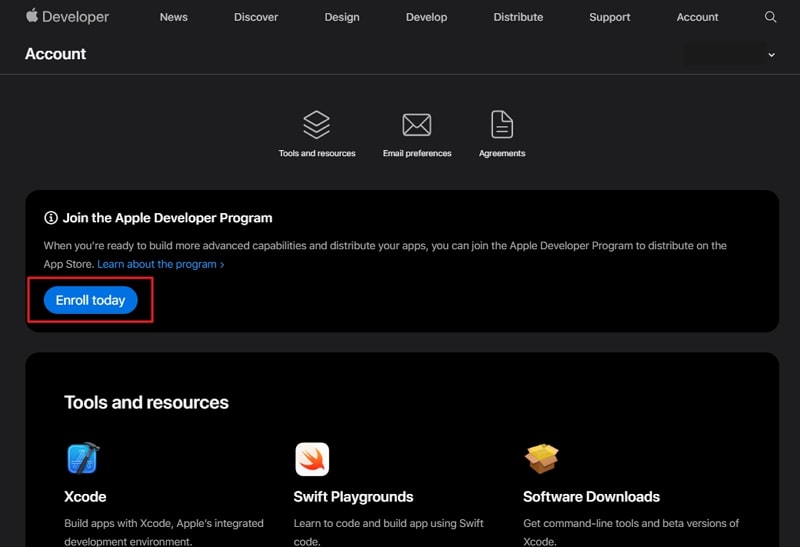
- Step 2. A new page will appear, from which you need to choose the “Enroll Today” button and choose the “Continue enrollment on the web” option if you are using a web browser. This will take you to the form where you need to fill in the basic information such as your legal name, phone number, address, Zip code, and other details.
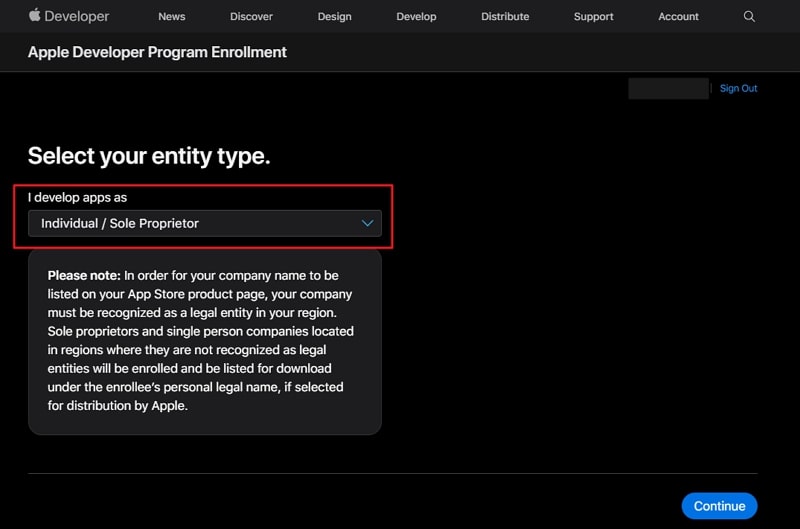
- Step 3. After filling in the basic information, click the “Continue” button. A new page will appear where you can choose whether to proceed as an individual or an organization. Once the selection is made, follow the on-screen instructions to proceed. In the end, you will be asked to complete the purchase of an Apple Developer Program subscription, which is $99 for 1 year.
Bonus Tip: The Most Efficient Tool To Unlock the Apple ID Without Passcode in 2023
The key requirement to create an Apple Developer Account is having an Apple ID. It’s undeniable that the entire Apple ecosystem centers around the Apple account. What should you do if you discover that you’ve forgotten your password? Forgetting your password can lead to various challenges. Fortunately, there’s no need to be concerned because we have a solution for you.
Thus, in such situations, when the user finds no option to unlock their Apple ID without a passcode, we recommend you use Wondershare Dr.Fone - Screen Unlock (iOS) to unlock your device easily. Furthermore, this tool enables you to remove all types of lock screens of various iOS devices, including iPhones, iPad, and iPods.
Dr.Fone - Screen Unlock (iOS)
Unlock iPhone/iPad Lock Screen Without Hassle.
- Simple, click-through, process.
- Unlock screen passwords from all iPhone and iPad.
- No tech knowledge required, everybody can handle it.
- Supports the latest iOS version fully!


4,395,217 people have downloaded it
Key Features of Wondershare Dr.Fone
- Using Wondershare Dr.Fone, you can bypass and remove the MDM profile from your iOS device without data loss.
- Users don’t need technical skills to use this unlock Apple ID tool because it resolves issues within three steps.
- This iOS screen unlock tool can also help you bypass the iCloud activation lock and remove iTunes backup encryption.
Simplified Steps To Unlock iPhone Using Wondershare Dr.Fone – Screen Unlock (iOS)
Having an unlocked Apple ID is crucial before you learn how to make an Apple Developer Account. Following are the straightforward instructions to unlock Apple ID with Wondershare Dr.Fone:
- Step 1: Choose the Remove Apple ID Tool
Begin the process by installing Wondershare Dr.Fone on your computer and accessing its main interface. After this, tap on the “Toolbox” from the left side toolbar and choose the “Screen Unlock” option. This will take you to a new window where you need to select “iOS” as your device’s nature. From the new window, tap on the “Remove Apple ID” to proceed with the Apple ID unlocking process.

- Step 2: Proceed Further by Choosing the Respective Options
Ensure that your iOS device whose lock you are trying to remove is connected to your computer and tap “Unlock Now.” Moving ahead, the platform will ask you whether screen lock and 2FA are enabled. This needs to be enabled for the Apple ID removal process. After this, put your device in Recovery Mode with the help of on-screen instructions.

- Step 3: Select the iOS Firmware Version
Once the platform detects your device model, choose your system version and then click the “Start” button. The respective iOS firmware will start downloading, and Wondershare Dr.Fone will verify it once it is downloaded. Following this, click “Unlock Now,” which will lead to a warning popup.

- Step 4: Conclude the Process To Unlock Your Apple ID
The warning informs you about the imminent data loss that will result during Apple ID unlocking. To confirm that you agree with the procedure, you are required to type in “000000” as the PIN code. Finally, click “Unlock” to start the Apple ID unlocking procedure. On its completion, hit the “Done” button to conclude the process.

Conclusion
In conclusion, we’ve guided you through a thorough exploration of the steps involved in how to get an Apple Developer account. We’ve given clear, easy-to-follow instructions to facilitate the setup of your Apple Developer account. If your objective is to join the Apple Developer Program, we strongly advise adhering to the enrollment prerequisites outlined earlier in this article.
Additionally, for those who may encounter issues with their Apple ID due to forgotten passwords, we’ve introduced the Wondershare Dr.Fone tool. This efficient solution provides a seamless method for regaining access to your Apple ID without compromising your data. We highly recommend it for its user-friendliness and compatibility with all iOS devices.
How To Reset the Security Questions of Your Apple ID On Your Apple iPhone X
Your Apple ID serves as the gateway to a multitude of Apple services, encompassing the likes of the App Store, iCloud, iTunes, and beyond. To fortify the safeguarding of your Apple ID, Apple kindly requests that you establish security questions.
These inquiries act as an extra shield, enabling you to regain access to your account should you ever forget your password. However, there are various reasons to explain why people want Apple ID reset security questions, like discussed below. In this ultimate guide, we provide step-by-step instructions on how to reset the security questions of their Apple ID.
Part 1: What Is the Purpose of the Apple ID Security Questions
Before talking about “reset my security questions Apple ID,” let’s talk about what they are. Apple has a reputation for ensuring the high security of its devices and services. The devices have Face ID and Touch ID for security and strong encryption standards. Apple devices are considered among the most secure in the tech industry. Moreover, Apple takes device security seriously. An example is the use of security questions.
When you create an Apple ID or set up a new device, Apple prompts you to choose security questions. These questions are carefully designed to be something only you would know. This explains their role as an extra layer of protection for your account. Typical instances include questions like “What is the name of your first pet?” or “In which city were you born?”
Importance of Apple ID Security Questions
The security questions associated with your Apple ID serve a critical role. They perform a pivotal role in ensuring the security and confidentiality of your digital presence. Numerous modern authentication techniques, such as biometrics, offer a strong layer of safeguarding.
Nonetheless, there might be instances where you require reentry to your account, such as in cases of forgotten passwords. In such scenarios, security questions serve as a vital lifeline, enabling you to authenticate your identity and regain control of your Apple ID.
Purpose of Security Questions
- Account Recovery: Security questions are a valuable tool for account recovery. They provide a means for you to prove your identity to Apple support in case you’re locked out of your account. Thus helping you regain access to your account quickly.
- Additional Layer of Security: Imagine someone manages to get your Apple ID details. Even then, they would still need to answer your security questions to make changes to your account. This extra layer of account protection prevents unauthorized access.
- Privacy Protection: Apple understands the importance of privacy. By setting up security questions, you can choose information that is meaningful to you. At the same time, it is not easily discoverable by others, enhancing the privacy of your account.
Part 2: How To Reset the Apple ID Security Questions Through the Account Settings
As we’ve established, Apple prioritizes security and privacy. There are various reasons why you might want to reset your Apple ID security questions. These range from enhancing security to changing the info associated with your account. Whatever your reason, it’s essential to securely follow the proper procedure for iCloud reset security questions.
Why Reset Your Apple ID Security Questions?
- Enhancing Security: Security is an ever-evolving field. Resetting your security questions periodically can strengthen your account’s defense. It is especially handy against emerging threats and ensures your information remains secure.
- Prevention of Attacks: Do you suspect unauthorized access or believe your security questions may have been compromised? In this scenario, resetting them immediately can protect your account.
- Adhering to Best Practices: Security experts recommend changing passwords and security questions periodically. Regularly updating your security questions is a cautious security practice.
- Making Relevant Changes: Over time, life circumstances change. You might move to a new location, get a new pet, or have different personal experiences. Updating your security questions to reflect these changes can make them more effective.
Guide for Resetting Apple ID Security Questions Through Account Settings
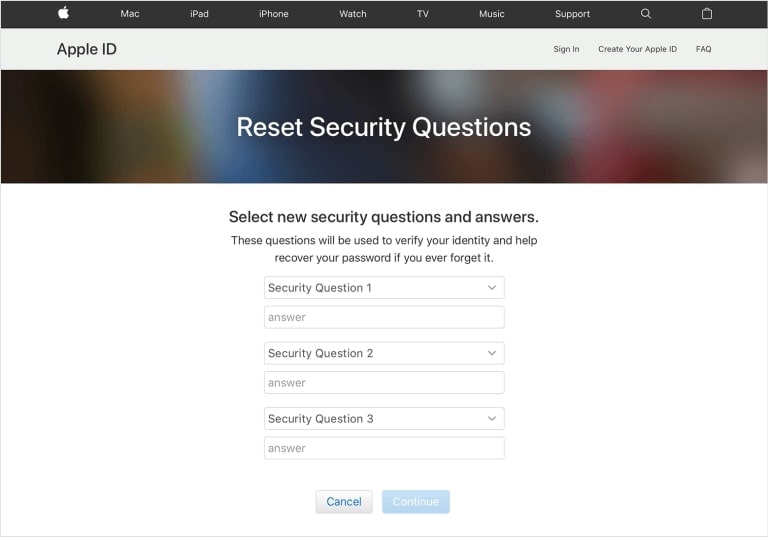
Resetting your Apple ID security questions through your account settings is a straightforward process that enhances the security of your Apple ID. Follow these detailed steps to reset your security questions:
- Step 1. Begin by visiting and signing into the official Apple ID management page at appleid.apple.com. Then, proceed to the “Sign-In and Security” section for changing the security questions.
- Step 2. Now, click “Account Security” and follow it by locating “Change security questions.” Click on it to proceed, and you’ll now be prompted to set up new security questions and provide their corresponding answers.
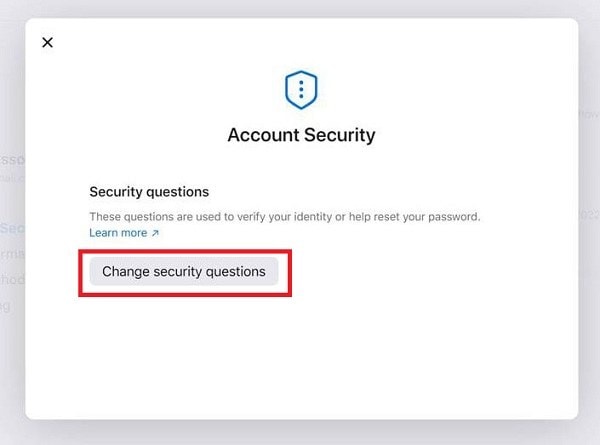
- Step 3. After adding your new security questions and answers, click the “Update” button. To complete the process, you will need to verify your identity by entering your Apple ID password.
Pro Tip: What if Your Apple ID Got Locked? Unlock It With the Best Solution
So, you’ve been following our ultimate guide to reset your Apple ID security questions. However, you hit a roadblock – your Apple ID is locked. It happens many times that people forget their Apple ID passcode or get their Apple ID locked due to various reasons. In such cases, there is no need to panic that you are now unable to unlock the ID and access your important data.
This is because we have an excellent solution that can help you regain access to your Apple ID quickly and efficiently. With the help of the Wondershare Dr.Fone, you can easily get your Apple ID unlocked without a passcode.
Using this tool, users are able to bypass the iCloud activation lock and Apple ID without a password to use it as per their need. Moreover, they can also Bypass MDM and screen time without data loss, which is a plus point of this unique tool.
Key Features of Wondershare Dr.Fone
- This tool is compatible with the latest iPhone 15 models and all iOS versions, including iOS 17.
- No technical skill is required to use this tool because of its easy-to-use interface.
- 6-digit passcode, Touch ID, Face ID, and various screen locks can be removed in no time.
Steps To Unlock Apple ID Without Password via Wondershare Dr.Fone
Following are the simple steps you need to follow to unlock your Apple ID after you have forgotten the passcode:
- Step 1: Initiate the Process by Launching Wondershare Dr.Fone
Begin the unlocking process of Apple ID by installing and launching Dr.Fone’s latest version on your computer. Connect your Apple iPhone X to the computer and tap on the “Toolbox” option to access different options, from which you need to select “Screen Unlock.”

- Step 2: Tap on Respective Option and Answer Platform Questions
Afterward, hit the “Remove Apple ID” option and tap the “Unlock Now” button in the next window. Proceeding ahead, the platform will ask you some questions which you will need to answer. However, it is necessary to ensure that your Apple iPhone X has “Screen Lock” and “2FA” enabled.
- Step 3: Enable Recovery Mode and Choose System Version
Then, put your device in Recovery Mode so that the platform can detect the “Device Model.” With this, you will need to choose “System Version” in the respective window and tap on the “Start” button. Required firmware will start downloading that is suitable to your device.

- Step 4: Disable Apple ID on Your Device
On its successful completion, you will be notified from the platform, after which you are required to proceed by clicking on the “Unlock Now” button. A prompt will pop up on the screen; type the code in it and hit “Unlock.” This will remove the Apple ID passcode successfully in just a few moments.
Part 3: How To Perform Apple ID Reset Security Questions Using iForgot Website
Apple offers multiple avenues for users to perform essential security protocol changes, one of which is through the iForgot website. This website serves as a valuable resource for Apple device users in various scenarios. These include forgotten passwords, 2FA issues, account recovery, and unlocking Apple IDs. Here is the process of Apple ID reset security questions using the iForgot website:
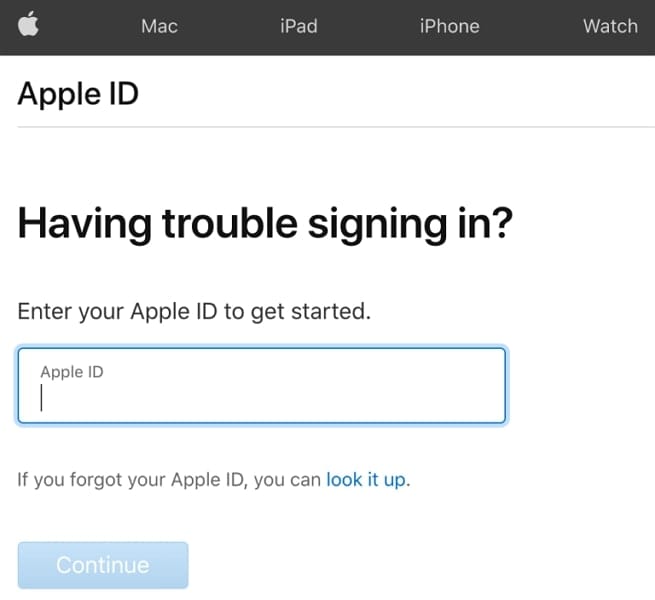
- Step 1. Begin by opening your web browser and navigating to the iForgot website at https://iforgot.apple.com/. You will then be asked to input your Apple ID. After entering your Apple ID, proceed by clicking the “Continue” button.
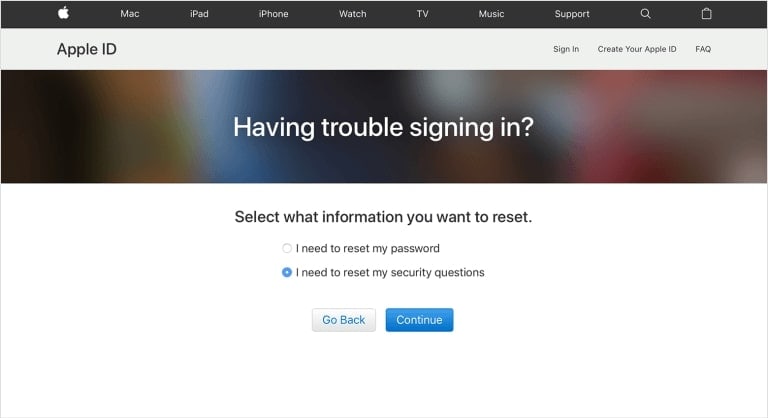
- Step 2. On the following page, you’ll encounter various options for account recovery. Opt for “I need to reset my security questions” and click “Continue.” For added security measures, Apple will request you to confirm your identity.
- Step 3. After your identity has been successfully verified, you’ll receive prompts to establish new security questions. Once you’ve created your new security questions, remember to save the changes.
Part 4: How To Reset the Apple ID Questions by Contacting the Customer Support
Contact Apple’s Customer Support if you have failed to reset your Apple ID security questions. They are well-equipped to assist with a wide range of device-related problems. You can use the following guide on how to reset the security questions on Apple ID via Apple Customer Support:
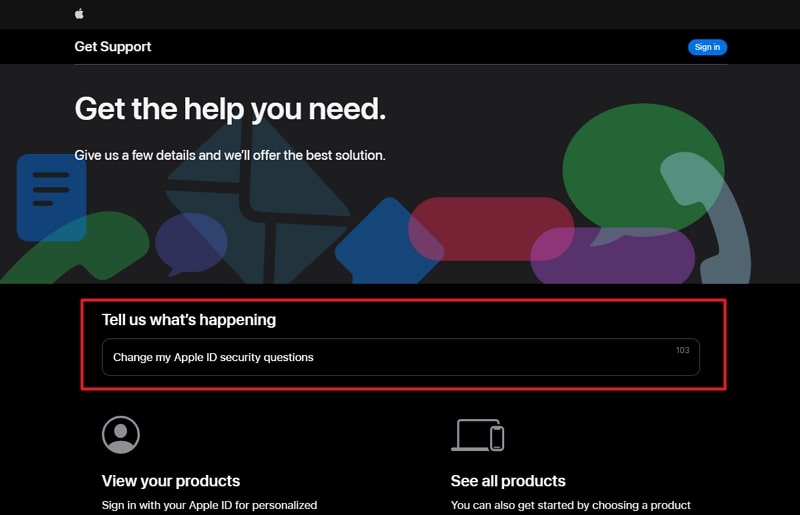
- Step 1: Begin by visiting the Apple Support website located at https://getsupport.apple.com/. Once there, use the search bar to type your issue. In this section, look for and click on “ Change my Apple ID security questions.”
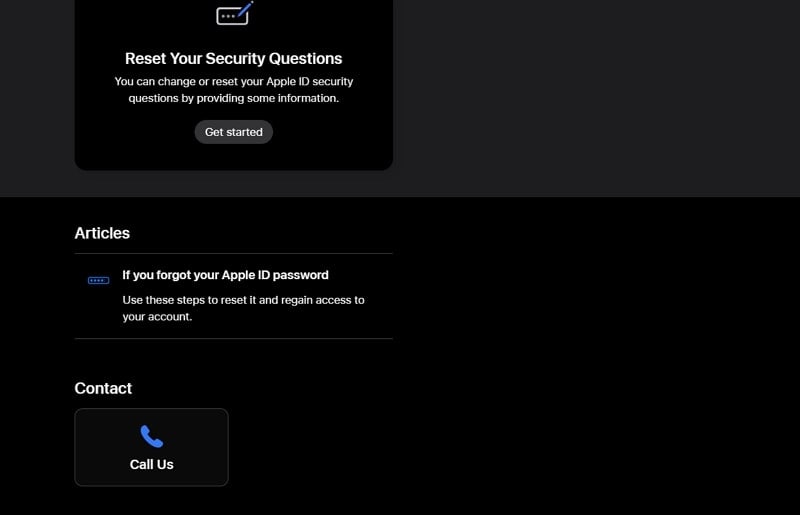
- Step 2: After selecting your issue, you will be presented with various support articles and options. Scroll down and choose the desired option from the “Contact” section. Follow the on-screen instructions to contact Apple support and provide details about your issue.
Conclusion
To summarize, we’ve explored the importance of Apple ID security questions. We provided you with different ways on how to reset the security questions on Apple ID. The article highlighted the significance of security in the Apple ecosystem. It also explained the role security questions play in protecting your account.
We discussed the various reasons why you might want to reset your Apple ID security questions. You learned how to reset your security questions through your Apple ID account settings and via the iForgot website. Additionally, we introduced Wondershare Dr.Fone as a reliable solution for unlocking your Apple ID. Dr.Fone offers a user-friendly interface, a high success rate, and the ability to resolve various iOS device issues.
How To Unlink Apple ID From Apple iPhone X
Apple devices are now an essential part of our daily lives. They provide access to a variety of services and apps. But there may come a time when you need to unlink your Apple ID from your device. It could be because you’re giving away or selling your device or facing device limits or download issues.
Either way, understanding how to do it is essential for maintaining control over one’s digital footprint. This article will walk you through the step-by-step process of how to unlink Apple ID from iPhone devices and Apple Watch. We’ll provide clear and concise instructions for every scenario, whether you have your Apple ID password, have lost or forgotten it, or are dealing with a lost device.

Part 1: How To Unlink Apple ID From Connected Devices With Password
Keeping track of where your Apple ID is being used is essential for maintaining control over your digital identity. Fortunately, using your Apple iPhone X or Mac, you can easily identify all the Apple iPhone X devices currently linked to your Apple ID. It is helpful for those who have shared their Apple ID with others or suspect unauthorized access.
Removing a device from your Apple ID with two-factor authentication activated will turn off verification code delivery on that device. Also, the Apple iPhone X device will no longer be able to access iCloud content, such as your photos, contacts, and calendar.
How To Unlink Apple ID From iPhone?
Before you unlink an iPhone from Apple ID, it’s also essential to identify all the Apple iPhone X devices currently signed in with your account. This crucial step ensures you don’t inadvertently lock yourself out of your Apple ID on other devices.
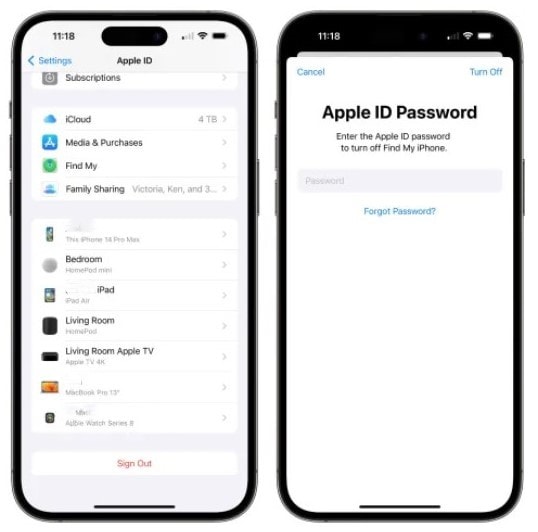
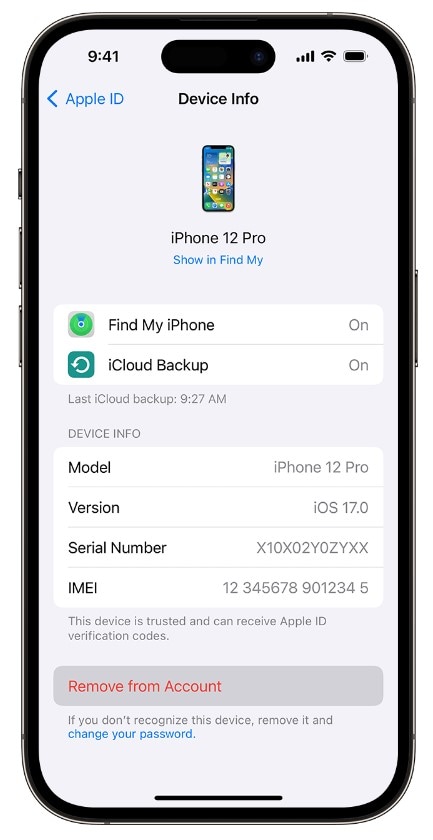
Step 1: Open the Settings app on your Apple iPhone X.
Step 2: Tap on [your name] at the top of the screen and scroll down.
Step 3: Unpair an iPhone from Apple ID in two ways:
Tap Sign Out, then enter your Apple ID password. Next, tap Sign Out Tap Delete Apple IDfrom Apple iPhone X to verify that you want to remove your Apple ID from the Apple iPhone X you are currently using.
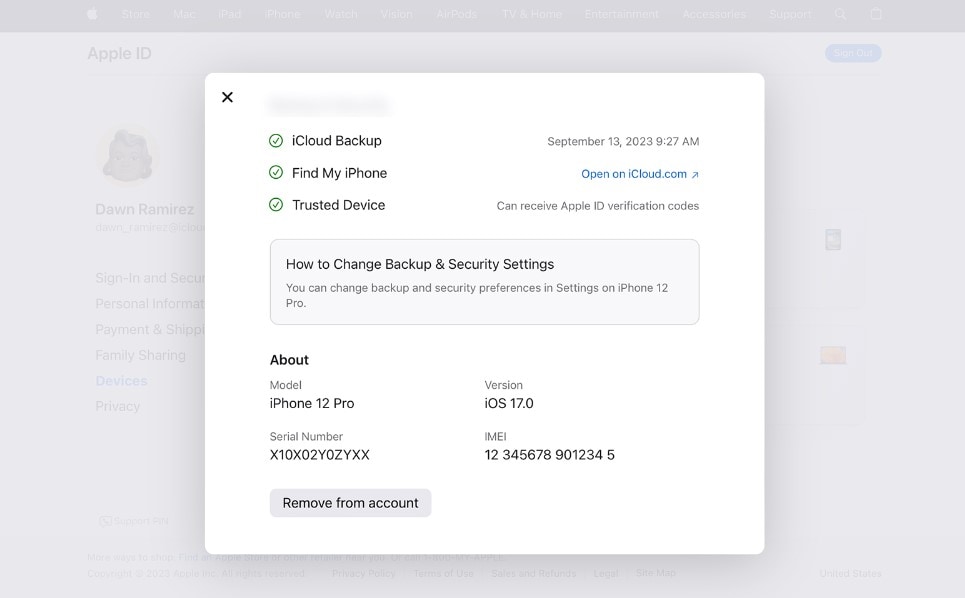
- Tap on any device name to see its details. If it is the one you trust, you can use it to receive Apple ID verification codes. Then, tap Remove from Account.
How To Unlink Apple ID Settings From Mac?
Follow these steps below to use your macOS to remove the connected devices from your Apple ID.
Step 1: Go to the Apple menu in the top left corner of the Apple iPhone X device’s screen.
Step 2: Select System Settings or System Preferences, depending on the Apple iPhone X device.
Step 3: Click [your name] or Apple ID for macOS Monterey or earlier.
Step 4: Scroll down and unpair the Apple ID on your Mac in two ways:
Click Sign Outto remove your Apple ID on the desktop you are currently using.
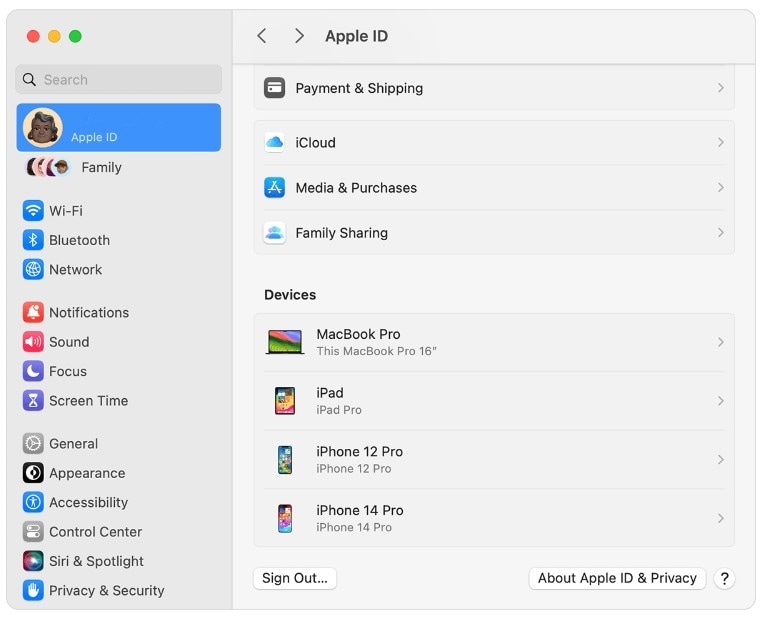
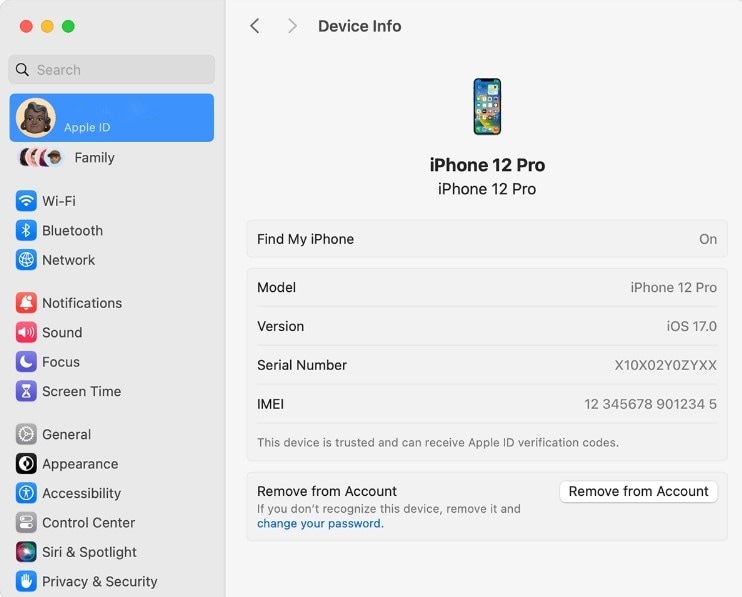
- From the Devicessection, click the connected device you want to unlink. Click Remove from Account.
Part 2: How To Unlink Apple ID From iOS Devices Without a Password?
In the previous section, we’ve explored the standard method to remove an Apple ID from an iPhone, which requires the Apple ID password. However, what if you’ve forgotten your Apple iPhone X’s passcode or don’t have the Apple ID password? In such situations, Wondershare Dr.Fone - Screen Unlock can help you unpair your Apple ID on iOS devices without hassle. Even without an Apple ID password, Dr.Fone can help you:
- Bypass the Activation Lock
- Unpair Apple ID and erase the iPhone’s content, even if the Find My feature is enabled
- Remove the iOS lock screen
The tool guides you through the process, ensuring a seamless experience with a user-friendly interface and intuitive design. Let’s delve into the step-by-step guide to discover how to unlink Apple ID from iPhone devices using Dr. Fone’s - Screen Unlock tool.
Step 1: Download, set up, then launch Dr.Fone on your desktop. Use a USB cable to establish a connection between your Apple iPhone X and desktop.
Step 2: From the Toolbox homepage, select Screen Unlock and choose iOS.
- Step 3: Select Remove AppleID to unpair the existing Apple ID from your Apple iPhone X without an Apple ID password.
- Step 4: Click Unlock Now to continue.

- Step 5: Click Yes to confirm you have a screen lock on your Apple iPhone X.

- Step 6: Click Yes to confirm you have enabled the two-factor authentication on your Apple iPhone X.

- Step 7: Follow the steps on the screen to put your Apple iPhone X into Recovery Mode. If you are having trouble, click DFU Mode in the bottom left corner.
- Step 8: Select an option in the System Version drop-down menu and click Start.
- Step 9: Wait while the respective iOS firmware downloads. Alternatively, click Copy to do it yourself.

- Step 10: Once the firmware is ready, click Unlock Now.
- Step 11: Read the note in the dialogue box and enter the code in the confirmation box. Then, click Unlock to continue.
- Step 12: Wait while the app is unlocking the Apple ID. Refrain from using your device while connected to your desktop.

- Step 13: Click Done, then check your Apple iPhone X to see if the Apple ID has been removed.

Part 3: How To Unlink iPhone From Apple ID if the Apple iPhone X device Was Lost?
You already know the methods to unlink iPhone from Apple ID, both with and without a password, assuming the Apple iPhone X device is accessible. However, what if your Apple iPhone X or Apple Watch is lost, stolen, or you already gave away? Fortunately, there’s still a way to unpair your Apple ID from your iOS device.
Unlink iPhone From Apple ID Remotely
Follow these steps and explore how to unlink Apple ID from iPhone and other iOS devices online:
- Step 1: Navigate to appleid.apple.com on a web browser.
- Step 2: Click Devices on the right-side navigation pane.
- Step 3: Choose your iOS device from the list in the Devices section.
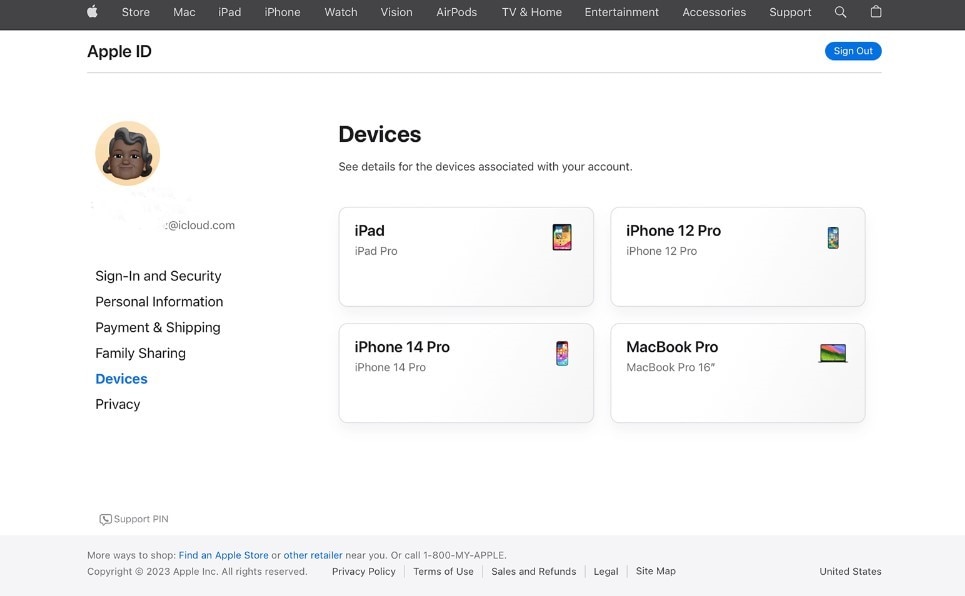
- Step 4: Click Remove from account and click Remove again to confirm.
Unlink iPhone From Apple ID Using the Find My App
Here is how to unpair your Apple ID on a device you sold or gave away via the Find My app.
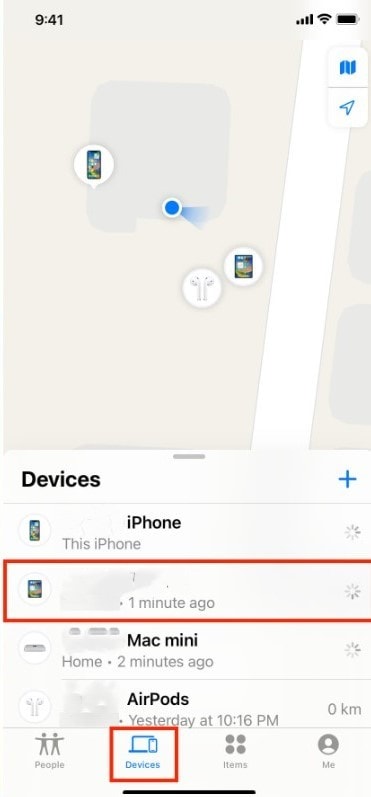
- Step 1: Open the Find My app and go to the Devices tab at the lower navigation pane. Next, select the name of your Apple iPhone X you want to unpair.
- Step 2: Tap Erase This Device, then tap Continue.

Note:
Indicate if the Apple iPhone X device was stolen.
- Step 3: Tap Erase, enter your Apple ID password, and then tap Erase again.
Bonus Part: How To Unlink Apple Watch From Apple ID?
There are several reasons to unpair an Apple Watch from an Apple ID. Perhaps you’re selling or giving away your Apple Watch or trading it in for a new one. Or maybe you only want to remove your Apple Watch from your Apple ID altogether.
No matter what your reason, removing an Apple Watch from an Apple ID is a simple process. Here, we’ll walk you through the steps to restore your Apple Watch to its factory settings.
How To Unlink Apple Watch From Apple ID if You Have Your Apple iPhone X?
Follow the unpairing process on the paired Apple iPhone X to remove the Activation Lock and erase your Apple Watch’s content and settings.
- Step 1: Check to ensure your Apple Watch and iPhone are close.
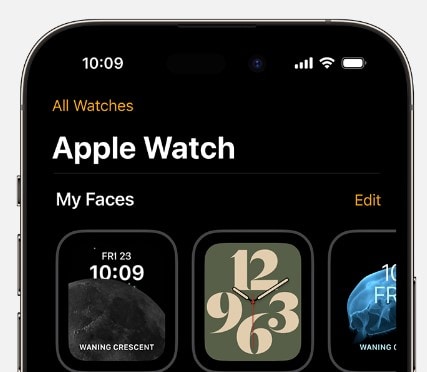
- Step 2: Launch the Watch application on your Apple iPhone X and go to the My Watch tab.
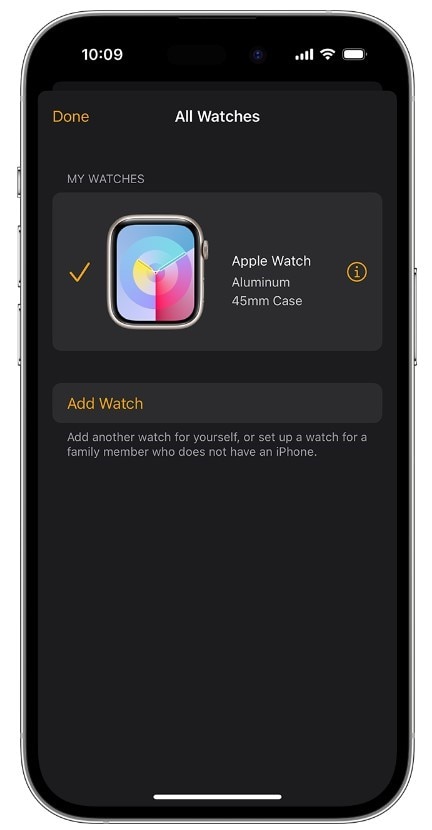
- Step 3: Tap All Watches in the upper left corner.
- Step 4: Locate and tap the information icon adjacent to the name of your Apple Watch.
- Step 5: Tap Unpair Apple Watch, then tap Unpair Apple Watch.
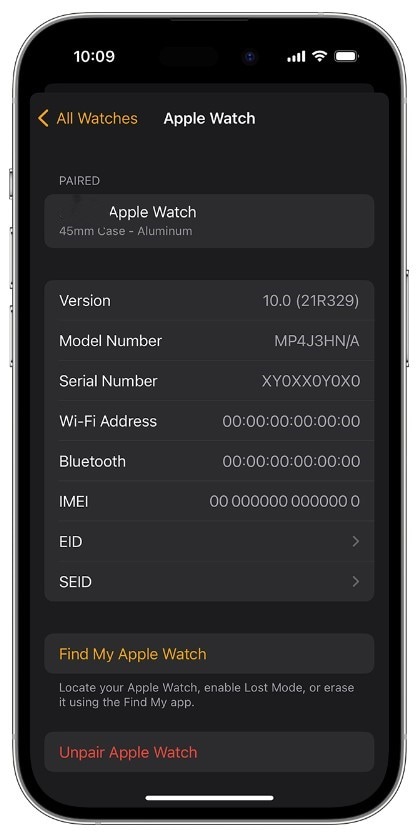
- Step 6: If you have a cellular Apple Watch, tap Remove Cellular Plan, and remember to reach your carrier to cancel your subscription.
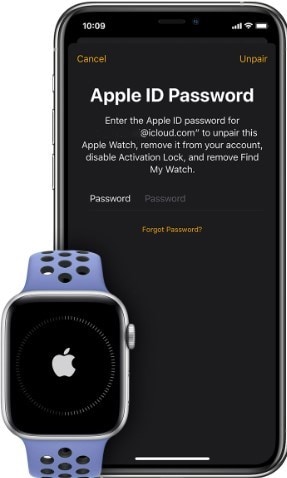
- Step 7: Provide your Apple ID password to deactivate the Activation Lock.
- Step 8: Tap Unpair to confirm your action.
How To Unlink Apple Watch From Apple ID Without Your Apple iPhone X?
You can erase your Apple Watch without the paired iPhone, but the Activation Lock will still be active. But, if you give away your Apple Watch without turning off the Activation Lock, the person you give it to cannot use it. They’ll have to enter your Apple ID and password to turn off the Activation Lock and use it with a new iPhone.
- Step 1: Open the Settings app on your Apple Watch.
- Step 2: Go to General > Reset, tap Erase All Content and Settings. Then, enter your password, if needed.
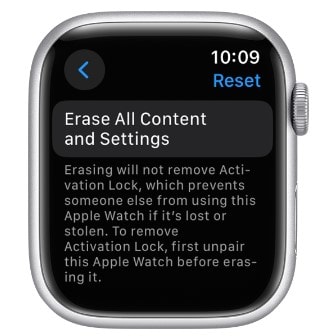
- Step 3: Tap Erase All to restore your Apple Watch to its factory settings.
Conclusion
There are several ways to unlink your Apple ID from your Apple iPhone X or iPad. The best way to do it depends on your situation and available iOS device. Whichever your reason is, understanding how to unlink Apple ID from iPhone and other iOS devices is crucial.
If you unfortunately encounter any challenges during the process, you can seek assistance from Apple Support. Consider using Dr.Fone for a quick and easy solution, which can unlink your Apple iPhone X from your Apple ID within minutes, even without an Apple ID password.
Also read:
- [New] 2024 Approved InteractiveMix for All Systems
- [New] 2024 Approved Top Picks Browsers Excelling at Digital Visualization
- [New] Soundwave Statements on WhatsApp Snapshots
- Apple ID Locked or Disabled On Apple iPhone 14? 7 Mehtods You Cant-Miss
- Here are Some of the Best Pokemon Discord Servers to Join On Samsung Galaxy A34 5G | Dr.fone
- How Honor X9b Mirror Screen to PC? | Dr.fone
- How To Change Your iPhone 14 Pro Max Apple ID on MacBook
- How to Unlock Apple ID From your Apple iPhone 8 Plus without Security Questions?
- In 2024, Can I Remove the Apple Watch Activation Lock By iPhone 15 Pro without the Previous Owner?
- In 2024, Enhancing Video Aesthetics with BB and LC Overlays on Facebook
- In 2024, How To Create an Apple Developer Account From iPhone SE
- In 2024, How to Remove Apple ID from iPhone XS without Password?
- In 2024, How To Unlink Your Apple iPhone SE (2020) From Your Apple ID
- In 2024, Protecting Your Privacy How To Remove Apple ID From Apple iPhone 11 Pro
- In 2024, Tips And Tricks To Tell if Your Apple iPhone 12 Pro Is Unlocked
- In 2024, Why Apple Account Disabled On your iPhone SE (2020)? How to Fix
- The Edge Enhancements in Windows 10 Release for 2024
- The Ultimate Guide to Video Cuts Windows Edition, Made Simple
- What is the best Pokemon for pokemon pvp ranking On OnePlus 12? | Dr.fone
- Title: In 2024, How To Create an Apple Developer Account From Apple iPhone X
- Author: Alma
- Created at : 2025-01-27 22:06:55
- Updated at : 2025-01-31 17:17:29
- Link: https://apple-account.techidaily.com/in-2024-how-to-create-an-apple-developer-account-from-apple-iphone-x-by-drfone-ios/
- License: This work is licensed under CC BY-NC-SA 4.0.