
In 2024, How To Erase an Apple iPhone 8 Without Apple ID Password?
How To Erase an Apple iPhone 8 Without Apple ID Password?
Have you ever wondered what happens when you erase the content of your Apple iPhone 8 storage? Erasing an iPhone means restoring it to its factory settings to install the latest iOS version. It also permanently removes all your data, including photos, videos, contacts, apps, and other information stored on the Apple iPhone 8 device.
This process is often necessary when you sell or give away your Apple iPhone 8 to ensure your personal information remains secure. But, you may encounter a situation where you should learn how to erase an iPhone without an Apple ID. While this may seem challenging, you can use a few methods to achieve this goal. This article will show you how to do it with or without an Apple ID password.

Part 1: A Checklist on What To Do Before Erasing an iPhone
If you’re looking at how to erase an iPhone without an Apple ID or account password, you’ve come to the right place. Before you begin, preparing your device and ensuring you have all the necessary information is crucial. Here’s a checklist of what to do before erasing your Apple iPhone 8:
Backup Your Apple iPhone 8
You can back up to iCloud or use Finder on macOS 10.15 or later. Remember that iCloud backups are stored on Apple’s servers and always encrypts backups. On the other hand, computer backups are stored on your computer’s hard drive and require a connection to the backup computer. Consider what your needs and preferences are when choosing between these two backup options.

Prepare Your Apple iPhone 8 Passcode
You’ll need your Apple iPhone 8 passcode to erase an iPhone. If you’ve forgotten your passcode, reset it using recovery mode.
Ready Your Apple ID Password
You may be asked to provide your Apple ID password to disable the Find My iPhone function and remove the Apple iPhone 8 device from your account. Have it handy to avoid any delays. It’s necessary for security verification during the erasure process.
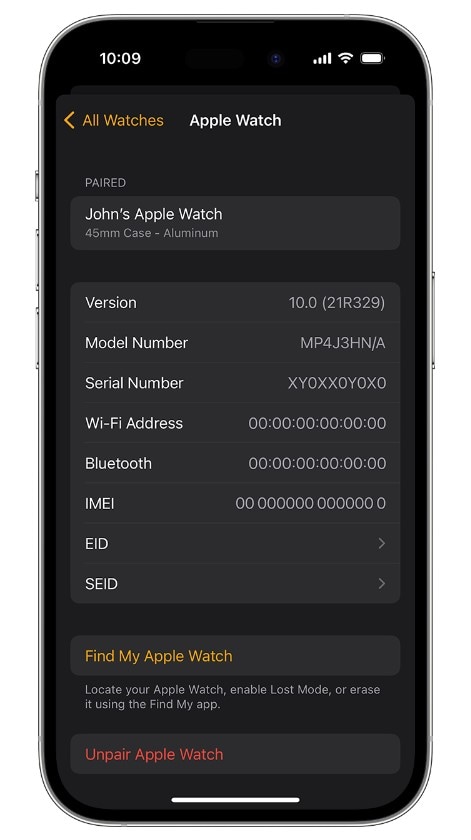
Unpair Apple Watch
If you own an Apple Watch, unpair it from your Apple iPhone 8. It ensures a smooth disconnection and prevents complications when erasing the Apple iPhone 8 device.
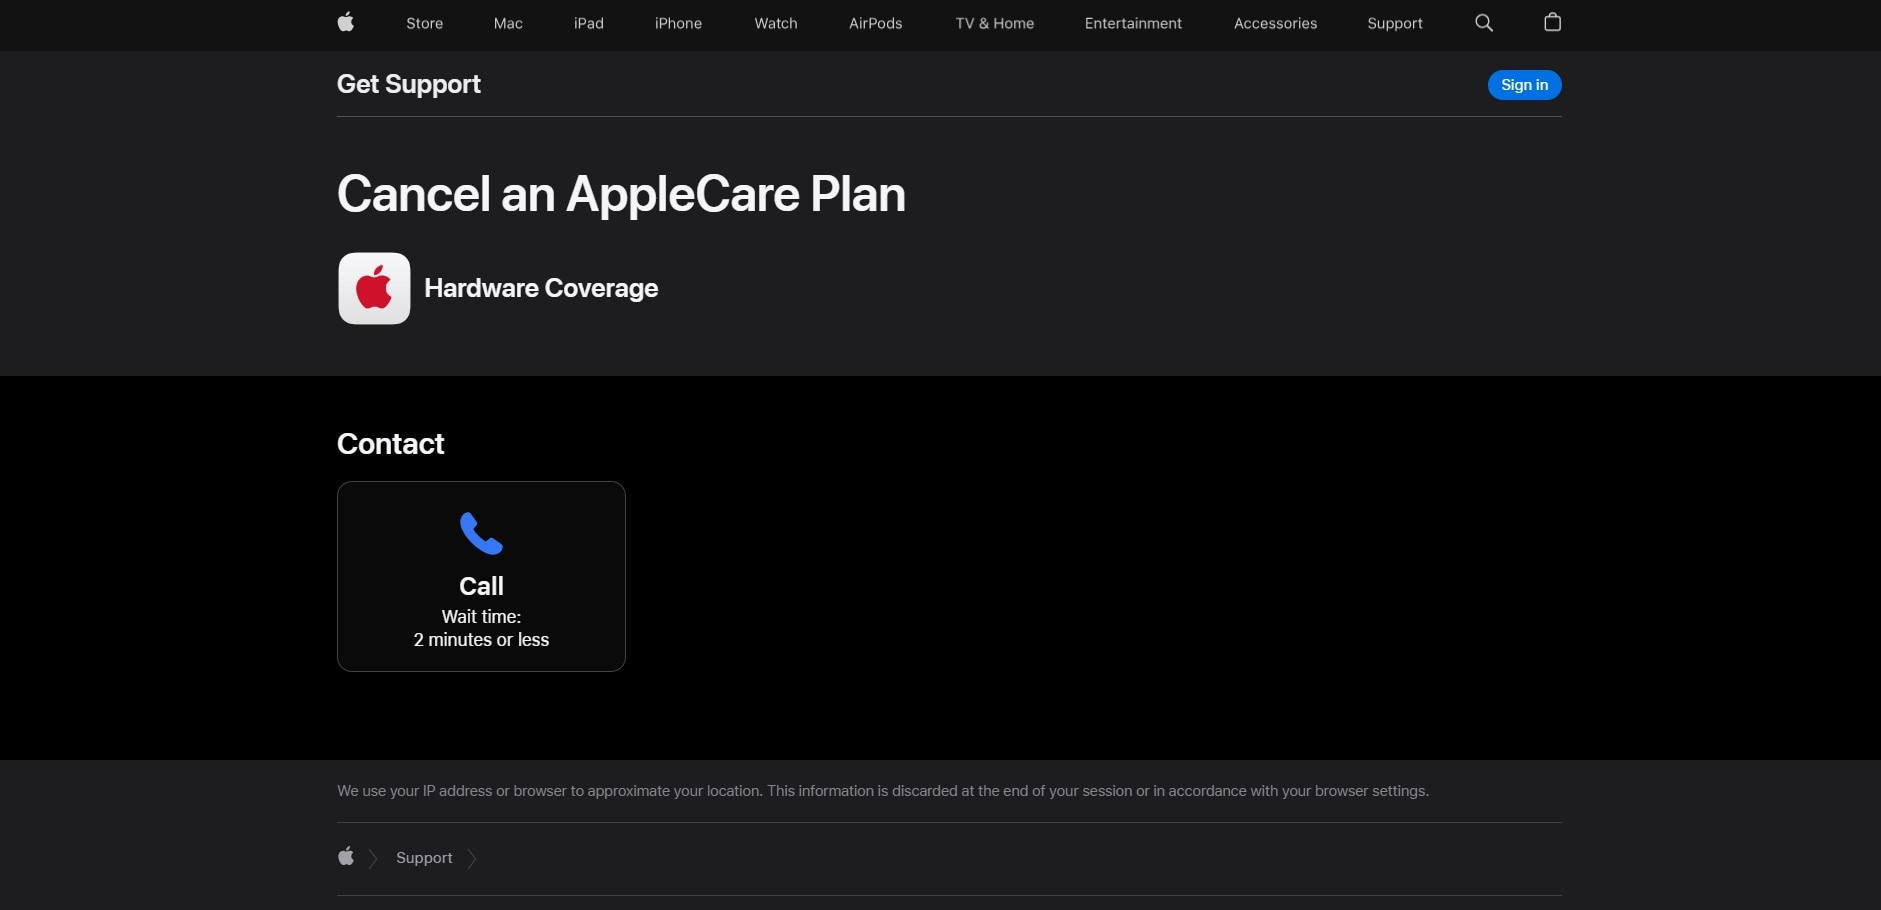
Cancel Your AppleCare Plan
If you have an active AppleCare plan for your Apple iPhone 8, cancel it on your Apple iPhone 8 before erasing the Apple iPhone 8 device. You can cancel your AppleCare plan by phone by calling AppleCare customer support. It will prevent any unnecessary charges after the erasing process.
Sign Out of iCloud
If your Apple iPhone 8 has iOS 10.3 or later, open the Settings app, then tap on your name at the top. Next, scroll down, tap Sign Out, enter your Apple ID password, and tap Turn Off.
Remove Your Apple iPhone 8 From Your List of Trusted Devices
Remove your old device from your list of trusted devices in your Apple ID settings for added security. This measure strengthens the defense against unauthorized access to your data.
Part 2: How To Erase iPhone Without Apple ID Password via Settings?
Erasing an iPhone and restoring it to factory settings is a straightforward process you can do in a few steps. Whether you’re preparing to sell or gift your device or troubleshooting persistent software issues, erasing your Apple iPhone 8 contents can enhance its performance. The process is easy if you have your Apple ID password readily available.
However, if you’ve forgotten your Apple ID password, don’t fret. Follow the guide below to reset your Apple ID password and erase all content and settings on your Apple iPhone 8:
- Step 1: Open the Settings application, then tap [name].
- Step 2: Go to Sign-In & Security > Change Password.
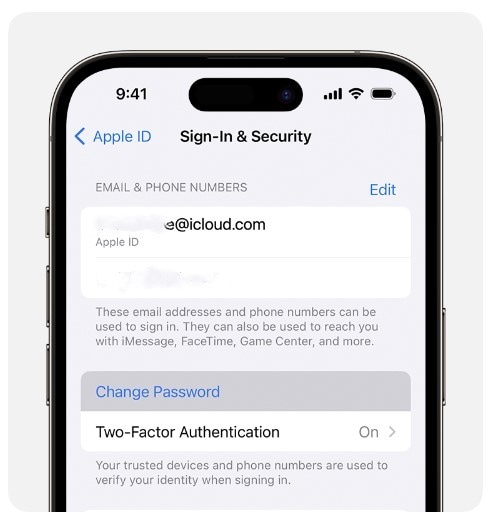
- Step 3: Follow the on-screen instructions to reset your Apple ID password.
- Step 4: Go to General > Reset from the Settings app, then tap Erase All Content and Settings.

- Step 5: Input your Apple ID password or your passcode when prompted.
- Step 6: Click Continue to confirm. Then, wait while the contents are being removed from your Apple iPhone 8 device.
Part 3: How To Erase iPhone Without Apple ID Password on Computer?
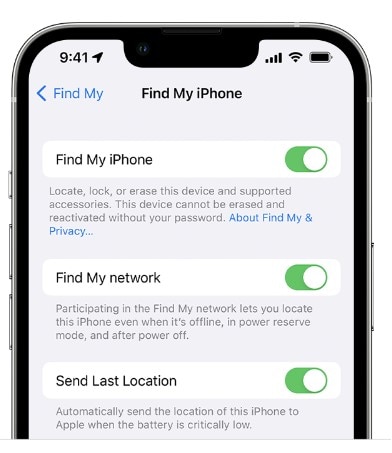
Activation lock is a security feature. It prevents anyone from activating an iPhone without your Apple ID password. If you try to factory reset your Apple iPhone 8 without turning off Find My iPhone, the activation lock will be in place. It means you need to enter your Apple ID password to activate the Apple iPhone 8 again. To turn it off, also ensure to turn off Find My on your device.
Go to Settings > [your name] > Find My or Find My iPhone to check.
If you want to erase an iPhone without Apple ID password on your computer, you can do so as long as you turn off the Find My. However, you’ll need to put your Apple iPhone 8 into Recovery Mode first.
- Step 1: Turn off your Apple iPhone 8, then put it into Recovery Mode.
- For iPhone 8 or later: Press and hold the Side button.
- For iPhone 7 or iPhone 7 Plus: Press and hold the Volume Down button.
- For iPhone 6s or earlier: Press and hold the Home button.
- Step 2: Connect your Apple iPhone 8 to the computer with the button held down.
- Step 3: Hold the buttons steadily until the Recovery Mode screen is visible.
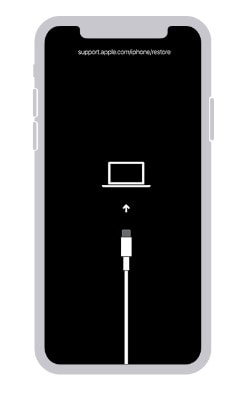
Step 4: Switch on your Apple iPhone 8. Then, connect it to a Mac or Windows computer using a USB cable.
Step 5: When prompted, follow the on-screen instructions to enter your device passcode or click Trust This Computer.
Step 6: Depending on your computer, open Finder or iTunes. Then, do either of the following:
For macOS 10.15 or later: Select your Apple iPhone 8 under the Locationssection, then click Restore iPhone.
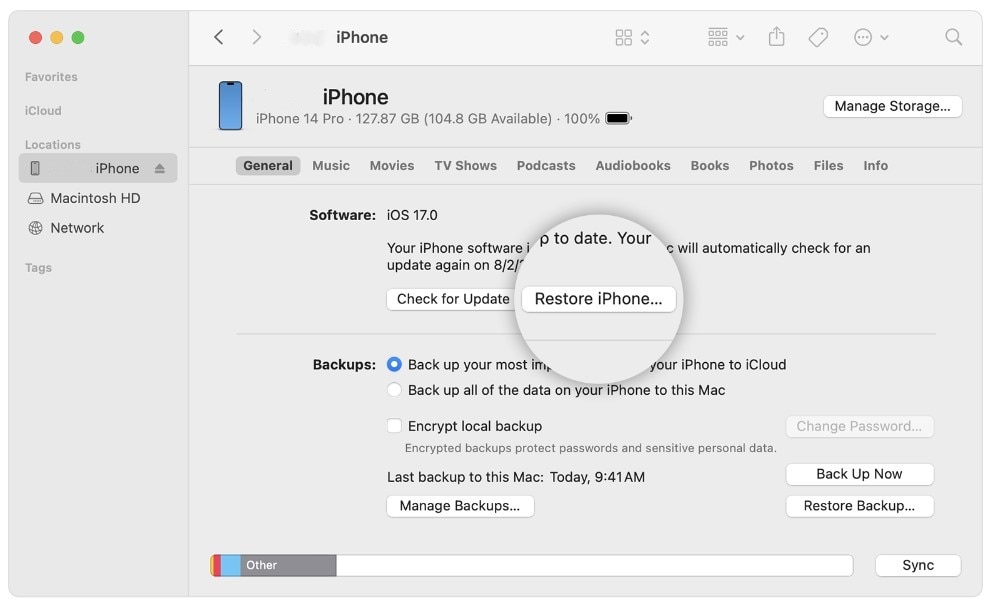
- For macOS 10.14 or earlier or Windows: Click the Apple iPhone 8 in the top left window, click Summary, then click Restore iPhone.
- Step 7: Click Restore in the dialogue box. iTunes or Finder will download your Apple iPhone 8’s latest iOS software and restore the Apple iPhone 8 to its factory settings.
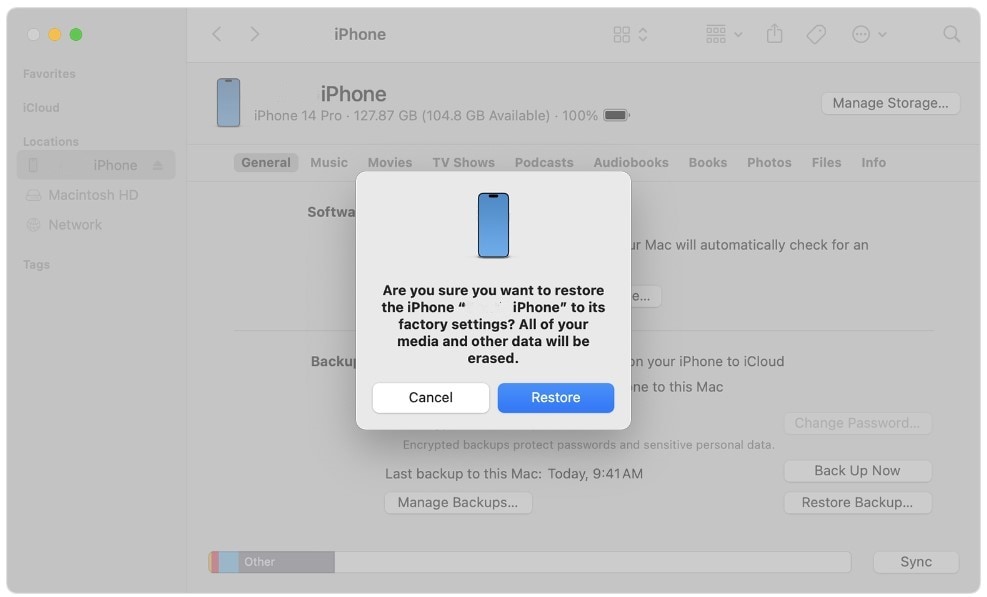
- Step 8: Once the restore is complete, the Apple iPhone 8 will restart.
Part 4: Erase an iPhone Without Apple ID via Activation Lock Support Request
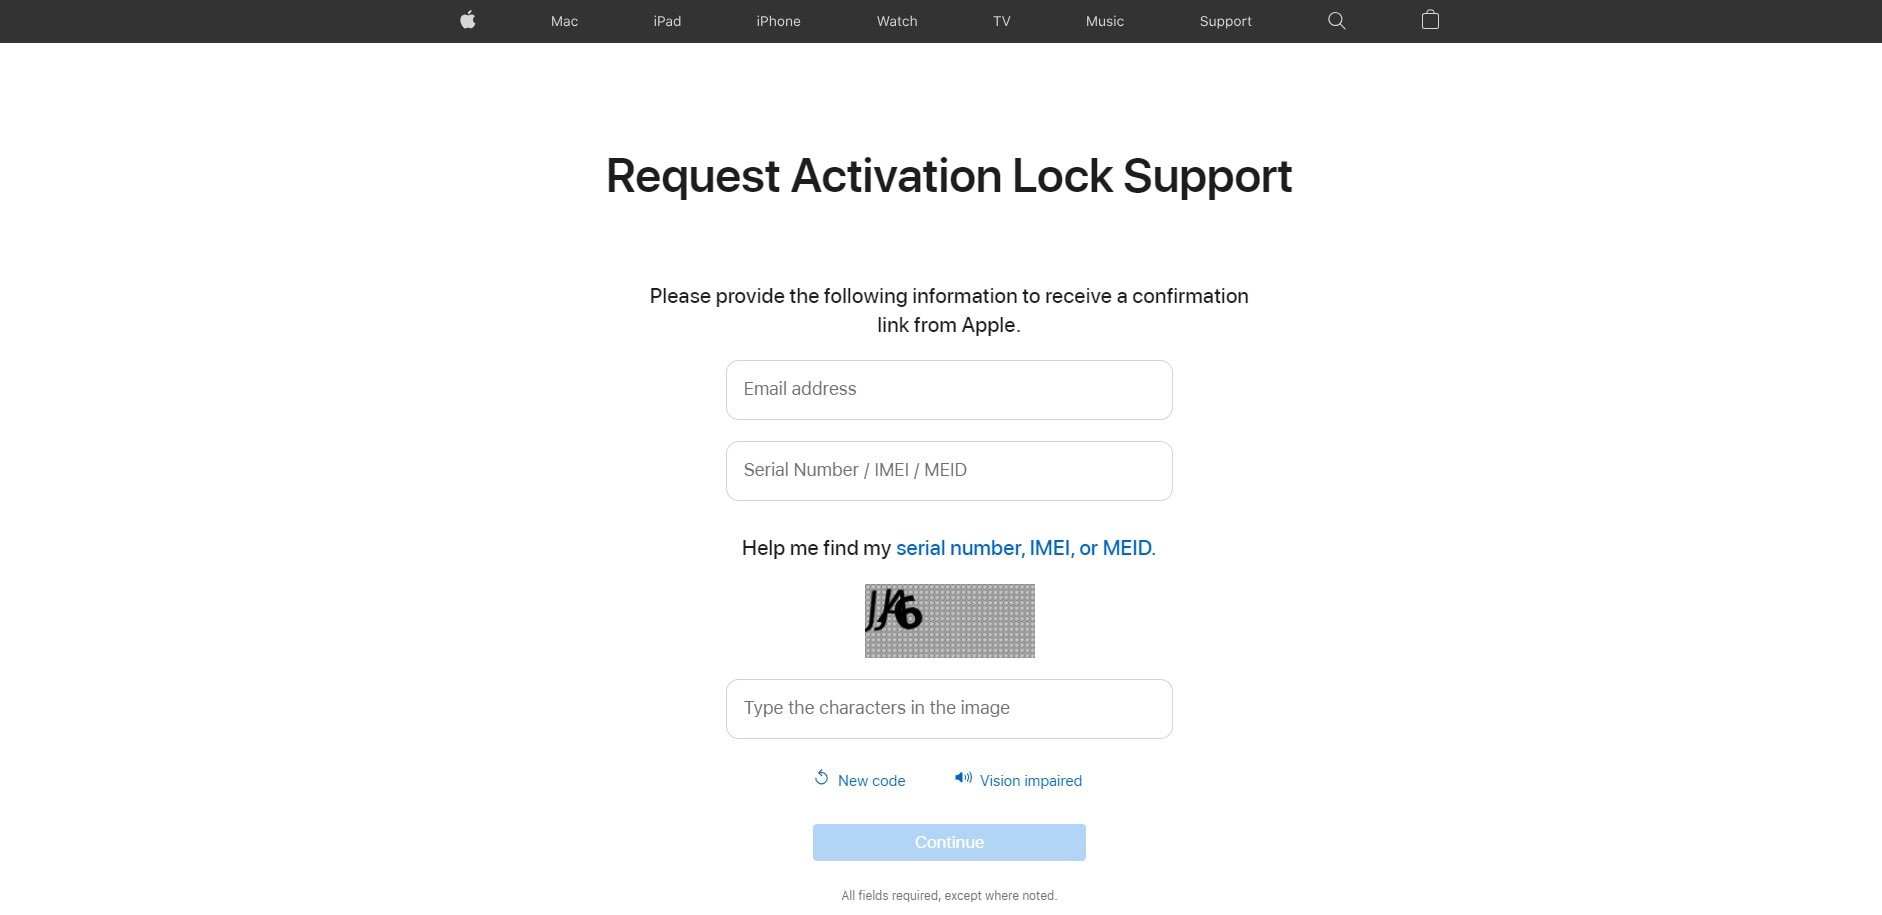
You can request to unlock Activation Lock support from Apple if your device is not in Lost Mode or if you need to erase an iPhone without an Apple ID password. To do this, you need to provide proof of purchase of the iPhone. It can be in the form of a receipt, invoice, or credit card statement.
The proof should show the serial number of the iPhone, IMEI, or MEID. Once Apple unlocks the Activation Lock on your Apple iPhone 8, your Apple iPhone 8 contents will be permanently erased. Also, note that if you restore your Apple iPhone 8 from a local backup, the Activation Lock will re-enable.
To start this request, follow these steps:
- Step 1: Head to Apple’s Activation Lock support page. (al-support.apple.com)
- Step 2: Scroll down the page, select the agreement checkbox, click Continue, and it will redirect you to a new page.

- Step 3: Enter your email address and other required information, then click Continue.
Part 5: How To Erase an iPhone Without an Apple ID Password in Minutes?
The time it takes to process an unlock Activation Lock support request can take days. If your device is erased as soon as possible, use the Wondershare Dr.Fone Screen Unlock tool. This third-party mobile solution can erase an iPhone without an Apple ID password, even if the Find My feature is enabled. Also, it can:
- Remove several iOS lock screens, such as passcode, Touch ID, and more.
- Remove the iCloud Activation Lock
- Bypass Apple ID from iPhone without a password
- Remove MDM restrictions
Dr.Fone Screen Unlock is a simple, easy-to-use tool compatible with the latest iOS models. Follow these steps to remove the Apple ID from your Apple iPhone 8 and erase all its contents within minutes:
Step 1: Download and install Dr.Fone on your desktop. Launch the app and connect your Apple iPhone 8 using a USB cable.
Step 2: From the Toolbox homepage, select Screen Unlock, then choose iOS.

- Step 3: Select Remove AppleID to delete iPhone contents, including the Apple ID.

- Step 4: The next screen shows the connected device. Click Unlock Now.

- Step 5: Click Yes to confirm you have set up a screen lock.

- Step 6: Click Yes to verify you have enabled two-factor authentication on your Apple iPhone 8.

- Step 7: Follow the in-app instructions to put your device in Recovery Mode.

- Step 8: Select an option from the System Version drop-down list, then click Start.

- Step 9: Wait while the iOS firmware downloads.

- Step 10: Once downloaded, click Unlock Now to proceed.

- Step 11: Enter the code in the dialogue box and click Unlock.

- Step 12: Keep your Apple iPhone 8 connected to your computer while the process progresses.

- Step 13: Click Done and check that your Apple iPhone 8’s data and Apple ID have been removed.

Conclusion
It can be challenging to erase an iPhone without an Apple ID password, but it’s achievable by following the right steps. Remember to weigh the security implications and back up your data beforehand.
If you’re seeking a straightforward method on “how to erase an iPhone without Apple ID,” Dr.Fone Screen Unlock tool is a good solution. With its user-friendly interface and efficient operation, Dr.Fone simplifies the process, making it accessible to users of all technical levels. Don’t let a forgotten Apple ID password hinder your device’s functionality. Try Dr.Fone Screen Unlock and reclaim control of your Apple iPhone 8.
Detailed Guide on Removing Apple iPhone 8 Activation Lock without Previous Owner?
Today, many individuals will purchase a utilized iPad or a recycled iOS phone instead of a fresh, box new one. However, they are often disturbed by the Activation Lock screen showing up on the screen once they buy them. This case will probably happen because the iPad is associated with the past user’s iCloud account and will be an iPad locked to the owner.
It becomes a difficult issue as removing a connected iCloud account without the past user is almost difficult. However, sit back and relax. We’ve discovered a few potential ways. This guide will show you the iPad locked to owner bypass. Furthermore, you can use our expert tool, i.e., Dr.Fone-Screen Unlock, to bypass the lock.
After reading this guide, you will understand how to erase the Activation Lock without a past user. How about we get everything started?
Method 1. Dr.Fone - Screen Unlock
Rather than making our readers wait about how to remove Activation Lock without Apple ID or past user, we suggest you with Wondershare Dr.Fone-Screen Unlock.
It is an expert iCloud activation lock bypass program that can remove the activation lock on your iPad. It is the best possible solution when you fail to remember your Mac ID or password. Download the application on your Windows or Macintosh and follow the steps to remove the activation lock without a previous user.
Steps to Follow:
Step 1. Install and launch the Dr.Fone program and choose the Screen Unlock tool.
Step 2. Pick the “iCloud Activation Lock Removal” option.

Step 3. Now you can start to bypass the lock.

Step 4. Begin to remove and wait briefly. The phone will be in a typical state with practically no lock after removing the activation lock.
Step 5. The program will remove the activation lock like a flash. Your iPad will begin with no activation lock. You can access and utilize the iPad now. However, you must know that you can’t call or use cellular data and iCloud of your new Apple ID after bypassing the lock.

Method 2. Remove it from iCloud
If you cannot reach the past user but rather you are still in contact with them, they can unlock your iPad. Here are the step-by-step guidelines on eliminating the iPad activation lock through the iCloud web:
- Open the iCloud site in a browser.
- Sign in to the current iCloud account being used with the locked iPhone.
- When you sign in, click on the choice that says Find iPhone.
- Presently, you can remotely perform activities on your phone.
- Click on the drop-down named All Gadgets and pick your iPad.
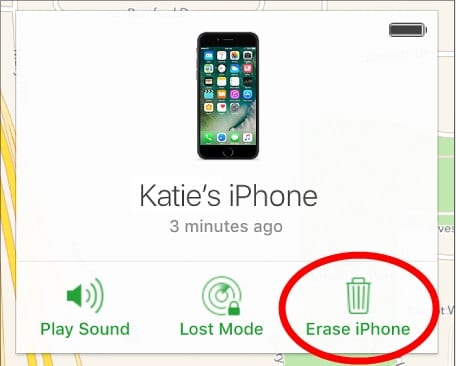
- Click on Erase iPhone.
Method 3. Use DNS bypass
Bypassing DNS Server is one more way for you if you’re searching for simple methods for eliminating Activation Lock without the past user. Note that this DNS strategy can bypass the iCloud lock for a brief time. Here’s how:
Step 1. Open your iPad and explore the “Choose a Wi-Fi Network” page.
Step 2. Presently, press the Home button and select Wi-Fi settings. Presently, tap the “I” symbol right behind your Wi-Fi network. It will show the properties of the Wi-Fi.
Step 3. Select “Configure DNS” and set it as indicated by your region:
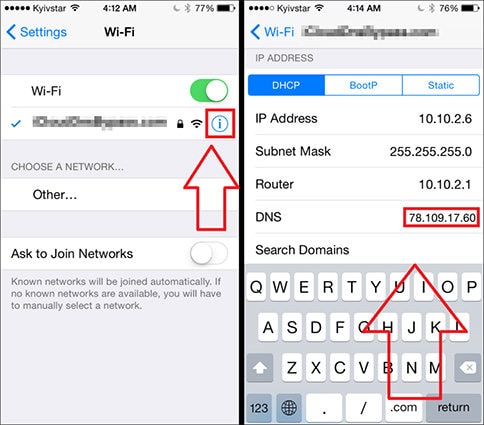
- USA: 104.154.51.7
- South America: 35.199.88.219
- Europe: 104.155.28.90
- Asia: 104.155.220.58
- Australia and Oceania: 35.189.47.23
- Other Continents: 78.100.17.60
Step 4. From that point forward, return to the Wi-Fi page.
Step 5. Presently, click over and again on “Next” and “Back” and hold on until the iPad connects with your area’s iCloud DNS bypass server.
Method 4. Local Apple Support
Following the techniques above, you can try reaching Apple’s local service when you can’t remove the Activation Lock. However, you need to provide the following things:
- iPad serial number
- Buying receipt
When they confirm you own the iOS iPad legitimately, they will help you further by unlocking your iPad.
Part 2: How to Reset iPad without Passcode?
1. Reset iPad by Computer
- Connect your iPad to a computer. Press and hold the Power button + Home button (if your iPad has a Home button). Otherwise, press and hold the Power button + either Volume button (if your iPad doesn’t have a Home button) until you see the Recovery Mode screen.
- On your Macintosh, find the connected iPad.
- Tap Restore and trust that the process will end.
- Set up your iPad and restore the factory default settings without a password.
2. Reset it by Find My
- Go to iCloud.com, and sign in with your Apple ID and password.
- Click on the Find [device] symbol in the menu.
- Select your iPad from the list of all the connected devices.
- Select Erase iPad.
- Follow the prompts for iPad locked to owner reset.
3. Reset with iTunes
- Open the iTunes application or website.
- Connect your iPad to your PC with a connector. Enter your password whenever required.
- Click on the iPad symbol in the upper-left corner.
- Select Summary in the left section.
- Click Restore iPad and then click the Restore button to confirm and reset the iPad locked to the owner.
Conclusion
This iPad locked to owner bypass guide explains how to remove the activation lock. We have mentioned a list of helpful methods to remove the lock from your device. However, if you are still looking for a quick and efficient answer, we suggest you install Dr.Fone - Screen Unlock (iOS) . Dr.Fone is a safe and effective tool for all your unlocking needs.
Troubleshooting ‘Error Connecting to the Apple ID Server’ On Apple iPhone 8
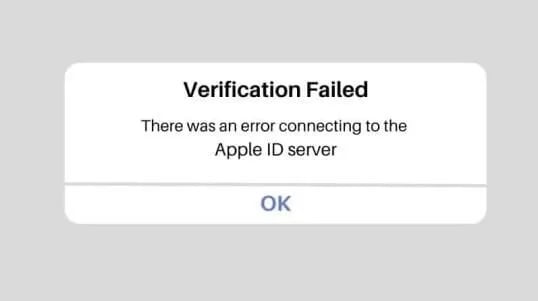
Experiencing an “error connecting to the Apple ID server“ can be a frustrating roadblock for users. Apple owners often face this issue, hindering seamless access to their Apple ID. Fear not; the guide unveils 11 practical solutions to troubleshoot the problem.
The article has everything from verifying your network connection to ensuring the accuracy of your Apple ID credentials. Don’t let the Apple ID verification failed dilemma linger. Explore the page below and navigate through these troubleshooting steps for a seamless connection to the server.

Part 1: What Causes the “Error Connecting to the Apple ID Server” Problem?
Below are the potential culprits if an error is connected to the Apple ID server. Understanding these causes is pivotal for effective troubleshooting.
Temporary Problems With Apple Servers
Periodic disruptions in Apple servers can lead to the “Apple ID verification failed“ issue. These may occur due to routine maintenance or unexpected server outages.
The Internet Connection Is Not Working
The problem may also stem from a disrupted internet connection. You should investigate your Wi-Fi or cellular data to ensure a stable connection. Restarting routers or switching to an alternative network can also help.
Problems With Apple ID
Authentication issues can arise if users input incorrect Apple ID credentials or if their accounts face security concerns. Verifying and correcting these details or resetting the Apple ID password is crucial.
Incorrect Date and Time Settings
The device’s date and time settings must be accurate to establish a secure connection with the Apple ID server. You should check and adjust these settings, enabling automatic updates for synchronization.
Part 2: [10 Quick Solutions] There Was an Error Connecting to the Apple ID Server
The section below provides user-friendly fixes tailored to ease frustration and restore seamless connectivity.
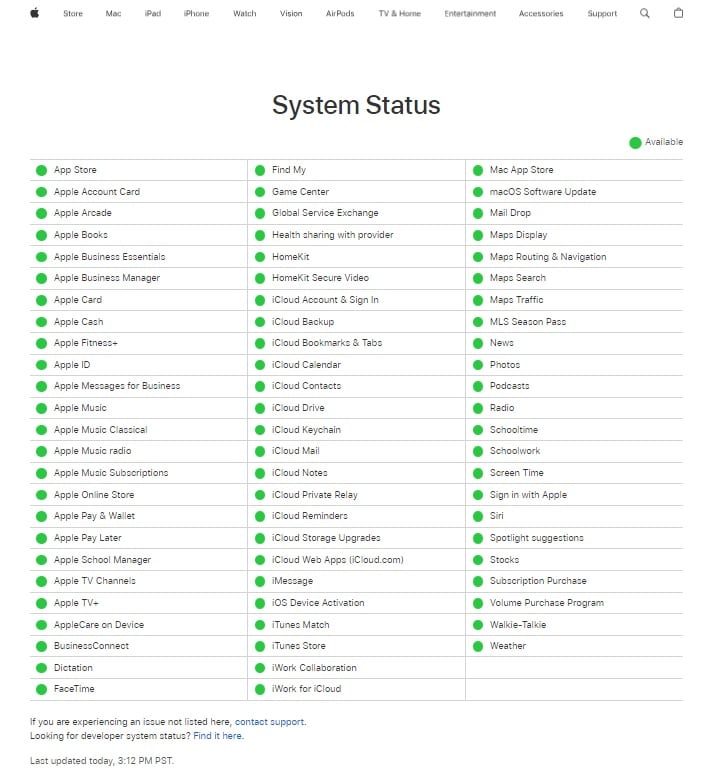
Check Apple’s Servers
The initial step is to investigate the status of Apple’s servers. Server outages or scheduled maintenance can be the culprits behind the connectivity hiccup. Head to Apple’s service status page for real-time updates on server conditions.
Check Your Network Connection
A fundamental yet crucial solution is to examine your network connection. Instabilities in Wi-Fi or cellular data can impede communication with Apple’s servers. Ensure a stable connection and troubleshoot any disruptions, considering a switch to an alternative network. You can follow this guide to check your network signal.
Set Up Another Admin User Account (for macOS Users)
Creating a new admin user account can serve as a strategic move for macOS users. Here’s how. It helps isolate issues tied to a specific user account. It provides insights into whether the problem is user-specific. Here’s how.
- Step 1: Open System Preferences on your Mac and choose Users & Groups.
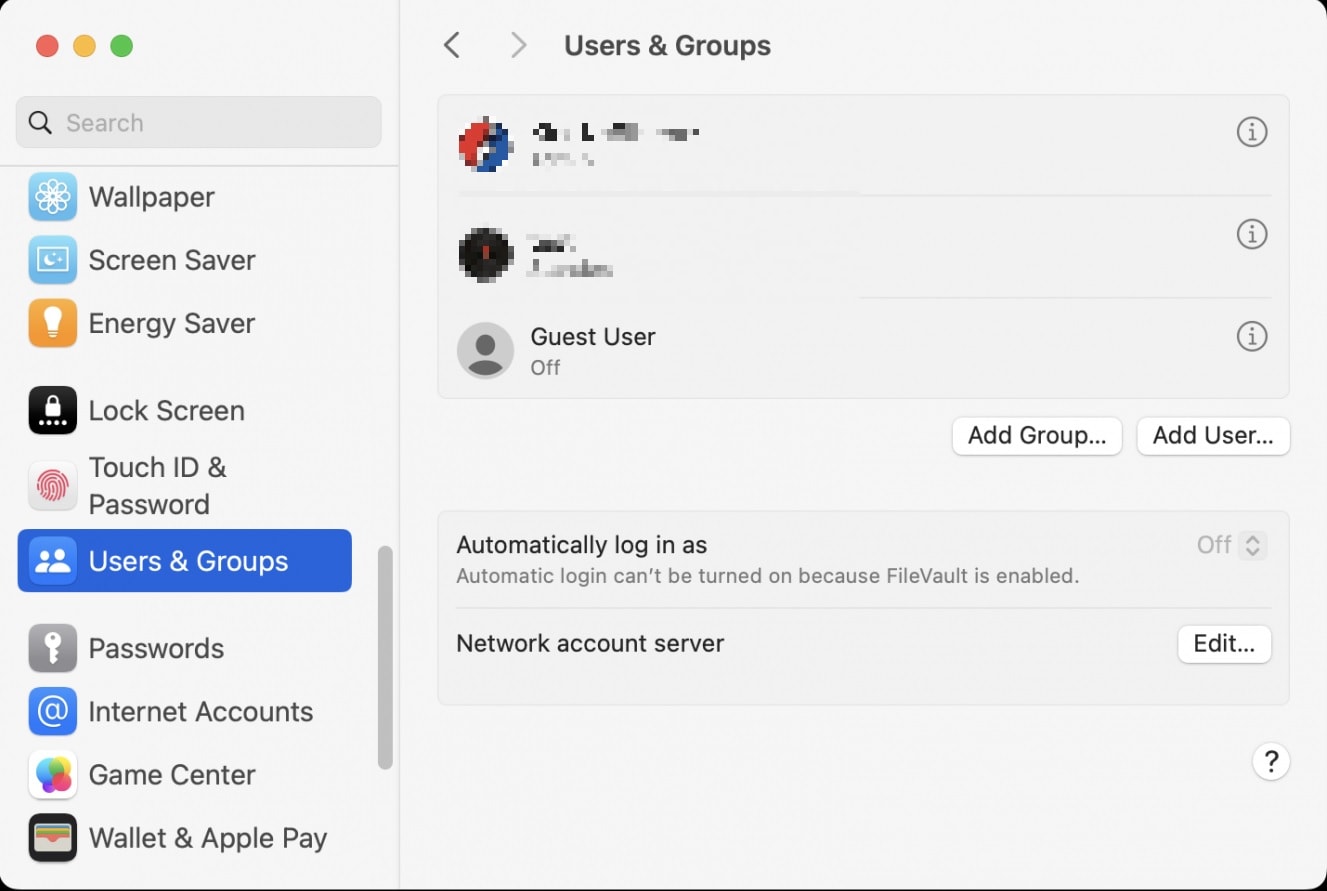
- Step 2: Click the lock icon and enter your admin password. Click the + or Add User… button to add a new user, selecting Administrator as the account type. Log in to the new account and check if the issue persists.
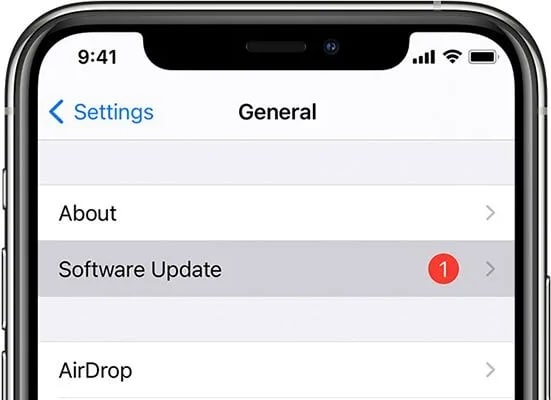
Update Your iOS or macOS Software
Outdated operating systems often contribute to connectivity issues. Ensure your iOS or macOS software is up to date by checking for available updates. Here’s how.
- For iOS: Go to Settings, tap General, and select SoftwareUpdate.
- For macOS: Open SystemPreferences, click on Software Update.
Download and install any available updates.
Boot macOS in Safe Mode
Booting your Mac in Safe Mode is another approach to troubleshooting. The mode disables unnecessary processes, allowing you to identify and resolve potential conflicts causing the connection error. To put your Mac into safe mode, restart it and hold down the Shift key. Release it when the Apple logo appears.

Restart Your Apple Device
A classic yet effective solution is to restart your Apple device. This simple action refreshes system processes and can resolve various connectivity issues. Power off your device and turn it back on to initiate a clean start.
Sign Out and Sign Back Into Your Apple ID Account
Temporarily signing out of your Apple ID account and then signing back in can be a virtual reset. The process refreshes the connection and addresses potential authentication issues, resolving the error.
- On iOS: Go to Settings, tap your Apple ID, and choose SignOut. Sign in again.
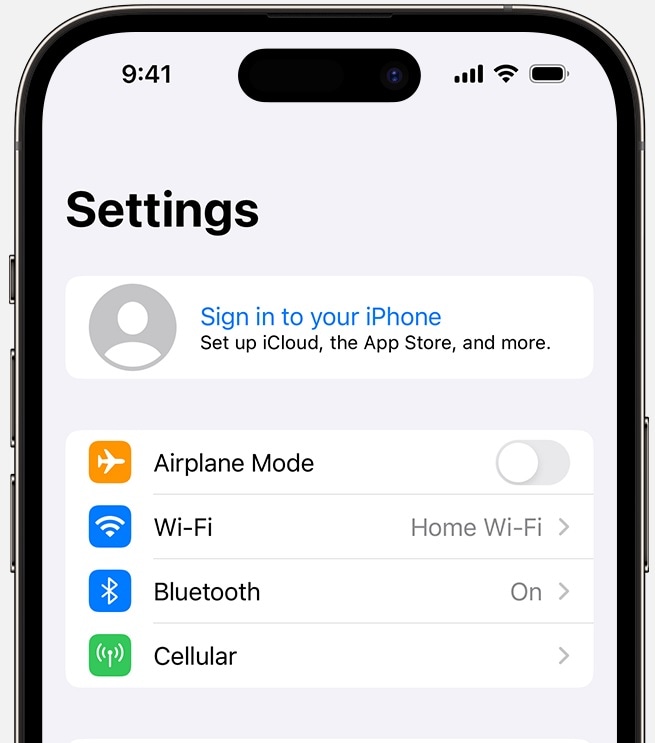
- On macOS: Open SystemPreferences, select Apple ID, and click Sign Out. Sign in again.
Reset Your Apple ID Password
Security concerns related to compromised credentials can contribute to the connection problem. If in doubt, initiate a password reset for your Apple ID. It not only enhances account security but also addresses authentication errors. Here’s how.
Disable VPN
If you use a Virtual Private Network (VPN), consider temporarily disabling it. VPNs can sometimes interfere with the connection to Apple’s servers, causing the error. Disabling the VPN allows you to test whether it’s the source of the problem.
Adjust Date and Time Settings Automatically
Inaccurate date and time settings on your device can lead to authentication failures. Ensure your device’s date and time are accurate and set to update automatically. This prevents synchronization issues with the Apple ID server.

If you’ve tried all the above and you’re still getting the error connecting to the Apple ID server, you may want to consider using Wondershare Dr.Fone - Screen Unlock. It is a powerful tool that can help you bypass the Apple ID lock screen on your Apple iPhone 8, iPad, or iPod touch.
Part 3: A More Comprehensive Solution: Use a Professional Third-Party Software
Wondershare Dr.Fone is renowned for its versatile features. The platform’s Screen Unlock function is designed to address Apple ID-related challenges. What’s more, Dr.Fone is compatible with various iOS versions. It ensures its applicability across a broad range of devices. Its user-friendly interface makes it accessible for both novice and experienced users.
Dr.Fone - Screen Unlock (iOS)
Unlock iPhone/iPad Lock Screen Without Hassle.
- Simple, click-through, process.
- Unlock screen passwords from all iPhone and iPad.
- No tech knowledge required, everybody can handle it.
- Supports the latest iOS version fully!


4,395,217 people have downloaded it
Key Features
- **Comprehensive lock screen removal.**Fone excels in eliminating various lock screens on iOS devices, providing an all-encompassing solution to accessibility challenges.
- **iCloud activation lock and Apple ID bypass.**The software stands out by allowing users to bypass the iCloud activation lock and Apple ID without a password. The feature is particularly useful for users facing login complications.
- **MDM bypass without data loss.**Fone goes beyond standard capabilities by enabling users to bypass Mobile Device Management (MDM) without data loss. This function is crucial for corporate settings or individuals managing multiple devices.
- **Effortless process.**Simplifying the user experience, Dr.Fone offers straightforward steps for the unlocking process.
Step-by-Step Guide on Using Dr.Fone - Screen Unlock
Below are the steps to use Dr.Fone - Screen Unlock.
Step 1: Download and Install Dr.Fone - Screen Unlock on your computer. Launch the app afterward,
Step 2: From the main interface, choose the Screen Unlock option. Next, connect your iOS device to the computer using a USB cable. Click on iCloud Activation Lock Removal to initiate the process.
- Step 3: Follow the on-screen instructions and wait for Dr.Fone to detect your device information automatically. From there, the software will provide the necessary firmware package. Click Unlock Now to initiate the process.
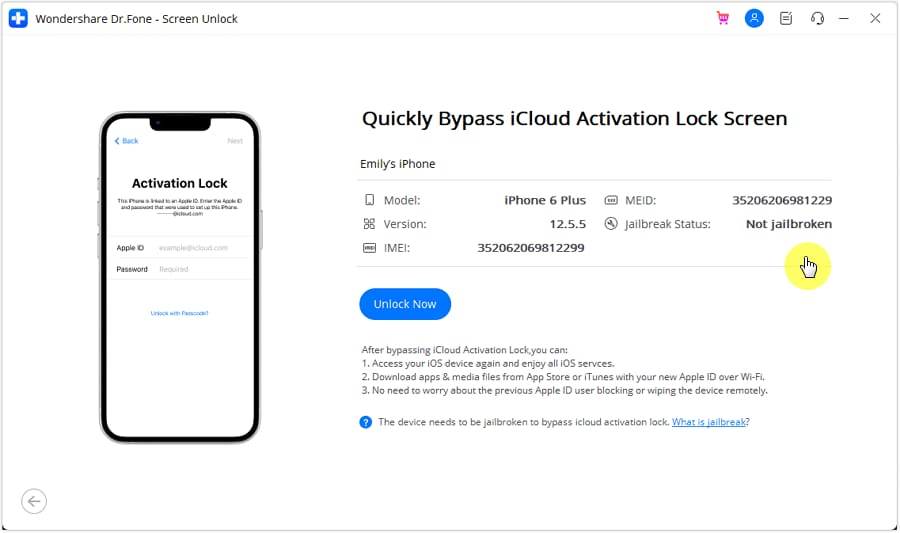
- Step 4: Upon completion of the process, a confirmation message will be displayed on the window. Click the Done button to finalize the unlocking of the Activation Lock.
Conclusion
Don’t lose hope if you still can’t connect to the Apple ID server. Take advantage of the provided solutions for a seamless resolution. However, it would help if you also consider the convenience and effectiveness of Dr.Fone - Screen Unlock for a comprehensive fix.
If the Apple ID verification failed error persists, reaching out to Apple Support remains a reliable avenue for additional assistance with your Apple ID connectivity concerns. Your resolution journey begins with these steps, ensuring a swift return to hassle-free Apple services.
Also read:
- [New] Professional's Guide to Photo Watermarking Solutions for 2024
- [Updated] Transform Your Visuals with These 11 Expert Strategies
- 2024 Approved Movies Are Quite Different From the Video You Recorded and Edited. No Worries, This Article Explains Why There Are Differences Between Self-Made Videos and Movies, as Well as Simple yet Detailed Steps to Make Cinematic Look Videos with FCPX
- 2024 Approved Perfecting Your Video's Narrative Integrating Timestamps Smartly
- A Step-by-Step Guide to Finding Your Apple ID On Your Apple iPhone 8 Plus
- Charting YouTube's Course for Video Short Growth with Funding
- How To Fix Apple ID Verification Code Not Working From Apple iPhone 7
- How To Remove the Two Factor Authentication On Apple iPhone 8
- In 2024, Apple ID Locked for Security Reasons On Apple iPhone 11 Pro? Find the Best Solution Here
- In 2024, How to Remove iPhone SE (2020) Device from iCloud
- In 2024, How to Transfer Music from Oppo A58 4G to iPod | Dr.fone
- In 2024, How to Unlock Apple ID On your iPhone 6 without Security Questions?
- In 2024, Protecting Your Privacy How To Remove Apple ID From Apple iPhone 15 Pro Max
- In 2024, Top 10 Dynamic Image Backdrops for Video Editing
- Introducing a New Era of Customer Service - Mondly's FAQs
- Removing Device From Apple ID For your Apple iPhone XR
- Seamless Text Input: The Complete Guide to Using Bing AI in Android Keyboards
- Title: In 2024, How To Erase an Apple iPhone 8 Without Apple ID Password?
- Author: Alma
- Created at : 2025-01-14 18:27:41
- Updated at : 2025-01-17 19:51:29
- Link: https://apple-account.techidaily.com/in-2024-how-to-erase-an-apple-iphone-8-without-apple-id-password-by-drfone-ios/
- License: This work is licensed under CC BY-NC-SA 4.0.