
In 2024, How To Fix Apple ID Verification Code Not Working On Apple iPhone 13
How To Fix Apple ID Verification Code Not Working On Apple iPhone 13
In smartphones, the Apple ID stands out as a cornerstone of security for iPhone users and the broader iOS ecosystem. Its robust verification features are a key reason why many people choose iPhones. Thus, its heightened security is highly valued. However, even extremely reliable systems can encounter hiccups.
Sometimes, you might need help with the issue of the Apple ID verification code not working. This leads to frustration, especially if you need to remember your Apple iPhone 13 ID details. This 2024 guide will delve into practical solutions to fix issues with Apple ID verification codes, helping you regain access to Apple ID and peace of mind.

Part 1: When Does the Apple Verification ID Failed Prompt Appear?
Before diving into solutions, it’s essential to understand the various scenarios that can trigger the “Apple Verification ID Failed” prompt. Recognizing the cause of the problem is the first step toward the right fix. Let’s explore the common reasons you might encounter this issue:
Wrong Password Input
One of the most straightforward reasons for a failed verification is entering the wrong password. This could be a simple typing error or misremembering your password. Repeated wrong attempts can also lead to your account being temporarily disabled as a security measure.
Apple Server Issues
At times, the problem may not be on your end. Apple’s servers can experience downtime or technical glitches like any other online service. During such instances, verification processes might fail, as the server cannot authenticate your credentials.

Slow Internet or Intermittent Connection
A stable and reliable internet connection is improtant for the verification process. If your internet is slow or experiencing intermittent connectivity, it can disrupt the communication between your device and Apple’s servers, leading to verification failure.
Two-Factor Authentication (2FA) Issues
Apple’s two-factor authentication provides an extra layer of security. However, it can also be a source of problems. If there’s a delay in receiving the 2FA code or if 2FA fails to work, you won’t be able to complete the verification process. This could be due to network issues or, sometimes, glitches within the 2FA system itself.
Suspicious Activity
Apple takes your security seriously. If there’s any unusual activity detected on your account, such as login attempts from unfamiliar locations or devices, Apple might lock your account as a precaution. This can trigger the verification failed prompt as the system seeks to protect your account from potential unauthorized access.
By understanding these scenarios, you can diagnose better why you’re facing the issue of Apple verification ID not working. In the following sections, we will explore solutions tailored to these specific problems, helping you regain access to your account efficiently.
Part 2: How To Fix Apple ID Verification Failed
Encountering an “Apple ID Verification Failed” error can be frustrating. Here are some practical solutions that correspond to the common reasons for this issue. These steps should help you regain access to your Apple ID.
Method 1: Connecting to a Stabler Internet Connection
A stable internet connection is crucial. If you’re encountering issues, switch to a more reliable Wi-Fi network. Alternatively, toggling your Wi-Fi or mobile data off and back on can refresh your connection.
Method 2: Changing Password/2FA Device Using Apple ID Account
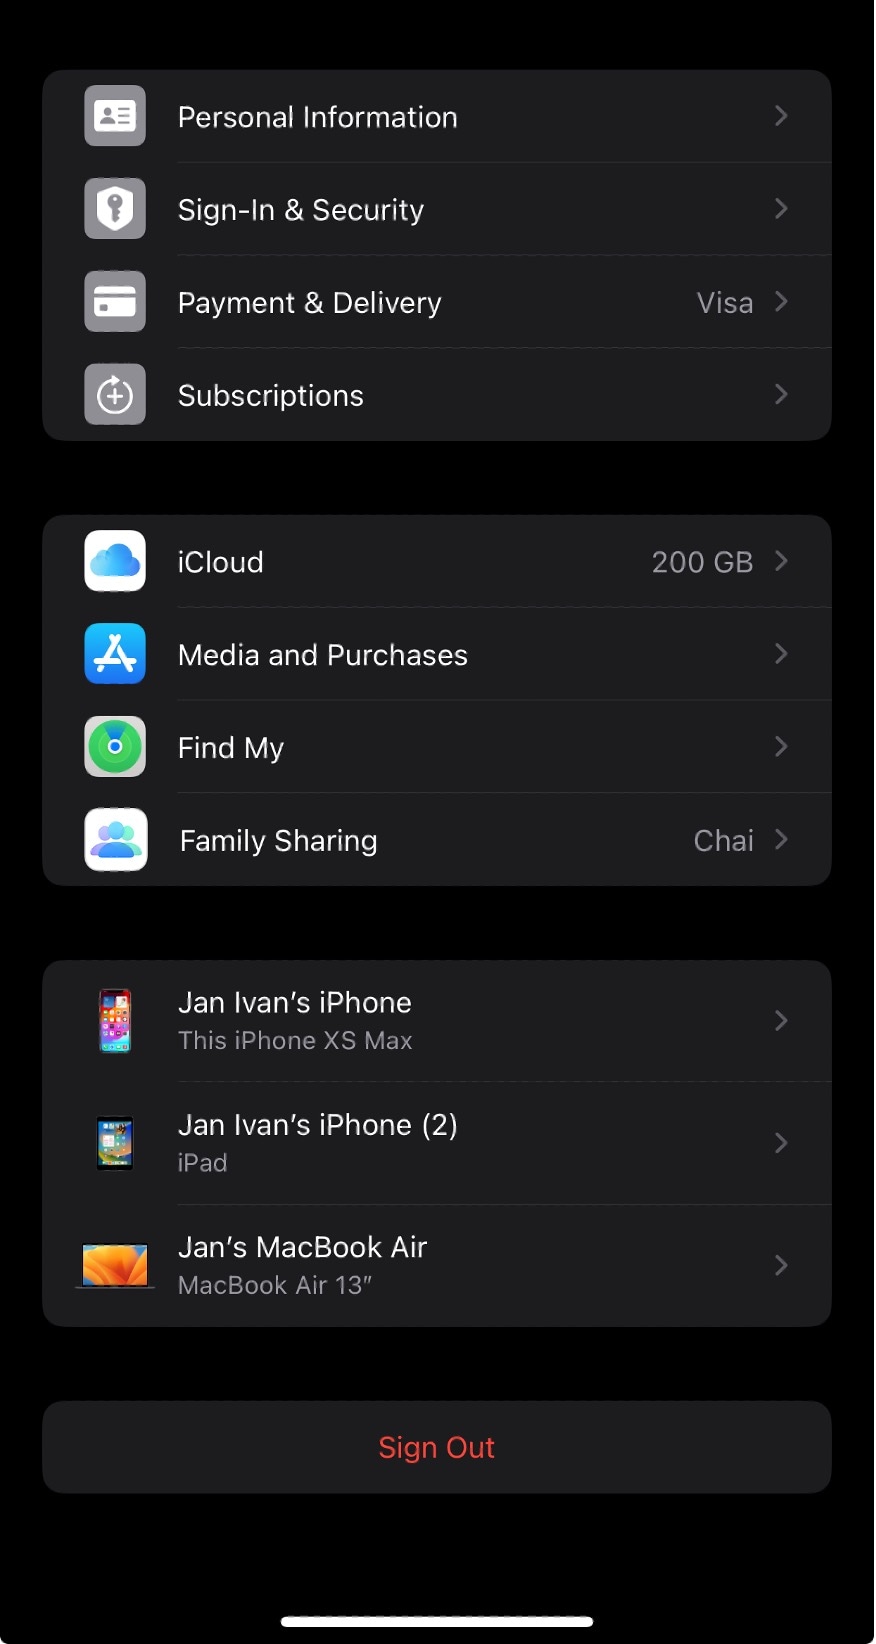
If you’re facing troubles due to password errors or 2FA issues, resetting your password or updating 2FA settings may help. Visit Settings > Apple ID account page > Sign In & Security and follow the instructions to Change Password or update your Two-Factor Authentication settings.

Method 3: Check iPhone’s Date & Time Settings
Incorrect date and time settings can influence Apple ID verification. Go to Settings, select General, and tap on Date & Time. Ensure Set Automatically is enabled, allowing your Apple iPhone 13 to adjust these settings according to your time zone.

Method 4: Signing Out/In Your Apple ID
Sometimes, simply signing out and back into your Apple ID can resolve verification issues. Navigate to Settings, tap your name at the top, scroll down, and select Sign Out. After signing out, sign back in and check if the issue persists.
Method 5: Disabling VPN
If you’re using a VPN, it can sometimes cause issues with Apple ID verification. Try disabling your VPN from the Settings or the VPN app you’re using, and then attempt the verification process again.
Method 6: Updating to the Latest iOS
Running an outdated iOS version can cause compatibility issues. Go to Settings, select General, and tap on Software Update. If an update is available, download and install it to ensure your device is up-to-date.
Method 7: Checking Apple Server Status and Trying Again Later
Sometimes, the problem is on Apple’s end. Check the Apple System Status page to see if there are any issues with their servers. If there are, it’s best to wait and try the verification process later.
By following these methods, you should be able to resolve the “Apple ID Verification Failed” issue and regain full access to your Apple ID functionalities.
Part 3: How To Remove Apple ID Account From iOS Device
If the above fixes have proven unsuccessful, it might be time to consider removing the Apple ID directly from your device using a third-party tool. This can often resolve the failed verification of Apple ID on new or old phones when other methods fail.
Thankfully, Wondershare Dr.Fone offers a solution with its Screen Unlock (iOS) feature, which includes a Remove Apple ID/iCloud account removal function. It’s a very handy tool for reviewing verification requirements, especially when you forget your Apple ID credentials.
Removing Apple ID Account With Dr.Fone - Screen Unlock (iOS)
Here’s how to use powerful Dr.Fone’s - Screen Unlock (iOS) to remove Apple ID.
Step 1: Download, install, and launch Wondershare Dr.Fone.
Step 2: Go to Toolbox > Screen Unlock > iOS.

- Step 3: Select Remove Apple ID to proceed.

- Step 4: Choose Unlock Now once the connectivity status is confirmed.

- Step 5: Ensure you have a screen lock and the two-factor authentication enabled. Follow the on-screen instructions.

- Step 6: Put your device into Recovery Mode or DFU Mode by following the on-screen instructions. Then, confirm the correct system version of your device.

- Step 7: Wait for the download to finish on your software.

- Step 8: After the firmware is confirmed, click Unlock Now. Then, type in “000000” on the appearing text box and click Unlock.

- Step 9: After the process is completed, click Done. If it still doesn’t work, then click Try again.

Conclusion
Navigating the Apple ID Verification Code not working issue can be a source of significant frustration. This guide aimed to alleviate that by detailing common triggers, such as password errors, server issues, and connectivity problems, and providing targeted solutions like ensuring stable internet, updating iOS, and checking server status.
For those rare instances where conventional methods fall short, Dr.Fone emerges as a reliable ally. Its Screen Unlock feature effectively addresses Apple ID-related hurdles. Whether you’re grappling with verification failures or other phone-related challenges, Dr.Fone - Screen Unlock (iOS) stands out as a dependable tool, ready to assist in simplifying your digital life.
Tips: Are you searching for a powerful Screen Unlock tool? No worries as Dr.Fone is here to help you. Download it and start a seamless unlock experience!
How To Unlink Your Apple iPhone 13 From Your Apple ID
iPhones are known for their robust security features. The Apple ID is the central feature used to provide many security services that ensure the safety of personal data. Yet, life often leads you to moments when you must part ways you’re your devices. Be it for selling, gifting, or any other reason.
In such cases, it’s essential to understand how to unlink iPhones from your Apple ID. This 2023 guide is your go-to resource, providing insight into various methods to disassociate your Apple iPhone 13 from your Apple ID, even when facing a forgotten or unrecoverable passcode.
Part 1. How the Apple ID System Works
The Apple ID is like the key to your Apple iPhone 13’s world. It’s a special account that connects your Apple iPhone 13 to Apple’s services. With it, you can download apps, back up your data, and more. It’s an essential part of your Apple iPhone 13 experience.
Here are ways that it protects your device.
- **Preventing use when stolen.**If your Apple iPhone 13 gets into the wrong hands, your Apple ID keeps it locked. Even if someone tries to reset or erase the phone, they can’t use it without your Apple ID passcode.
- **Preventing use even after reformatting the phone.**Even if you reset or erase your Apple iPhone 13, it stays locked to your Apple ID. This is super important for keeping your data safe.
- **Other ways.**Apple ID helps you find your lost iPhone and secures your payments and personal info.
Remembering your Apple ID passcode is an intelligent move. It makes managing your Apple iPhone 13 more accessible and safer. Forgetting it can make things tricky, especially when you want to unlink your Apple iPhone 13 from your Apple ID. But don’t worry, there are solutions for that, too!
Part 2. How To Unlink Your Apple iPhone 13 Normally
The usual way to unlink your Apple iPhone 13 from your Apple ID is recommended, especially when remembering your Apple ID passcode. This ensures a smooth and secure transition for your device. Here’s how you can do it, step-by-step:
Step 1. Sign out of Apple ID (through Settings):
Open your Apple iPhone 13’s Settings.
Scroll down and tap on your name at the top.
Next, scroll to the bottom of the screen and choose Sign Out.
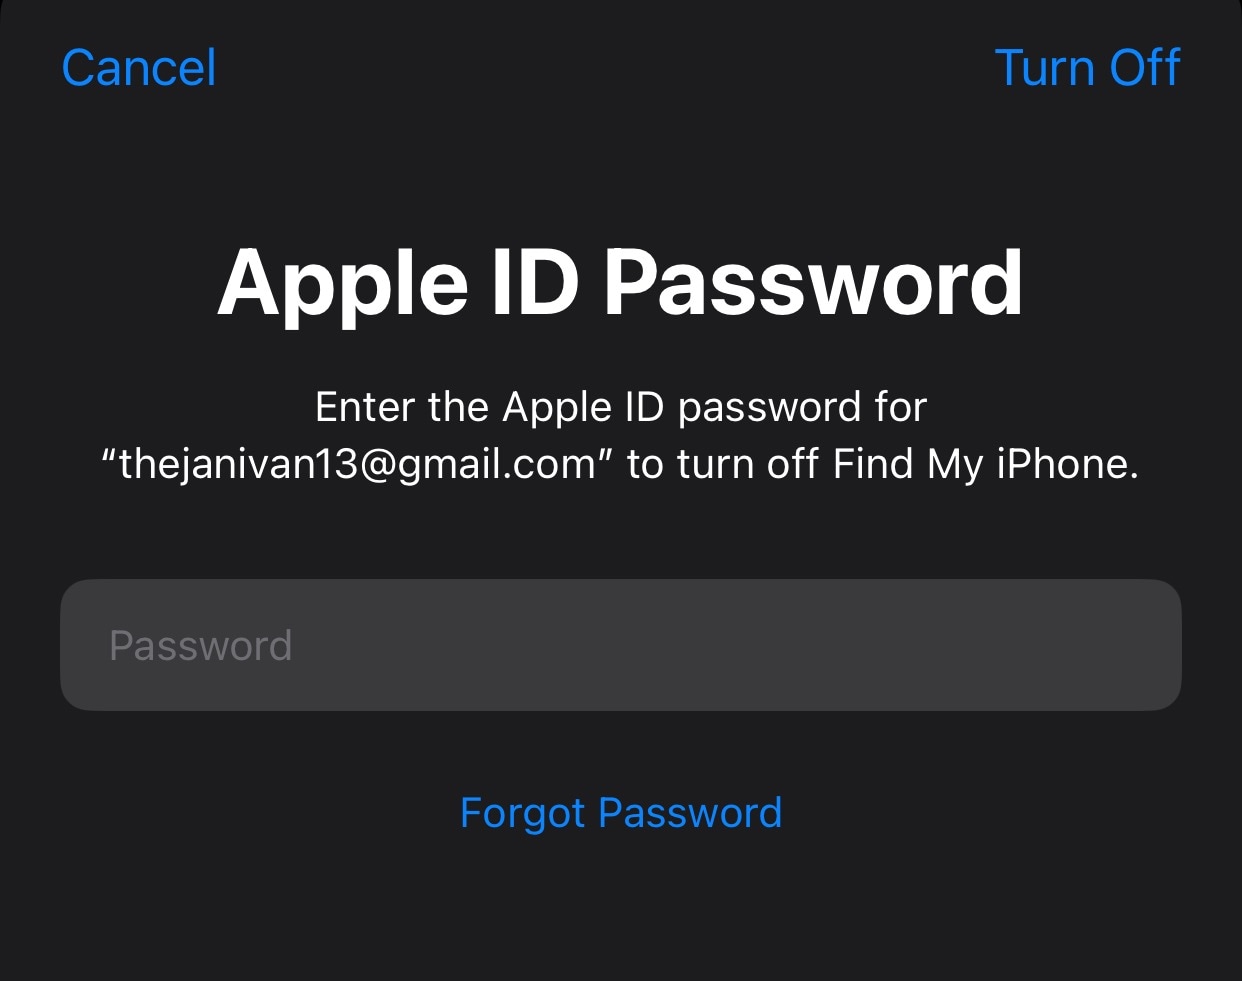
You’ll be asked to enter your Apple ID passcode and tap Turn Off.
Confirm by selecting the data you want to keep on your Apple iPhone 13.
Finally, tap Sign Out.
Step 2. Deactivating iMessage and FaceTime:
After signing out of your Apple ID, go back to
Scroll down to Messages and tap it.
Turn off iMessage by flipping the switch.
Go back to Settingsand tap FaceTime.
Turn off FaceTime by flipping the switch.

Step 3. Reformat the phone:
Return to
Scroll down and tap
Scroll down and select
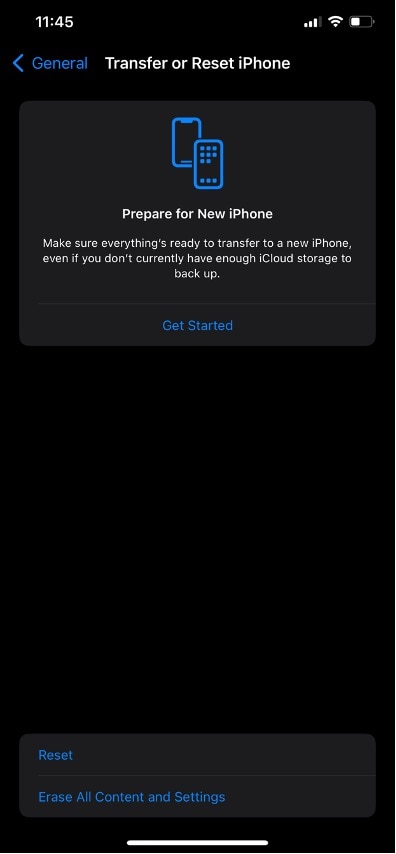
Choose Erase All Content and Settings.
Confirm this action. Your Apple iPhone 13 will reset to its original state.
Following these steps, your Apple iPhone 13 will be unlinked from your Apple ID and ready for a new user or any other purpose. Remember, this method is best when you can easily recall your Apple ID passcode.
Part 3. What To Do If You Forgot Your Apple ID Passcode
If you still need to remember your Apple ID Passcode, following the steps in the previous section would be unadvisable, as it will leave your Apple iPhone 13 locked and inaccessible. In this case, recovering your Apple ID Passcode is essential before unlinking iPhones.
These are some ways to recover your Apple ID passcode:
Use the Forgot Your Password Option
Start by going to the Apple ID account page or using the “Forgot Your Apple ID or Password?” link on your Apple iPhone 13’s login screen. You must enter your Apple ID and follow the steps provided to reset your passcode. Apple will guide you through resetting your Apple ID passcode, often requiring you to verify your identity via email or other security questions.

Contact Apple Customer Service
If the above method doesn’t work or you’re facing difficulties, contacting Apple Customer Service is a good idea. They can assist you in recovering your Apple ID passcode and provide expert guidance.
After recovering your Apple ID Passcode, you can perform the steps outlined in the previous section to unlink your Apple iPhone 13 normally. With your passcode in hand, the process becomes straightforward, allowing you to maintain control of your device while preparing it for a new user or another purpose. Remember, your Apple ID Passcode is a vital key to unlocking the full potential of your Apple iPhone 13, so it’s essential to keep it safe and secure.
Part 4. If You Can’t Recover Your Passcode: Wondershare Dr.Fone
If, for instance, you find yourself in a situation where you really can’t recover your Apple ID passcode, or perhaps you’ve reformatted your phone without unlinking your Apple ID, leaving it inaccessible, it’s time to turn to a trusted third-party tool to help you unlock and unlink your Apple ID from your Apple iPhone 13.
Wondershare Dr.Fone is a versatile and powerful phone management tool designed to assist you in various aspects of your iOS device. It offers a range of features to help you manage and troubleshoot your Apple iPhone 13, including data recovery, system repair, and device unlocking. It’s a user-friendly solution that caters to your needs when dealing with complex issues like opening your Apple iPhone 13 from an Apple ID.
One of Dr.Fone’s standout features is the Screen Unlock feature. It is an invaluable tool when facing challenges like an inaccessible iPhone due to a forgotten Apple ID passcode or a device that has been reformatted without unlinking the Apple ID. With Dr.Fone – Screen Unlock, you can learn how to unpair iPhones from the previous Apple ID, ensuring you can use it effectively.
How To Unlink Apple ID With Wondershare Dr.Fone – Screen Unlock
Before anything, be warned that this method removes all data from an iPhone. Creating a backup of your phone before performing the steps below is best.
Step 1: Launch Dr.Fone. Click Toolbox and then select Screen Unlock (iOS).
Step 2: Click Remove Apple ID.
- Step 3: Connect your Apple iPhone 13 to your computer. Click Unlock Now once you’ve confirmed its connection.
- Step 4: Click Yes on the screen lock verification page.
- Step 5: Click Yes on the Two-Factor Authentication verification page.

- Step 6: Follow the instructions to put your device into Recovery Mode. If they don’t work, click Try DFU Mode.
- Step 7: Verify your device details**.** Edit manually for any discrepancies. Click Start once done.

- Step 8: The firmware will start downloading. If it is slow, click Copy for a direct download link of the firmware.
- Step 9: Click Unlock Now once downloading is done.

- Step 10: Input the code “000000” on the appearing prompt and click Unlock.
- Step 11: Avoid any disconnection during the unlocking process.

- Step 12: Click Done once you see this page. Click Try Again if the method does not work.
Conclusion
In summary, this guide has navigated you on how to unlink iPhones from their Apple ID, covering both the normal process and what to do when you’ve forgotten your passcode. However, the critical lesson here is remembering your Apple ID passcode to avoid unnecessary complications.
Should you ever find yourself locked out of your device, Wondershare Dr.Fone - Screen Unlock emerges as your go-to solution. The all-around phone management tool can rescue you from tricky situations and help you unlink your device effortlessly. Remember to keep your Apple ID passcode safe and handy, but know that Dr.Fone has your back when you need it.
Your Account Has Been Disabled in the App Store and iTunes On Apple iPhone 13?
You may see the error message, “Your account has been disabled in the App Store and iTunes” when you try to log in. This is often an indication that for some reason your Apple ID is not working as it should. When you consider that you will not be able to download or update apps or even make a purchase using Apple Pay without your Apple ID, it is easy to see why this error message can be a problem.
Why is my account disabled in the App store? Here, we take a look at the reasons why you may see the error messages and what you can do to fix them.
Part 1. Why has my account been disabled in the App Store and iTunes?
The following are some reasons why you may see this error message popup on your screen:
- Entering the incorrect Apple ID and password multiple times
- Not using your Apple ID for an extended period of time
- Any billing issues such as unpaid iTunes and App Store orders
- Safety and security reasons like when Apple suspects your account may be hacked
- When there are charging disputes on your credit card
Part 2. How to fix “Your account has been disabled in App store and iTunes”?
There are numerous methods to tackle this issue and regain access to your device. For a quick and concise understanding, you can watch our informative video tutorial. If you prefer a more in-depth, step-by-step explanation, continue reading this article for detailed instructions on each method.
Tips: Did you forget your Apple ID password or are you struggling to remove your Apple ID account? Worry not, as Dr.Fone is here to help you remove your Apple ID without password in a matter of seconds. By logging into a new account, you can fully restore access to all your iCloud services and Apple ID features, ensuring a seamless user experience.
Method 1. Wait 24 hours and Try Again
This method will prove useful to you if you have entered the wrong password several times. If this is the reason your account has been disabled, leave it alone for about 24 hours. When the time has elapsed, try entering the correct password to see if this fixes the issue.
If you just forget the password and cannot remember it, you can follow the steps below to reset the password on your own iOS device:
- Step 1: Open Settings.
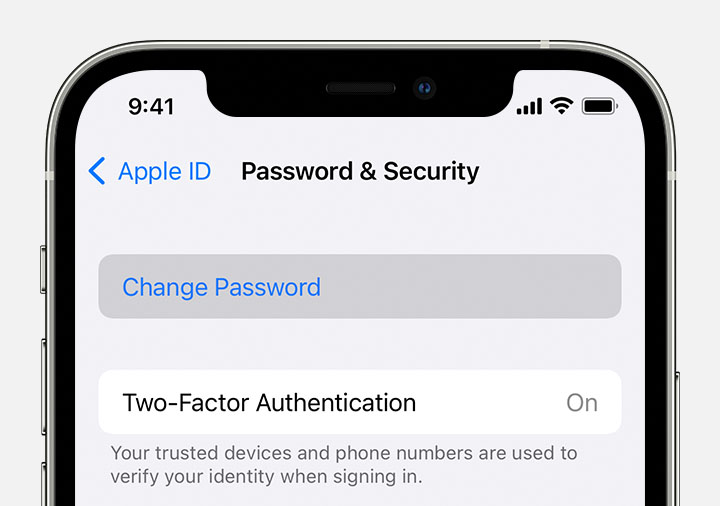
- Step 2: Tap [your name] on top of the screen> Password & Security > Change Password.
- Step 3: Enter the passcode for your device.
- Step 4: Follow the onscreen steps to reset your password.
If the above steps were unable to change or reset the password, follow the steps below:
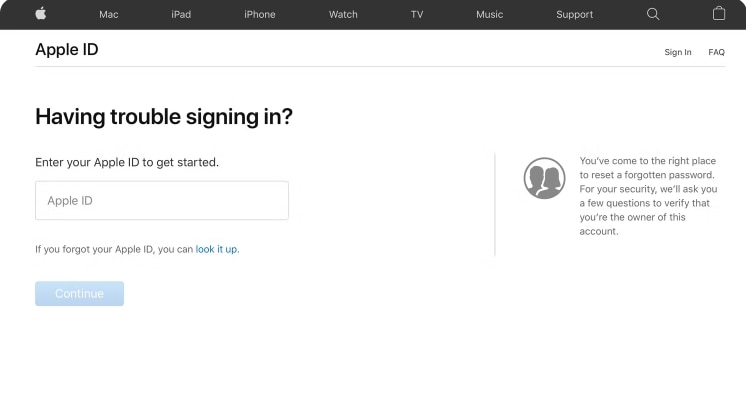
- Step 1: Go to https://iforgot.apple.com/ .
- Step 2: Put your Apple ID (email) in the box and click “Continue”.
- Step 3 Enter the phone number that you use with your Apple ID.
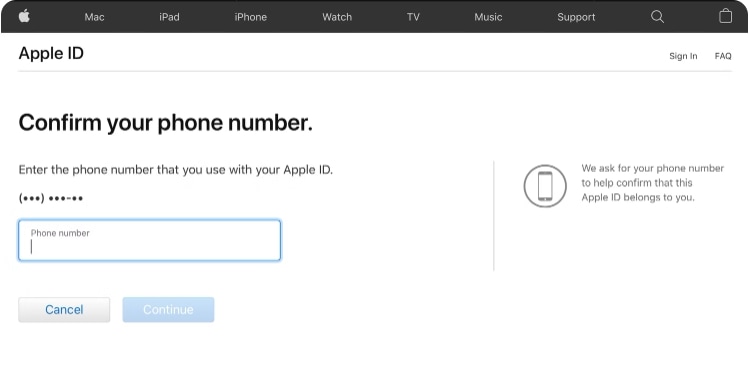
- Step 4: Look for the notification on iPhone, Mac, or iPad and follow the instructions to reset the password.

Note that if you are changing your Apple ID password on an iPhone or iPad, you will need to enter your device’s six-digit passcode, then reset a new password.
Forgetting the password is particularly troublesome, but there is good news. That is, you can use Password Manager to find your passwords on your Apple iPhone 13/iPad without spending too much time remembering them!
Dr.Fone - Password Manager (iOS)
Recover and keep all your passwords in one place
- Unlock and manage various passcodes, PINs, Face IDs, Apple ID, WhatsApp password reset, and touch ID without limitations.
- To find your password on an iOS device, it effectively functions without harming or leaking your information.
- Ease your job by finding any strong password across various platforms to manage multiple email accounts.
- The installation of Dr.Fone on your device won’t take much space, without any disturbing ads.
3981454 people have downloaded it
Method 2. View Your Payment Methods and Update Them
If you think that your account has been disabled because of a payment issue, it is necessary to check your payment methods and update them. Follow these simple steps to do it:
- Step 1: Open the Settings and then tap on your name at the top.
- Step 2: Select “iTunes & App Store” and then choose your Apple ID.
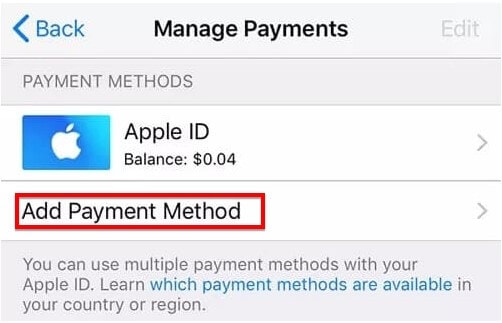
- Step 3: Tap “View Apple ID” and then select “Manage Payments”.
- Step 4: Tap “Add Payment Method” to add a new payment method.
If the payment method was the issue, your account will be re-enabled after these steps.
Method 3. Settle Any Unpaid Charges
Do you have any unpaid purchases or subscriptions?
It is important to keep track of any purchases or subscriptions that you have signed up for and ensure that you pay for them on time. This not only helps you avoid late fees and penalties, but it also ensures that your account remains active and accessible. If you do have any unpaid charges, it is recommended that you settle them as soon as possible in order to reinstate your account and prevent any further issues. Keep a record of all your expenses and regularly review your bills to avoid missing any payments and keep your accounts in good standing.
Method 4. Sign Out and Sign in Again
Signing out of your account and then signing back in may help if this issue is caused by a software glitch.
- On your iOS device, go to Settings > [Your Name] > iTunes & App Store and Sign Out. Then sign in again.
- On your Mac, open the App Store (Store > Sign Out) and iTunes (Account > Sign Out. Then sign in again.
Method 5. Try Contacting Apple Support Directly
If you see a message that says, “Your account has been disabled in the App Store and iTunes,” contact Apple Support for help. You can follow these simple steps to contact Apple support:
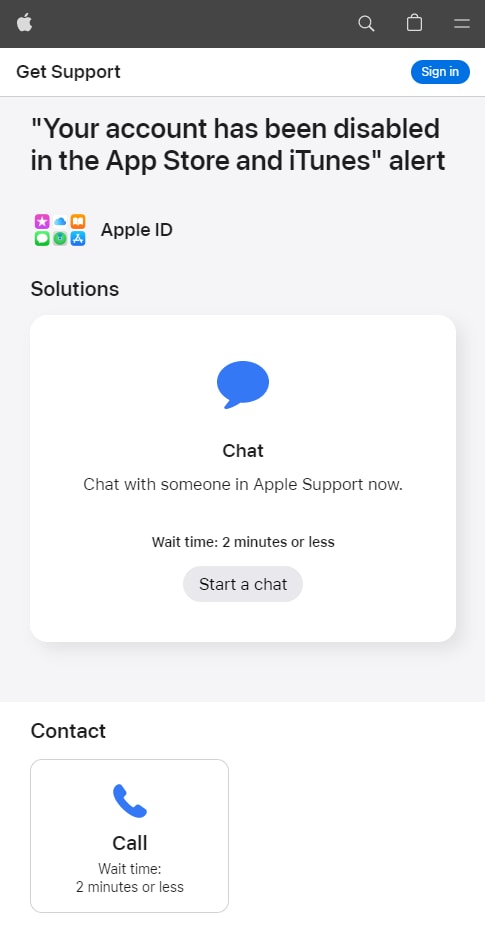
- Step 1: Go to https://getsupport.apple.com/solutions .
- Step 2: Then click “Start a chat” to chat with someone in Apple Support now.
- Step 3: Or schedule a call with Apple Support, and they should be able to help you fix your account disabled in App store.
Part 3. What does it influence when “Your account has been disabled in the App Store and iTunes”?
When you see the error message “Your account has been disabled in the App Store and iTunes” it often means the following:
- You cannot access Apple Books, App Store purchases, and even iTunes purchases.
- You may not have access to your iCloud account or any of the data stored in the account until you fix the problem.
- Furthermore, you may not be able to access Apple services and any Apple Store orders and repairs may need to be rescheduled.
- Until you can fix the issue, you will not be able to receive iMessage, FaceTime, and iCloud Mail.
Part 4. Is “Your account has been disabled in the App Store and iTunes” the same as “Apple ID disabled”?
No. The error message “Your account has been disabled in the App Store and iTunes” differs from “Apple ID disabled”. You will primarily see the “Your account has been disabled in the App Store and iTunes” when you try to access content in the App Store. On the other hand, you may see the message “Apple ID disabled” when you enter the Apple ID and password to bypass the iCloud Activation Lock screen .
After you see these errors, you will not be able to access some of the features and apps that require your Apple ID for access.
Part 5. How to fix Apple ID disabled by removing Apple ID?
Sometimes the only way to fix “Apple ID Disabled” is to remove the Apple ID from the Apple iPhone 13 device. This may become a viable solution if you lost or forgot the Apple ID password or ID and you have no way to recover them. It is also one of the best solutions when you purchased a second-hand device, and you don’t know the Apple ID password for the account associated with the Apple iPhone 13 device.
One of the best ways to remove the Apple ID from an iOS device is to use Dr.Fone - Screen Unlock (iOS) . This third-party unlocking software is designed to easily and effectively remove the Apple ID password from any device. The following are some things it can do;
Dr.Fone - Screen Unlock (iOS)
Remove iCloud Account without Password in Minutes
- Remove Apple ID/iCloud Account efficiently.
- Save your Apple iPhone 13 quickly from the disabled state.
- Free your sim out of any carrier worldwide.
- Bypass iCloud activation lock and enjoy all iCloud services.

- Works for all models of iPhone, iPad, and iPod touch.

4,008,669 people have downloaded it
Here’s how to use Dr.Fone Screen Unlock to remove the Apple ID from the Apple iPhone 13 device;
- Step 1: Install the Program
To begin, download the Dr.Fone Toolkit from the program’s main website. Install the toolkit onto your computer. Open it after successful installation and then choose “Screen Unlock” from the main screen.
- Step 2: Choose to Remove Apple ID
On the next screen, you should see three options. Choose “Remove Apple ID” since we want to remove the Apple ID from the Apple iPhone 13 device.
- Step 3: Connect the iOS Device
Connect the iOS device to the computer using its lightning cable. Then enter the Apple iPhone 13 device’s passcode and, when prompted, tap “Trust” to allow the computer to detect the Apple iPhone 13 device. The program should detect the Apple iPhone 13 device and display information about it. Then click “Unlock Now”.
- Step 4: Apple ID Removal will Begin
Dr.Fone will immediately begin removing the Apple ID from the Apple iPhone 13 device. You should see a progress bar indicating how long the process will take. Ordinarily, the removal should take just a few seconds. When the process is complete, you will see a notification on the screen letting you know that the Apple ID has been removed.
You should then be able to sign in to another Apple ID or create a new Apple ID and password to use on the Apple iPhone 13 device.
Conclusion
In conclusion, encountering a disabled Apple account in the App Store and iTunes can be a frustrating experience. However, by understanding the reasons behind it, following the recommended steps to resolve the issue, and considering the broader impact on your digital life, you can navigate this situation effectively. Remember, prompt action and patience are key to restoring your account and getting back to enjoying the Apple ecosystem hassle-free.
Also read:
- [New] Discover Instagram Stories In Private Mode
- 6 Proven Ways to Unlock Oppo Find N3 Flip Phone When You Forget the Password
- AI-Driven Domestic Efficiency: ChatGPT's Role?
- Effortless Video Format Transformation: Download Our Free Cross-Platform Online Tool to Convert MOV Files to MP4 Compatible with Any Device or Operating System Like macOS, Windows 11, and More!
- How to Change Credit Card on Your iPhone 15 Apple ID and Apple Pay
- How To Fix Apple ID Verification Code Not Working On iPhone XR
- iCloud Separation How To Disconnect Apple iPhone 11 and iPad
- In 2024, Charting the Future Essential Online Stock YTs
- In 2024, How to Remove an AirTag from Your Apple ID Account On Apple iPhone 15?
- In 2024, How to Reset Apple ID and Apple Password From iPhone 6 Plus
- In 2024, How To Unlink Apple ID From Apple iPhone 15 Plus
- In 2024, Tips and Tricks for Apple ID Locked Issue From iPhone 6 Plus
- Instantly Convert RMVB Video Format to MOV - Cost-Free Solution by Movavi
- Rev Voice Recorder Download and Review for 2024
- Step-by-Step Repair Tips: Correcting Windows 11/10 Error Code 0X80ebase F
- Title: In 2024, How To Fix Apple ID Verification Code Not Working On Apple iPhone 13
- Author: Alma
- Created at : 2024-12-01 16:03:53
- Updated at : 2024-12-06 16:09:44
- Link: https://apple-account.techidaily.com/in-2024-how-to-fix-apple-id-verification-code-not-working-on-apple-iphone-13-by-drfone-ios/
- License: This work is licensed under CC BY-NC-SA 4.0.