
In 2024, How To Reset the Security Questions of Your Apple ID On Your Apple iPhone 6s Plus
How To Reset the Security Questions of Your Apple ID On Your Apple iPhone 6s Plus
Your Apple ID serves as the gateway to a multitude of Apple services, encompassing the likes of the App Store, iCloud, iTunes, and beyond. To fortify the safeguarding of your Apple ID, Apple kindly requests that you establish security questions.
These inquiries act as an extra shield, enabling you to regain access to your account should you ever forget your password. However, there are various reasons to explain why people want Apple ID reset security questions, like discussed below. In this ultimate guide, we provide step-by-step instructions on how to reset the security questions of their Apple ID.
Part 1: What Is the Purpose of the Apple ID Security Questions
Before talking about “reset my security questions Apple ID,” let’s talk about what they are. Apple has a reputation for ensuring the high security of its devices and services. The devices have Face ID and Touch ID for security and strong encryption standards. Apple devices are considered among the most secure in the tech industry. Moreover, Apple takes device security seriously. An example is the use of security questions.
When you create an Apple ID or set up a new device, Apple prompts you to choose security questions. These questions are carefully designed to be something only you would know. This explains their role as an extra layer of protection for your account. Typical instances include questions like “What is the name of your first pet?” or “In which city were you born?”
Importance of Apple ID Security Questions
The security questions associated with your Apple ID serve a critical role. They perform a pivotal role in ensuring the security and confidentiality of your digital presence. Numerous modern authentication techniques, such as biometrics, offer a strong layer of safeguarding.
Nonetheless, there might be instances where you require reentry to your account, such as in cases of forgotten passwords. In such scenarios, security questions serve as a vital lifeline, enabling you to authenticate your identity and regain control of your Apple ID.
Purpose of Security Questions
- Account Recovery: Security questions are a valuable tool for account recovery. They provide a means for you to prove your identity to Apple support in case you’re locked out of your account. Thus helping you regain access to your account quickly.
- Additional Layer of Security: Imagine someone manages to get your Apple ID details. Even then, they would still need to answer your security questions to make changes to your account. This extra layer of account protection prevents unauthorized access.
- Privacy Protection: Apple understands the importance of privacy. By setting up security questions, you can choose information that is meaningful to you. At the same time, it is not easily discoverable by others, enhancing the privacy of your account.
Part 2: How To Reset the Apple ID Security Questions Through the Account Settings
As we’ve established, Apple prioritizes security and privacy. There are various reasons why you might want to reset your Apple ID security questions. These range from enhancing security to changing the info associated with your account. Whatever your reason, it’s essential to securely follow the proper procedure for iCloud reset security questions.
Why Reset Your Apple ID Security Questions?
- Enhancing Security: Security is an ever-evolving field. Resetting your security questions periodically can strengthen your account’s defense. It is especially handy against emerging threats and ensures your information remains secure.
- Prevention of Attacks: Do you suspect unauthorized access or believe your security questions may have been compromised? In this scenario, resetting them immediately can protect your account.
- Adhering to Best Practices: Security experts recommend changing passwords and security questions periodically. Regularly updating your security questions is a cautious security practice.
- Making Relevant Changes: Over time, life circumstances change. You might move to a new location, get a new pet, or have different personal experiences. Updating your security questions to reflect these changes can make them more effective.
Guide for Resetting Apple ID Security Questions Through Account Settings
Resetting your Apple ID security questions through your account settings is a straightforward process that enhances the security of your Apple ID. Follow these detailed steps to reset your security questions:
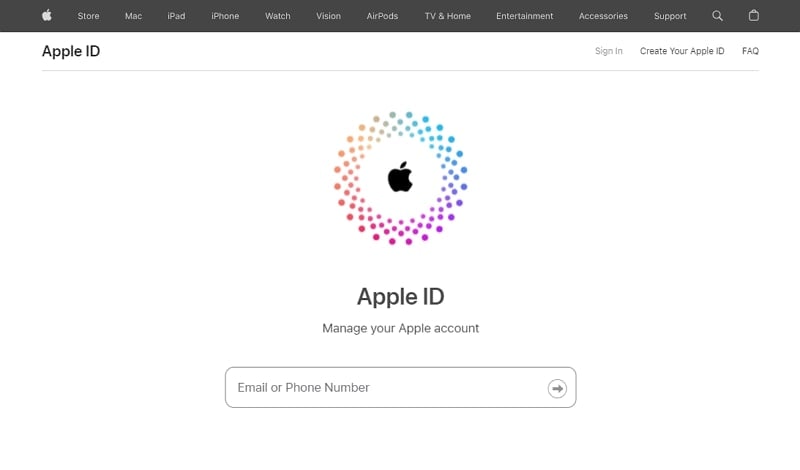
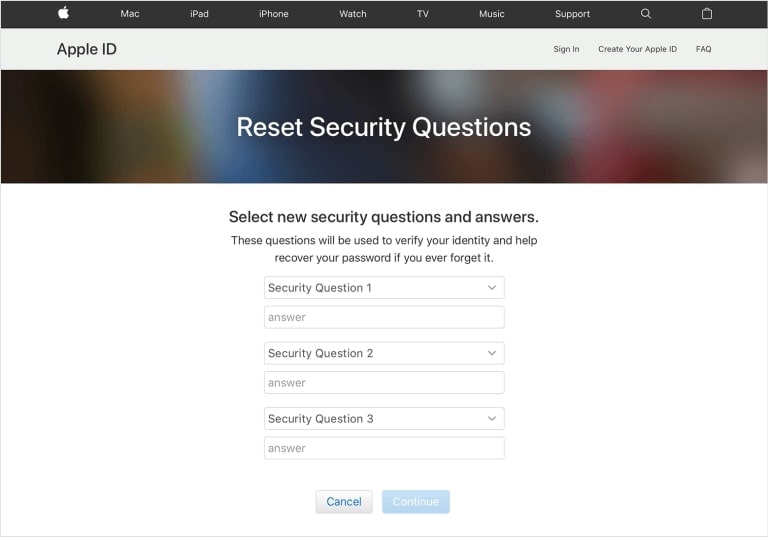
- Step 1. Begin by visiting and signing into the official Apple ID management page at appleid.apple.com. Then, proceed to the “Sign-In and Security” section for changing the security questions.
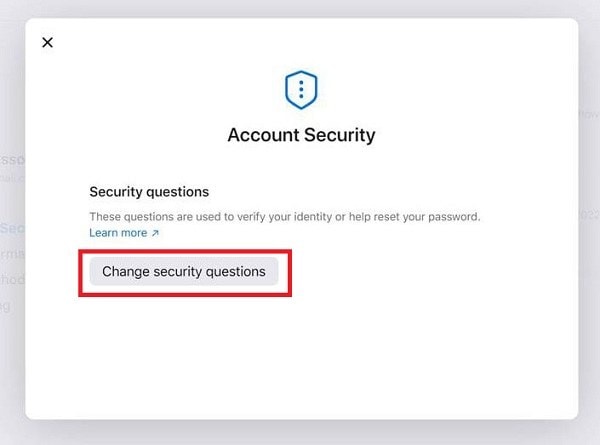
- Step 2. Now, click “Account Security” and follow it by locating “Change security questions.” Click on it to proceed, and you’ll now be prompted to set up new security questions and provide their corresponding answers.
- Step 3. After adding your new security questions and answers, click the “Update” button. To complete the process, you will need to verify your identity by entering your Apple ID password.
Pro Tip: What if Your Apple ID Got Locked? Unlock It With the Best Solution
So, you’ve been following our ultimate guide to reset your Apple ID security questions. However, you hit a roadblock – your Apple ID is locked. It happens many times that people forget their Apple ID passcode or get their Apple ID locked due to various reasons. In such cases, there is no need to panic that you are now unable to unlock the ID and access your important data.
This is because we have an excellent solution that can help you regain access to your Apple ID quickly and efficiently. With the help of the Wondershare Dr.Fone, you can easily get your Apple ID unlocked without a passcode.
Using this tool, users are able to bypass the iCloud activation lock and Apple ID without a password to use it as per their need. Moreover, they can also Bypass MDM and screen time without data loss, which is a plus point of this unique tool.
Key Features of Wondershare Dr.Fone
- This tool is compatible with the latest iPhone 15 models and all iOS versions, including iOS 17.
- No technical skill is required to use this tool because of its easy-to-use interface.
- 6-digit passcode, Touch ID, Face ID, and various screen locks can be removed in no time.
Steps To Unlock Apple ID Without Password via Wondershare Dr.Fone
Following are the simple steps you need to follow to unlock your Apple ID after you have forgotten the passcode:
- Step 1: Initiate the Process by Launching Wondershare Dr.Fone
Begin the unlocking process of Apple ID by installing and launching Dr.Fone’s latest version on your computer. Connect your Apple iPhone 6s Plus to the computer and tap on the “Toolbox” option to access different options, from which you need to select “Screen Unlock.”

- Step 2: Tap on Respective Option and Answer Platform Questions
Afterward, hit the “Remove Apple ID” option and tap the “Unlock Now” button in the next window. Proceeding ahead, the platform will ask you some questions which you will need to answer. However, it is necessary to ensure that your Apple iPhone 6s Plus has “Screen Lock” and “2FA” enabled.

- Step 3: Enable Recovery Mode and Choose System Version
Then, put your device in Recovery Mode so that the platform can detect the “Device Model.” With this, you will need to choose “System Version” in the respective window and tap on the “Start” button. Required firmware will start downloading that is suitable to your device.

- Step 4: Disable Apple ID on Your Device
On its successful completion, you will be notified from the platform, after which you are required to proceed by clicking on the “Unlock Now” button. A prompt will pop up on the screen; type the code in it and hit “Unlock.” This will remove the Apple ID passcode successfully in just a few moments.

Part 3: How To Perform Apple ID Reset Security Questions Using iForgot Website
Apple offers multiple avenues for users to perform essential security protocol changes, one of which is through the iForgot website. This website serves as a valuable resource for Apple device users in various scenarios. These include forgotten passwords, 2FA issues, account recovery, and unlocking Apple IDs. Here is the process of Apple ID reset security questions using the iForgot website:
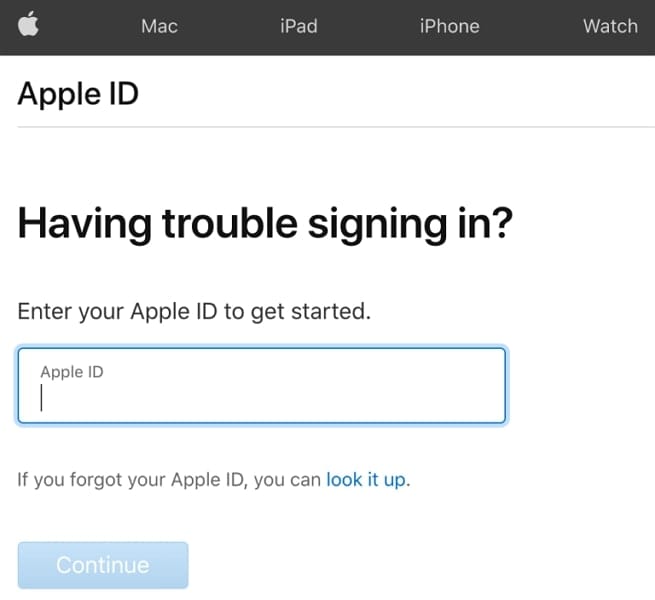
- Step 1. Begin by opening your web browser and navigating to the iForgot website at https://iforgot.apple.com/. You will then be asked to input your Apple ID. After entering your Apple ID, proceed by clicking the “Continue” button.
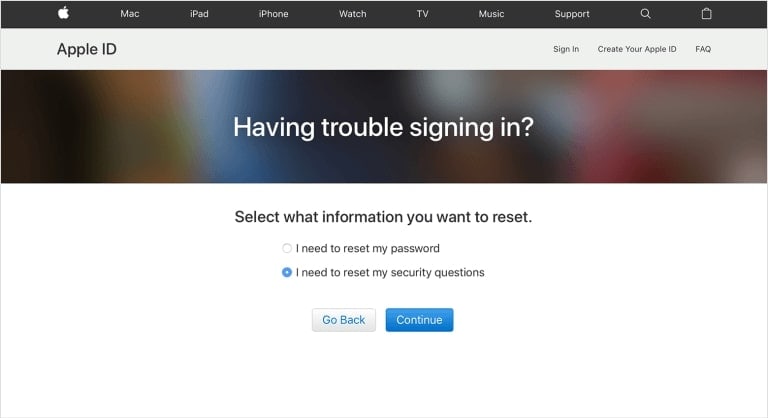
- Step 2. On the following page, you’ll encounter various options for account recovery. Opt for “I need to reset my security questions” and click “Continue.” For added security measures, Apple will request you to confirm your identity.
- Step 3. After your identity has been successfully verified, you’ll receive prompts to establish new security questions. Once you’ve created your new security questions, remember to save the changes.
Part 4: How To Reset the Apple ID Questions by Contacting the Customer Support
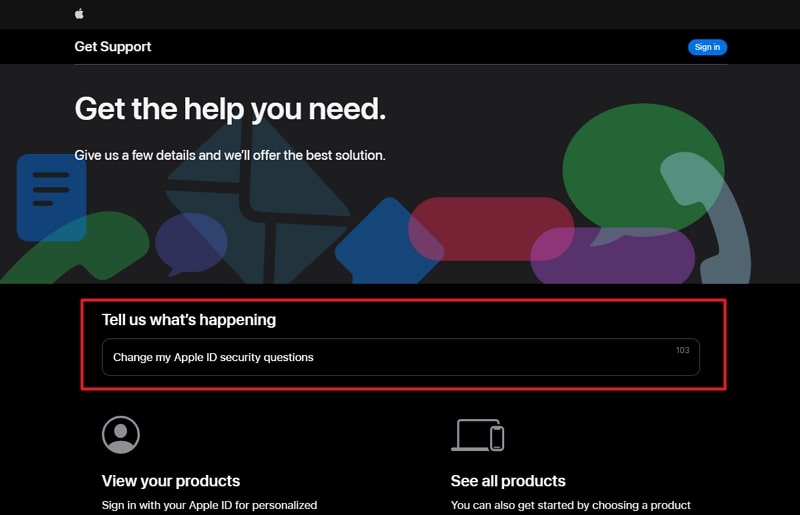
Contact Apple’s Customer Support if you have failed to reset your Apple ID security questions. They are well-equipped to assist with a wide range of device-related problems. You can use the following guide on how to reset the security questions on Apple ID via Apple Customer Support:
- Step 1: Begin by visiting the Apple Support website located at https://getsupport.apple.com/. Once there, use the search bar to type your issue. In this section, look for and click on “ Change my Apple ID security questions.”
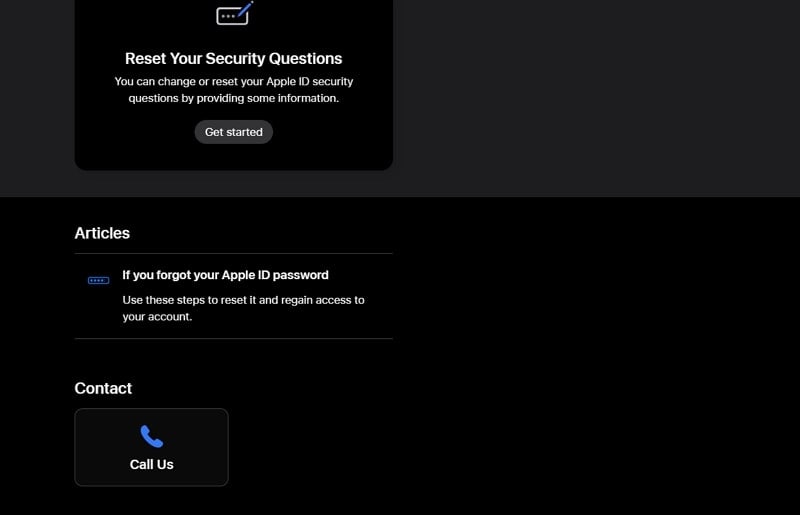
- Step 2: After selecting your issue, you will be presented with various support articles and options. Scroll down and choose the desired option from the “Contact” section. Follow the on-screen instructions to contact Apple support and provide details about your issue.
Conclusion
To summarize, we’ve explored the importance of Apple ID security questions. We provided you with different ways on how to reset the security questions on Apple ID. The article highlighted the significance of security in the Apple ecosystem. It also explained the role security questions play in protecting your account.
We discussed the various reasons why you might want to reset your Apple ID security questions. You learned how to reset your security questions through your Apple ID account settings and via the iForgot website. Additionally, we introduced Wondershare Dr.Fone as a reliable solution for unlocking your Apple ID. Dr.Fone offers a user-friendly interface, a high success rate, and the ability to resolve various iOS device issues.
How To Erase an Apple iPhone 6s Plus Without Apple ID Password?
Have you ever wondered what happens when you erase the content of your Apple iPhone 6s Plus storage? Erasing an iPhone means restoring it to its factory settings to install the latest iOS version. It also permanently removes all your data, including photos, videos, contacts, apps, and other information stored on the Apple iPhone 6s Plus device.
This process is often necessary when you sell or give away your Apple iPhone 6s Plus to ensure your personal information remains secure. But, you may encounter a situation where you should learn how to erase an iPhone without an Apple ID. While this may seem challenging, you can use a few methods to achieve this goal. This article will show you how to do it with or without an Apple ID password.
Part 1: A Checklist on What To Do Before Erasing an iPhone
If you’re looking at how to erase an iPhone without an Apple ID or account password, you’ve come to the right place. Before you begin, preparing your device and ensuring you have all the necessary information is crucial. Here’s a checklist of what to do before erasing your Apple iPhone 6s Plus:
Backup Your Apple iPhone 6s Plus
You can back up to iCloud or use Finder on macOS 10.15 or later. Remember that iCloud backups are stored on Apple’s servers and always encrypts backups. On the other hand, computer backups are stored on your computer’s hard drive and require a connection to the backup computer. Consider what your needs and preferences are when choosing between these two backup options.

Prepare Your Apple iPhone 6s Plus Passcode
You’ll need your Apple iPhone 6s Plus passcode to erase an iPhone. If you’ve forgotten your passcode, reset it using recovery mode.
Ready Your Apple ID Password
You may be asked to provide your Apple ID password to disable the Find My iPhone function and remove the Apple iPhone 6s Plus device from your account. Have it handy to avoid any delays. It’s necessary for security verification during the erasure process.
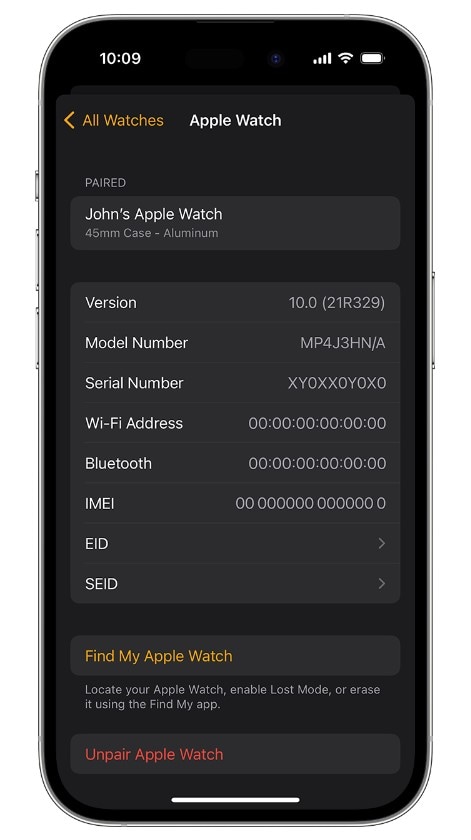
Unpair Apple Watch
If you own an Apple Watch, unpair it from your Apple iPhone 6s Plus. It ensures a smooth disconnection and prevents complications when erasing the Apple iPhone 6s Plus device.
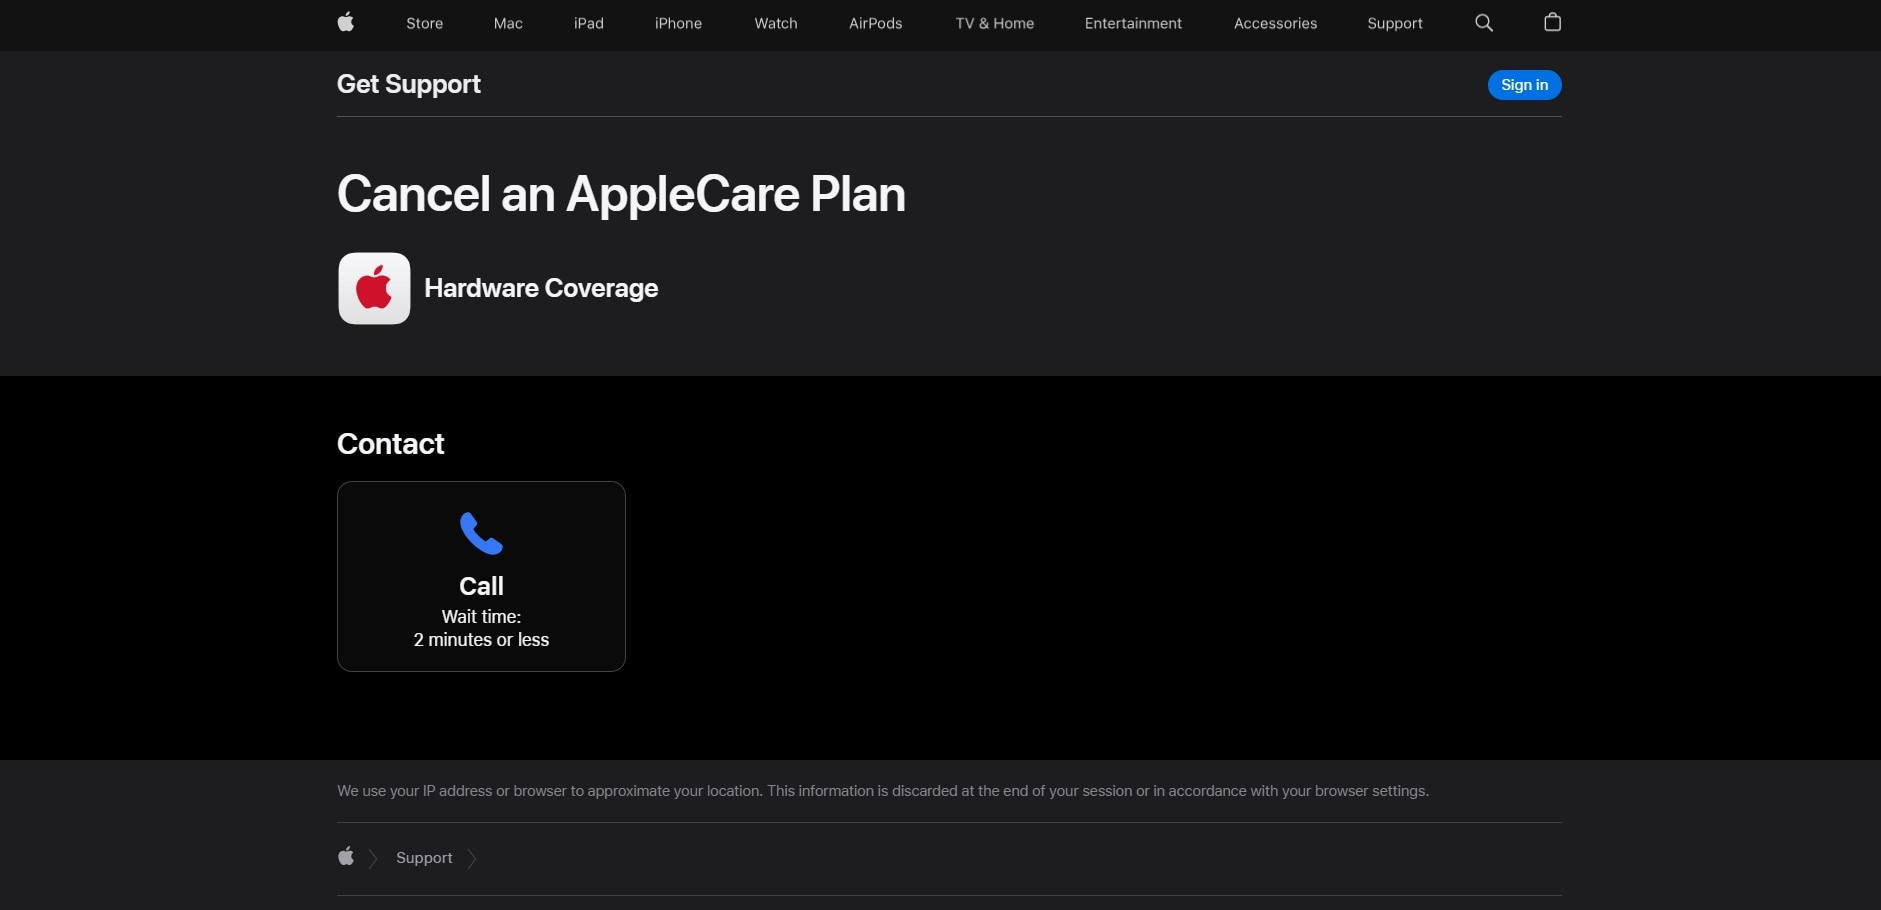
Cancel Your AppleCare Plan
If you have an active AppleCare plan for your Apple iPhone 6s Plus, cancel it on your Apple iPhone 6s Plus before erasing the Apple iPhone 6s Plus device. You can cancel your AppleCare plan by phone by calling AppleCare customer support. It will prevent any unnecessary charges after the erasing process.
Sign Out of iCloud
If your Apple iPhone 6s Plus has iOS 10.3 or later, open the Settings app, then tap on your name at the top. Next, scroll down, tap Sign Out, enter your Apple ID password, and tap Turn Off.
Remove Your Apple iPhone 6s Plus From Your List of Trusted Devices
Remove your old device from your list of trusted devices in your Apple ID settings for added security. This measure strengthens the defense against unauthorized access to your data.
Part 2: How To Erase iPhone Without Apple ID Password via Settings?
Erasing an iPhone and restoring it to factory settings is a straightforward process you can do in a few steps. Whether you’re preparing to sell or gift your device or troubleshooting persistent software issues, erasing your Apple iPhone 6s Plus contents can enhance its performance. The process is easy if you have your Apple ID password readily available.
However, if you’ve forgotten your Apple ID password, don’t fret. Follow the guide below to reset your Apple ID password and erase all content and settings on your Apple iPhone 6s Plus:
- Step 1: Open the Settings application, then tap [name].
- Step 2: Go to Sign-In & Security > Change Password.
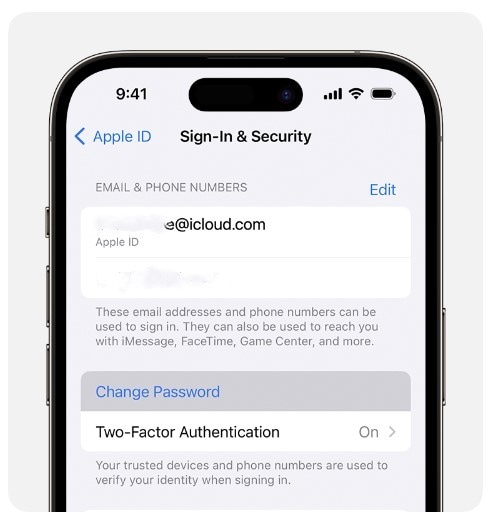
- Step 3: Follow the on-screen instructions to reset your Apple ID password.
- Step 4: Go to General > Reset from the Settings app, then tap Erase All Content and Settings.

- Step 5: Input your Apple ID password or your passcode when prompted.
- Step 6: Click Continue to confirm. Then, wait while the contents are being removed from your Apple iPhone 6s Plus device.
Part 3: How To Erase iPhone Without Apple ID Password on Computer?
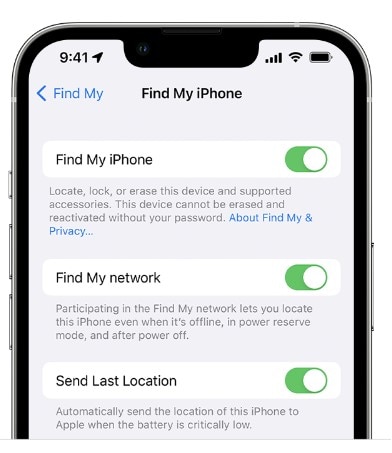
Activation lock is a security feature. It prevents anyone from activating an iPhone without your Apple ID password. If you try to factory reset your Apple iPhone 6s Plus without turning off Find My iPhone, the activation lock will be in place. It means you need to enter your Apple ID password to activate the Apple iPhone 6s Plus again. To turn it off, also ensure to turn off Find My on your device.
Go to Settings > [your name] > Find My or Find My iPhone to check.
If you want to erase an iPhone without Apple ID password on your computer, you can do so as long as you turn off the Find My. However, you’ll need to put your Apple iPhone 6s Plus into Recovery Mode first.
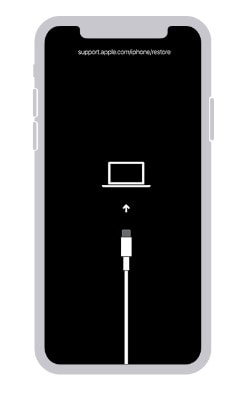
- Step 1: Turn off your Apple iPhone 6s Plus, then put it into Recovery Mode.
- For iPhone 8 or later: Press and hold the Side button.
- For iPhone 7 or iPhone 7 Plus: Press and hold the Volume Down button.
- For iPhone 6s or earlier: Press and hold the Home button.
- Step 2: Connect your Apple iPhone 6s Plus to the computer with the button held down.
- Step 3: Hold the buttons steadily until the Recovery Mode screen is visible.
Step 4: Switch on your Apple iPhone 6s Plus. Then, connect it to a Mac or Windows computer using a USB cable.
Step 5: When prompted, follow the on-screen instructions to enter your device passcode or click Trust This Computer.
Step 6: Depending on your computer, open Finder or iTunes. Then, do either of the following:
For macOS 10.15 or later: Select your Apple iPhone 6s Plus under the Locationssection, then click Restore iPhone.
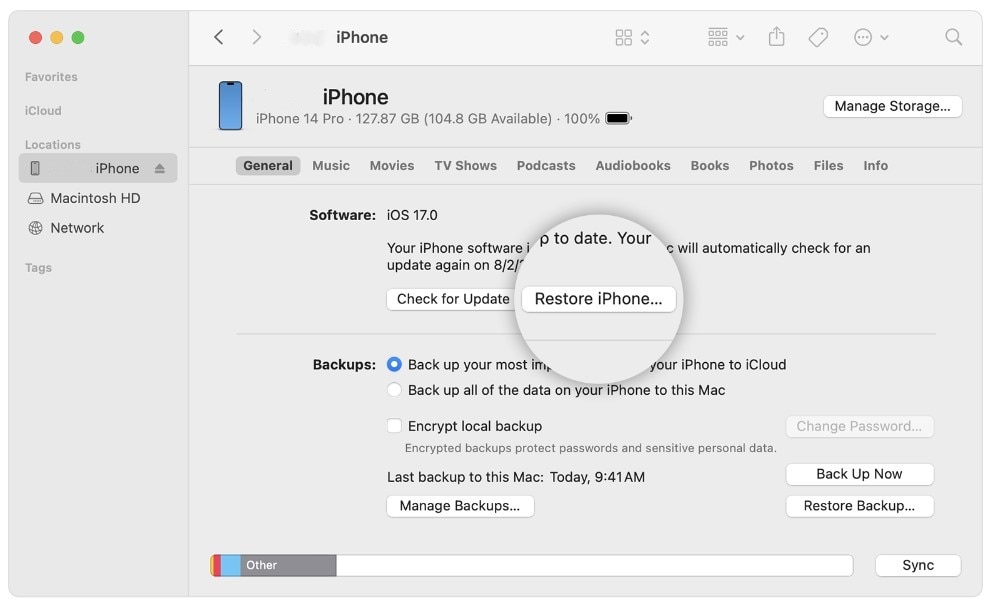
- For macOS 10.14 or earlier or Windows: Click the Apple iPhone 6s Plus in the top left window, click Summary, then click Restore iPhone.
- Step 7: Click Restore in the dialogue box. iTunes or Finder will download your Apple iPhone 6s Plus’s latest iOS software and restore the Apple iPhone 6s Plus to its factory settings.
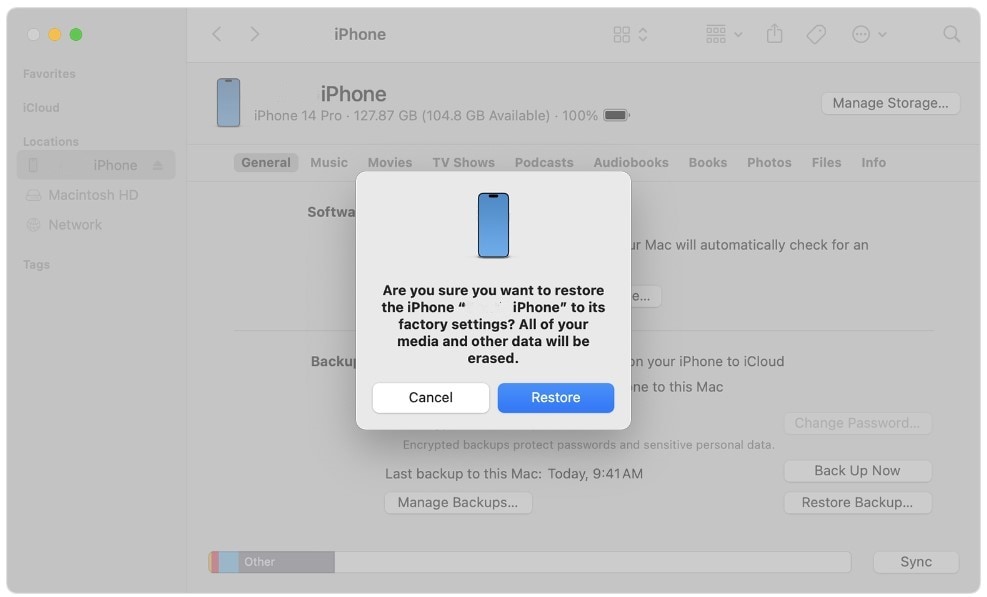
- Step 8: Once the restore is complete, the Apple iPhone 6s Plus will restart.
Part 4: Erase an iPhone Without Apple ID via Activation Lock Support Request
You can request to unlock Activation Lock support from Apple if your device is not in Lost Mode or if you need to erase an iPhone without an Apple ID password. To do this, you need to provide proof of purchase of the iPhone. It can be in the form of a receipt, invoice, or credit card statement.
The proof should show the serial number of the iPhone, IMEI, or MEID. Once Apple unlocks the Activation Lock on your Apple iPhone 6s Plus, your Apple iPhone 6s Plus contents will be permanently erased. Also, note that if you restore your Apple iPhone 6s Plus from a local backup, the Activation Lock will re-enable.
To start this request, follow these steps:
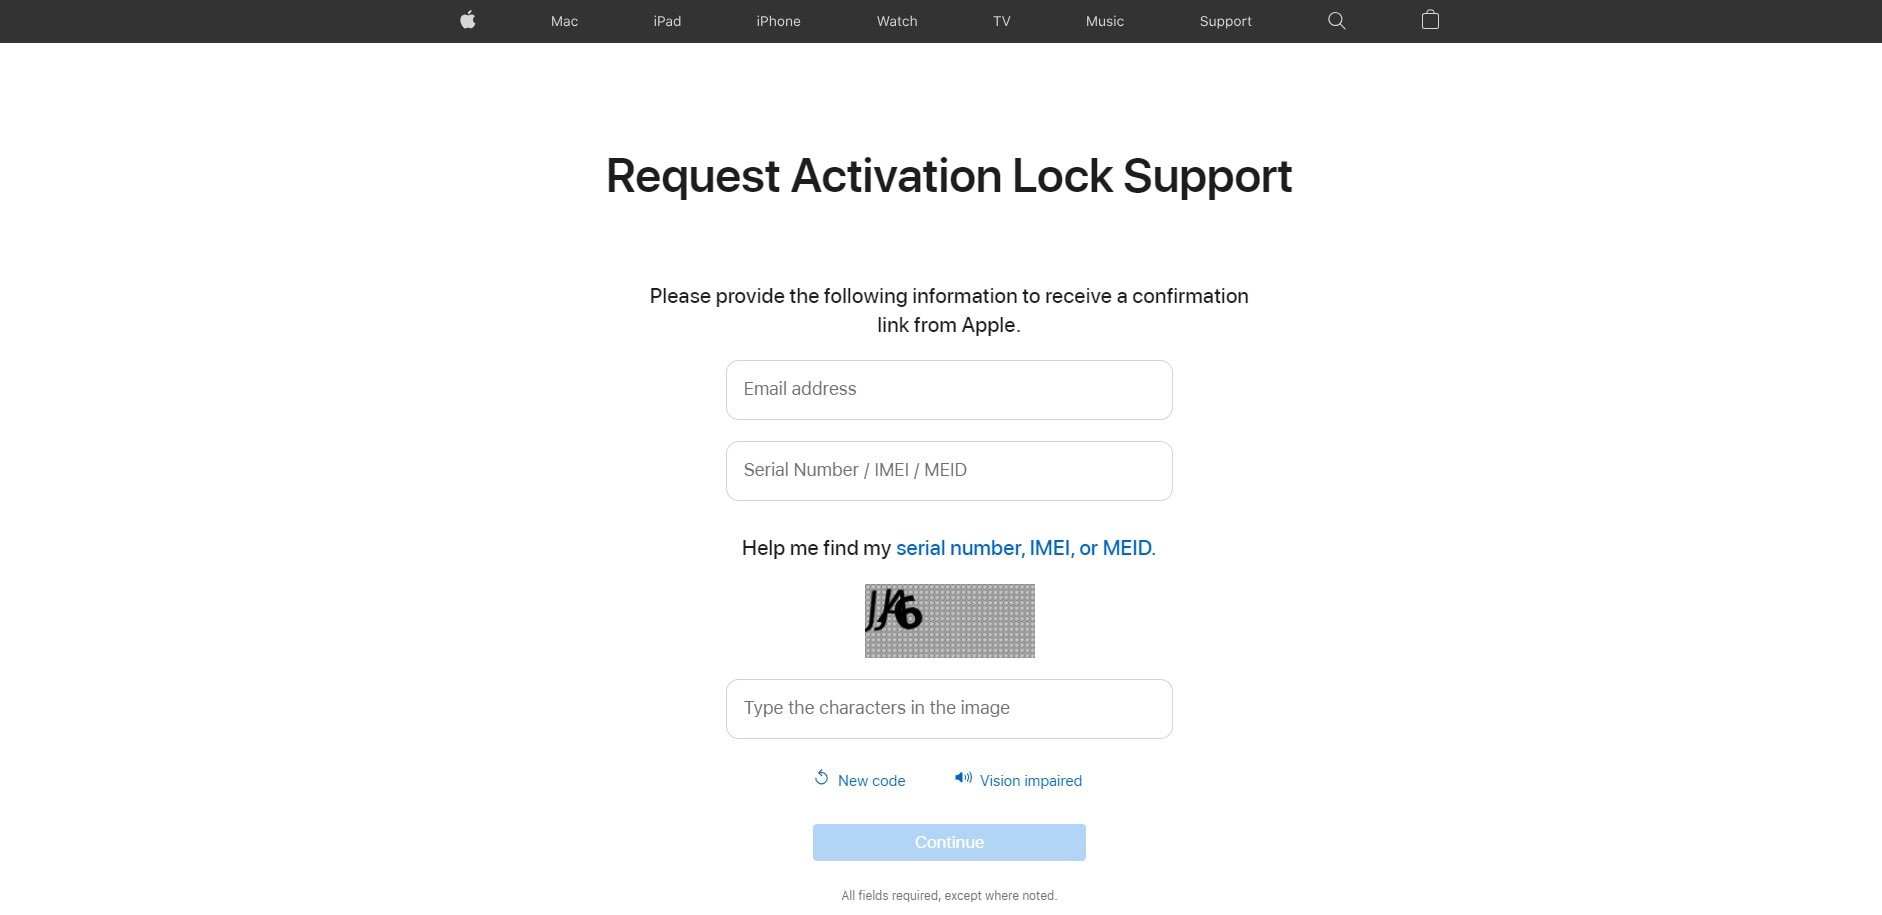
- Step 1: Head to Apple’s Activation Lock support page. (al-support.apple.com)
- Step 2: Scroll down the page, select the agreement checkbox, click Continue, and it will redirect you to a new page.

- Step 3: Enter your email address and other required information, then click Continue.
Part 5: How To Erase an iPhone Without an Apple ID Password in Minutes?
The time it takes to process an unlock Activation Lock support request can take days. If your device is erased as soon as possible, use the Wondershare Dr.Fone Screen Unlock tool. This third-party mobile solution can erase an iPhone without an Apple ID password, even if the Find My feature is enabled. Also, it can:
- Remove several iOS lock screens, such as passcode, Touch ID, and more.
- Remove the iCloud Activation Lock
- Bypass Apple ID from iPhone without a password
- Remove MDM restrictions
Dr.Fone Screen Unlock is a simple, easy-to-use tool compatible with the latest iOS models. Follow these steps to remove the Apple ID from your Apple iPhone 6s Plus and erase all its contents within minutes:
Step 1: Download and install Dr.Fone on your desktop. Launch the app and connect your Apple iPhone 6s Plus using a USB cable.
Step 2: From the Toolbox homepage, select Screen Unlock, then choose iOS.
- Step 3: Select Remove AppleID to delete iPhone contents, including the Apple ID.
- Step 4: The next screen shows the connected device. Click Unlock Now.

- Step 5: Click Yes to confirm you have set up a screen lock.

- Step 6: Click Yes to verify you have enabled two-factor authentication on your Apple iPhone 6s Plus.

- Step 7: Follow the in-app instructions to put your device in Recovery Mode.

- Step 8: Select an option from the System Version drop-down list, then click Start.
- Step 9: Wait while the iOS firmware downloads.

- Step 10: Once downloaded, click Unlock Now to proceed.
- Step 11: Enter the code in the dialogue box and click Unlock.

- Step 12: Keep your Apple iPhone 6s Plus connected to your computer while the process progresses.

- Step 13: Click Done and check that your Apple iPhone 6s Plus’s data and Apple ID have been removed.

Conclusion
It can be challenging to erase an iPhone without an Apple ID password, but it’s achievable by following the right steps. Remember to weigh the security implications and back up your data beforehand.
If you’re seeking a straightforward method on “how to erase an iPhone without Apple ID,” Dr.Fone Screen Unlock tool is a good solution. With its user-friendly interface and efficient operation, Dr.Fone simplifies the process, making it accessible to users of all technical levels. Don’t let a forgotten Apple ID password hinder your device’s functionality. Try Dr.Fone Screen Unlock and reclaim control of your Apple iPhone 6s Plus.
A Step-by-Step Guide to Finding Your Apple ID On Your Apple iPhone 6s Plus
In the world of Apple devices and services, your Apple ID is your key to unlocking a world of possibilities. The digital fingerprint connects you to your Apple iPhone 6s Plus, iPad, Mac, and all the apps and services you love. But if you’re asking, “How do I find my Apple ID?” you’ve come to the right place.
This article will take you on a journey to discover your Apple ID. The mission? To provide you with a clear guide, ensuring that finding your Apple ID is as easy as pie. So, dive in and unravel the secrets of your Apple ID!

Part I. A Brief Introduction to Apple ID?
At the heart of your Apple experience is an Apple ID. But what exactly is it, and why is it so important?

What Is My Apple ID?
Think of your Apple ID as your unique passkey to the entire Apple ecosystem. It’s a combination of your email address and a secure password that you use to sign in to all things Apple. Whether it’s your cherished iPhone, trusty iPad, or reliable Mac, your Apple ID ties them all together, making your digital life seamless.
Why Is Your Apple ID Significant?
Your Apple ID plays a crucial role in your digital journey. Here are some key points to highlight its significance:
- **Access to Apple Services.**Your ID is your golden ticket to various Apple services like the App Store, iTunes, and iCloud. It’s how you download apps, purchase music, and store your cherished photos and files in the cloud.
- **Device Linkage.**Your Apple ID serves as the glue that binds your devices. It ensures that your Apple iPhone 6s Plus, iPad, and Mac are in sync. When you change something on one device, it reflects across all your Apple gadgets.
- **Security and Privacy.**Apple places a high premium on security and privacy. Your ID helps keep your data safe and confidential, whether it’s your messages, emails, or personal information.
- **Find My.**If you ever misplace your Apple iPhone 6s Plus or other Apple devices, your Apple ID is your lifeline to track and recover them using the “Find My” feature.
- **App Purchases.**Your Apple ID remembers all the apps you’ve purchased, making it easy to reinstall them on a new device without repurchasing.
In a nutshell, your Apple ID is the gateway to a world of digital convenience and security. It makes your life easier, keeps your data safe, and ensures your Apple devices work seamlessly together. Now that you understand the importance of your Apple ID let’s move on to the exciting part: finding it!
Part II. How Do I Find My Apple ID on iPhone/iPad/Mac/Windows?
Knowing your Apple ID is the key to unlocking your Apple world. You’ll need your Apple ID if you’re an iPhone aficionado, a Mac enthusiast, or a Windows user dipping into the Apple ecosystem. Let’s explore how to find Apple ID on various devices.
On iPhone or iPad
The following steps are for finding your Apple ID on an iPhone or an iPad:
- Step 1: Begin by unlocking your Apple iPhone 6s Plus or iPad. Now, open the Settings app. It’s the one with the gearwheel icon – you can’t miss it!

- Step 2: Scroll down and tap “Sign in to your [Device].” If you’re already signed in, your name and Apple ID should be at the top.
- Step 3: There it is! Your Apple ID is displayed at the top of the screen, just beneath your name. Write it down or take a screenshot for safekeeping.

On Mac
Here’s how to locate your Apple ID on a Mac device:
- Step 1: If you’re on a Mac, click the “Apple logo” in the top-left corner of the screen. From the drop-down menu, select System Preferences.

- Step 3: In the System Preferences window, click on Apple ID.

- Step 4: Your Apple ID is now right in front of you, under your profile picture. Jot it down or take a screenshot – just in case.


On Windows PC
If you’ve lost your Apple ID and need to find it on your Windows device, follow these steps:
- Step 1: If you’re using a Windows PC, launch iCloud on your PC. Syncing your Apple device (such as an iPhone or iPad) to your computer is probably why you installed this.
Note: You can use iTunes instead of iCloud if you don’t have one on your Windows PC yet.

- Step 2: And that’s it! Your Apple ID should be there. Your Apple ID will be associated with your name as long as you are logged in.
Why It’s Important
Even on a Windows PC, your Apple ID is your gateway to Apple services, which means you can access your iCloud data and enjoy Apple Music and the iTunes Store.
Remember Knowing Your Apple ID Is Crucial
Your Apple ID is the key to a world of apps, services, and secure data. Knowing how to find it on your device is the first step in making the most of your Apple experience. So, take a moment to discover your Apple ID on your Apple iPhone 6s Plus, iPad, Mac, or Windows PC. It’s a small effort that brings you big benefits!
Part III. Want a Quicker Way To Unlock Your Apple Devices?
Have you ever found yourself locked out of your Apple device, desperately seeking a solution to regain access? If so, you’re not alone. For those times when you need a quick and reliable way to unlock your Apple device, Wondershare Dr.Fone - Screen Unlock is here to the rescue.
Introduction to Dr.Fone - Screen Unlock
So, what is Dr.Fone - Screen Unlock? It’s a nifty tool designed to simplify unlocking your Apple devices. Whether it’s a forgotten passcode, a locked screen, or an Apple ID issue, Dr.Fone - Screen Unlock is your go-to solution.
Key Features and Benefits
Let’s explore the key features and benefits of Dr.Fone - Screen Unlock:
- **Simplicity at Its Best.**One of the standout features of Dr.Fone - Screen Unlock is its simplicity. There is no need for technical expertise or hours of frustration. With a user-friendly interface, this tool makes the unlocking process a breeze, even for the less tech-savvy.
- Dr.Fone - Screen Unlock is designed to work swiftly, ensuring you regain access to your device in no time.
- It’s not limited to specific Apple devices – it supports various models, making it an all-in-one solution.
- **Data Protection.**The tool ensures your data remains intact during the unlocking process, so you don’t have to worry about losing precious information.
- Dr.Fone - Screen Unlock has a dedicated support team to assist you if you encounter any issues.
How To Use Dr.Fone - Screen Unlock
Unlocking your Apple device with Dr.Fone - Screen Unlock is as easy as 1-2-3. Here’s a step-by-step guide:
- Step 1: After Wondershare Dr.Fone has finished installing on your computer, go to Toolbox > Screen Unlock > iOS to open the relevant window.
- Step 2: Select the Unlock iOS Screen button repeatedly within the new window that has opened up so that you can proceed with unlocking the screen of your iOS device.

- Step 3: To begin unlocking the iOS device, tap Start on the following screen. Check to see if your gadget has adequate battery life.

- Step 4: The next step is to enter Recovery Mode on your iOS device. Put your iDevice into the appropriate mode by following the on-screen prompts. If you cannot get your iDevice to boot into Recovery Mode, you can attempt putting it into DFU mode by tapping the Try to enter DFU Mode button at the bottom.

- Step 5: The platform automatically recognizes the Device Model after users successfully enter Recovery Mode on their iDevice. Make any necessary adjustments to the model and pick the System Version. After that, tap the Start button to continue the screen unlocking process.
- Step 6: The next screen will show you where your device’s iOS firmware download stands. If you want to cancel the operation, just hit the Stop button. If the iOS firmware takes a long time to download on your platform, you can copy the download link by clicking the Copy option.
- Step 7: Once the iOS firmware has been downloaded and verified, it will be displayed on the following screen. Continue by clicking the Unlock Now button.
- Step 8: A dialog box asking for confirmation of the action will pop up on the screen. Enter the unlock code and select Unlock to continue.

- Step 9: On the following screen, you’ll see an iOS device’s unlocking status. Don’t forget to keep the Apple iPhone 6s Plus device plugged in, as doing otherwise will disrupt it.
- Step 10: To complete unlocking your iDevice, tap the Done button once you’re done. If you’re still stuck with a locked iOS device, tap the Try Again button to try again.

It’s important to note that Dr.Fone - Screen Unlock is a trusted solution that prioritizes data security and ease of use. So, if you ever find yourself locked out of your Apple device and need a quick and reliable way to unlock it, Dr.Fone - Screen Unlock should be your first choice.
Part IV. Additional Tips and Troubleshooting
While this guide has covered the basics of finding your Apple ID and using Dr.Fone - Screen Unlock, there are some common issues that Apple users might encounter. Here are some tips and troubleshooting solutions to help you navigate these problems:
Forgotten Apple ID Password
Issue: If you’ve forgotten your Apple ID password, don’t worry. You can reset it by following these steps:
- Visit the Forgot Apple ID or passwordlink on the Apple website.
- Enter your Apple ID and follow the prompts to reset your password.
Two-Factor Authentication Issues
Issue: Sometimes, two-factor authentication can cause access problems. Here’s what you can do:
- Ensure your trusted device is nearby when you sign in with your Apple ID.
- Verify that your device has an internet connection.
- Double-check your date and time settings.
Account Locked for Security Reasons
Issue: If your Apple ID is locked for security reasons, follow these steps:
- Visit iforgot.apple.com and unlock your account using your Apple ID and password.
- You may need to answer security questions or use two-factor authentication.
Problems With Apple ID Verification
Issue: If you’re having trouble with Apple ID verification, try these tips:
- Ensure you’re using the correct Apple ID and password.
- Check your email for a verification link.
- Follow the on-screen prompts for verification.
Unable To Sign Into iCloud
Issue: If you can’t sign in to iCloud, follow these steps:
- Make sure your device is running the latest software.
- Verify your network connection.
- Try signing in using a different device.
With these additional tips and troubleshooting solutions, you’ll be better prepared to handle any hiccups related to your Apple ID and password. We hope this information helps you make the most of your Apple experience!
Conclusion
In the vast Apple universe, your Apple ID is your golden ticket to an array of services and endless convenience. Remember, it’s not just a passcode; it’s your passport to an easier digital life. This “How to find Apple ID“ journey has been even smoother with Dr.Fone - Screen Unlock. This trusted tool simplifies the process, making it accessible to everyone.
So, explore Dr.Fone - Screen Unlock and make your Apple experience hassle-free. And don’t forget to safeguard your Apple ID like the treasure it is. Because with your Apple ID secure, you’re ready to unlock a world of endless possibilities!
- Title: In 2024, How To Reset the Security Questions of Your Apple ID On Your Apple iPhone 6s Plus
- Author: Alma
- Created at : 2024-07-14 12:03:54
- Updated at : 2024-07-15 12:03:54
- Link: https://apple-account.techidaily.com/in-2024-how-to-reset-the-security-questions-of-your-apple-id-on-your-apple-iphone-6s-plus-by-drfone-ios/
- License: This work is licensed under CC BY-NC-SA 4.0.