
In 2024, iCloud Separation How To Disconnect Apple iPhone 7 and iPad
iCloud Separation: How To Disconnect Apple iPhone 7 and iPad
Managing your iCloud is important to maintain the security of your Apple devices. Your iCloud account is the central hub for your photos, documents, contacts, and more. It’s essential to ensure that your devices are safe and secure. However, there are scenarios when you might want to remove it.
The page below will guide you on how to disconnect your Apple iPhone 7 from iCloud. It highlights the benefits of having full control over your data. Below, you can learn how to disconnect from iCloud,keeping your data organized and secure. Explore the article to learn more.

Part 1. Why Disconnect From iCloud?
iCloud is one of the most integral parts of the Apple ecosystem. It syncs your data across devices and ensures a connected digital experience. Yet, there are times when disconnecting from iCloud is necessary. Below are some specific reasons why you should learn how to disconnect your iPad/iPhone from iCloud.
Privacy Concerns
Privacy is an important concern in today’s digital age. Disconnecting from iCloud can provide a layer of security. It prevents sensitive information like photos, contacts, and documents from being stored in the cloud. This is important if you prefer to maintain complete control over your data.
Selling or Giving Away Your Device
When you decide to sell or give away your Apple iPhone 7 or iPad, it’s essential to disconnect it from iCloud. Failing to do so could allow the new owner access to your data. Disconnecting ensures your device is wiped clean of your iCloud information, protecting your privacy.
Limited Storage Space
Apple offers a limited amount of free iCloud storage. If you’ve reached or exceeded your storage quota, disconnecting certain devices can help free up space. It can also prevent annoying notifications about running out of storage and keep your backups and documents accessible.
Changing Apple ID
If you decide to change your Apple ID for any reason, disconnecting from iCloud is necessary. This operation allows you to reconnect your old ID to a new one if necessary. It ensures that all purchases, app downloads, and data are linked to the new ID.
The benefits of disconnecting from iCloud include enhanced security and privacy. Disconnecting your iCloud account can also lead to reduced usage. It’s great for users who want more control over their data or prefer to keep their devices offline.
Part 2. Disconnect iPhone/iPad From iCloud Through 6 Manners
Learning how to disconnect aniPhone or iPad from iCloudcan be necessary for various reasons. To guide you through the process, here are six methods to do so.
Use Settings To Access iCloud
- Step 1: Open the Settings app on your Apple iPhone 7/iPad. Next, tap your name at the top, where your Apple ID is listed.
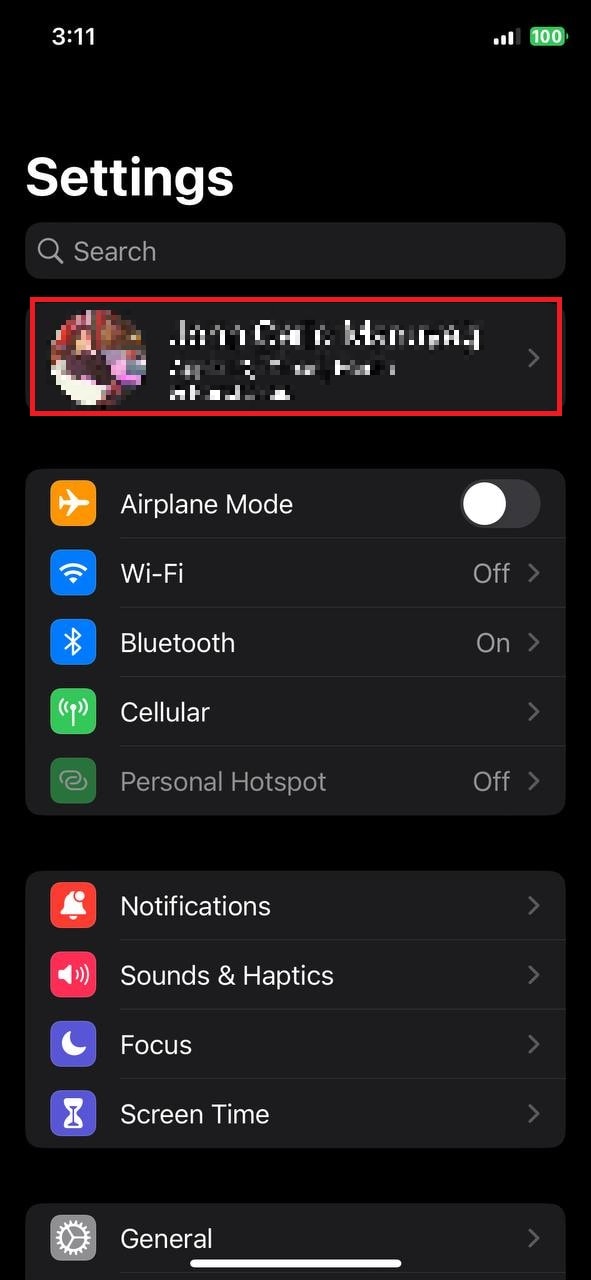
- Step 2: Scroll down and tap Sign Out. When prompted, type in your Apple ID and password. Next, choose TurnOff for the data you want to keep on your device. Afterwards, your Apple iPhone 7 or iPad is now disconnected from iCloud.
Visit iCloud.com
You can also remove your iCloud account on your Apple iPhone 7/iPad by visiting the iCloud.com website. Here’s how.
- Step 1: Launch a web browser on your computer or another device. Visit iCloud.com and sign in with your Apple ID.

- Step 2: Click AccountSettingsin the interface and scroll down. Choose the option to Sign Out of All Browsers. Next, confirm your choice to disconnect your iCloud from your Apple iPhone 7 or iPad.
Factory Reset
Performing a factory reset can cause all data on your device erased, effectively disconnecting it from iCloud. Here’s how.
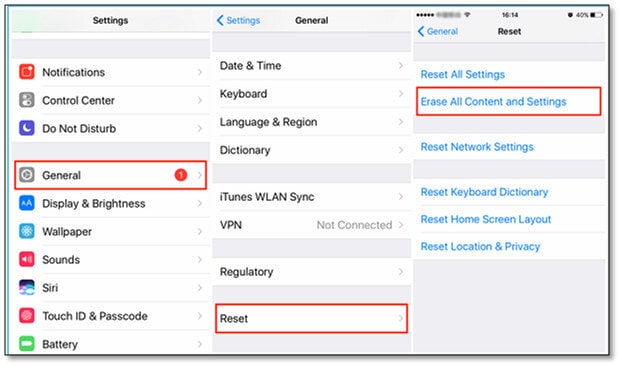
- Step 1:Go to your device’s Settings. Next, tap on General> Reset. ChooseErase All Content and Settings.

- Step 2: You’ll be prompted to enter your passcode and Apple ID password. Enter your details and confirm the reset.
Note
Be cautious with this method, as it will erase all data on your device.
Use the Find My App (iOS 13 and later)
You can use the Find My app to remove an iCloud account from a specific device. Here are the steps below.
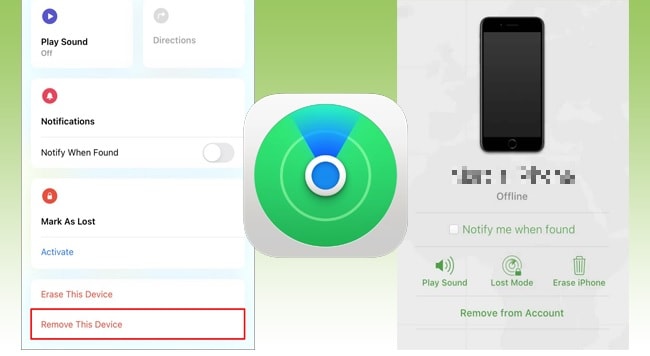
- Step 1: Open the Find Myapp on your device. Next, tap the Devicestab at the bottom.
- Step 2: Select the Apple iPhone 7 device you want to disconnect. Afterwards, tap Remove This Device. Once you confirm your choice, it will disconnect the Apple iPhone 7 device from an iCloud account.
Contact Apple Support
If you encounter issues disconnecting your device from iCloud, contacting Apple support is a wise choice. It’s a good option if you have difficulties using the previous methods. They can guide you through the process and offer personalized assistance.

Use a Third-Party Tool
If you’ve tried all the options and even contacted Apple support but still face persistent issues, it might indicate more serious problems. If it detects unusual activity, your Apple iPhone 7 or iPad might trigger iCloud’s Activation Lock. A trusted third-party tool like Wondershare Dr.Fone- Screen Unlock can work wonders in such cases.
Part 3. Steps To Remove iCloud From iPhone/iPad With a Flexible Alternative-Wondershare Dr.Fone
Dr.Fone is a flexible alternative tool that can remove iCloud from your Apple iPhone 7 or iPad. Your Apple iPhone 7 or iPad will most likely trigger iCloud’s Activation Lock if all the steps above do not solve your issue. In that case, Dr.Fone - Screen Unlock can help you bypass it, allowing you to regain control of your device. The steps below show you how to disconnect from iCloudin 3 simple steps.
- Step 1: Start by downloading and installing Dr.Fone on your computer. Once installed, launch the program. Click Toolbox> ScreenUnlock> iOSto move on to the next process.

- Step 2: On the next window, select iCloud Activation Lock Removal to initiate the process. Next, connect your Apple iPhone 7/iPad to the computer with a USB cable. Wait for Dr.Fone to recognize your device, and it will lead to the next screen.

- Step 3: Follow the next on-screen instructions. Afterwards, Dr.Fone will automatically remove the ActivationLockdisplayed under the progress bar.
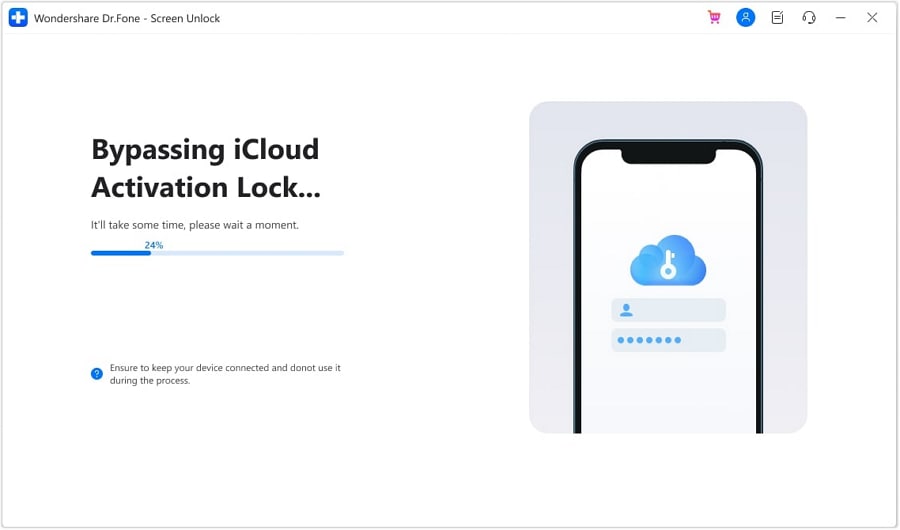
Once the process is completed, you should see the completion message below. Select Done to finish the removal of the iCloud Activation Lock on your Apple iPhone 7 or iPad. A successful process will automatically remove the iCloud on your device.

Part 4. How Dr.Fone Can Benefit You in Other Aspect
Dr.Fone goes beyond bypassing the iCloud activation lock. It offers a wide range of essential features that can enhance your device management and data recovery capabilities. Below are some key features that make Wondershare Dr.Fone a reliable tool.

- Unlock Apple ID without a Password. Dr.Fone allows you to unlock your Apple ID without needing a password. The feature is helpful if you’ve been locked out of your account or face authentication issues.
- **Remove SIM Lock/Phone Carrier.**The tool can also remove SIM locks and phone carrier restrictions. This feature allows you to use your device with any carrier or SIM card.
- **No Data Loss.**A crucial advantage of Dr.Fone is its ability to perform all these operations without causing data loss. Your precious data, apps, and settings remain intact throughout the process.
Apart from its iCloud-related capabilities, Dr.Fone offers a comprehensive set of tools for managing your iOS device.
Data Recovery
Dr.Fone can help you recover lost or deleted data. Retrieve your messages, photos, videos, contacts, and more. The feature is a lifesaver when accidental data loss occurs.
Phone Manager
You can manage your device’s data directly on your computer. Transfer files and easily perform tasks like importing, exporting, or deleting content.
Phone Backup
Dr.Fone provides robust backup solutions. The platform allows you to create backups of your device and restore them when needed. It’s an essential part of maintaining the integrity of your data.
Conclusion
Managing your iCloud is essential for maintaining privacy and control over your Apple devices. The various methods on how to disconnect your Apple iPhone 7 from iCloudcater to different scenarios. Whether you disconnect using device settings or the flexibility of third-party tools like Dr.Fone, the choice is yours.
With these options at your disposal, you can tailor your data to meet your specific needs. Always remember that having a handy third-party tool like Dr.Fone can put your data worries at ease. It ensures you have another method of how to disconnect from iCloudfor any iCloud-related concerns.
How to Erase an Apple iPhone 7 without Apple ID?
Our generation is all about high-performance gadgets and, a phone is one of the most important of it all. But with the concept of a smartphone, things have changed. iPhone/iPad has emerged as an important fashion quotient for a long now.
We often end up buying second-hand iPhones/iPads or sell our old version of the phones/pads to an unknown person and buy a new version of other brands, like Samsung S22. At times, be it after-sale/purchase or old iPhone, or if you may have yourself forgotten the password to your Apple ID, we often come across a big challenge, and that is how to erase an iPhone without an Apple ID password. Well, if that’s the case with you, then you’ve reached the right place. We’re about to discuss the most effective ways to erase an iPhone without an Apple ID password. Let’s discover them.
Part 1. How to erase an iPhone without Apple ID and iTunes
When it comes to taking care of all your Apple iPhone 7 recovery solutions, Dr. Fone has effectively managed to make a mark in the field. Especially when it comes to erasing an iPhone without an Apple ID password, the Dr.Fone – Screen Unlock (iOS) can help you get it done without a hitch. Not only can you erase an iPhone without an Apple ID password, but you can also get the Apple ID/iCloud lock removed too with much ease. With over 5 million-plus users, the tool is the most recommended in the market, serving every customer to their content.
Key Features:
The key features of Dr.Fone – Screen Unlock (iOS) are –
- It can unlock an iPhone/iPad by erasing an iPhone without an Apple ID password.
- Even when your screen is damaged and you cannot enter a passcode, Dr. Fone – Screen Unlock (iOS) can effortlessly get it done.
- If the passcode is wrongly set by your kids or an unknown, this software can help unlock the same.
- Works efficiently with almost all iOS devices and supports even the latest iOS version 14.
Step by Step Tutorial:
Let’s get to understand how to erase an iPhone without an Apple ID password:
Step 1: Connecting the iPhone/iPad
The first thing to do is download and install the Dr.Fone – Screen Unlock (iOS) software on your computer/laptop. Before you move on to any other step, connect your affected iPhone/iPad to your computer or laptop with the help of a USB.
Step 2: Select the correct Mode.
After the installation is done completely, launch the tool and select the “Screen Unlock” option on the software’s home interface. A new screen interface will appear, you will have three different options. You need to select the “Unlock iOS Screen” option and, this will start the entire process of unlocking.

Step 3: Boot your device into Recovery/DFU Mode
You now have to boot your Apple iPhone 7 or iPad device into Recovery mode or DFU mode so that the software can recognize your device for further process. For your convenience, Dr. Fone Screen Unlock (iOS) has a built-in instruction facility that helps you to follow the steps.

Step 4: Confirm the information and download firmware
After a successful reboot into Recovery mode, the tool will automatically detect your device’s information and the most compatible iOS firmware. To start the process of downloading the firmware, you need to hit on “Start” button.

Step 5: Erase an iPhone without an Apple ID password.
Once the download is complete, you can get started with erasing an iPhone without an Apple ID password. Hit the “Unlock Now” button, and voila! In no time, you’ve successfully erased an iPhone without an Apple ID password.

Part 2. Erase an iPhone without Apple ID via iTunes
Sometimes your phone might ask for an Apple ID and password to confirm your authority. In such cases, you may get stuck as either you have forgotten the password to it, or you don’t remember the Apple ID in the first place. For that matter, where it needs immediate help, we have listed down a set of steps that can help you erase an iPhone without Apple ID via iTunes –
Step 1: Connect your Apple iPhone 7 to the computer with the help of a USB and then open your iTunes.
Step 2: The best way to start the process is to move your phone to recovery mode. For this, you need to:
In iPhone 8 or later: Tap the Volume Up, then quickly tap Volume Down and hold down the Power key afterward.

In the case of iPhone 7/7Plus: Press the “Sleep/Power” and “Volume Down” keys together.
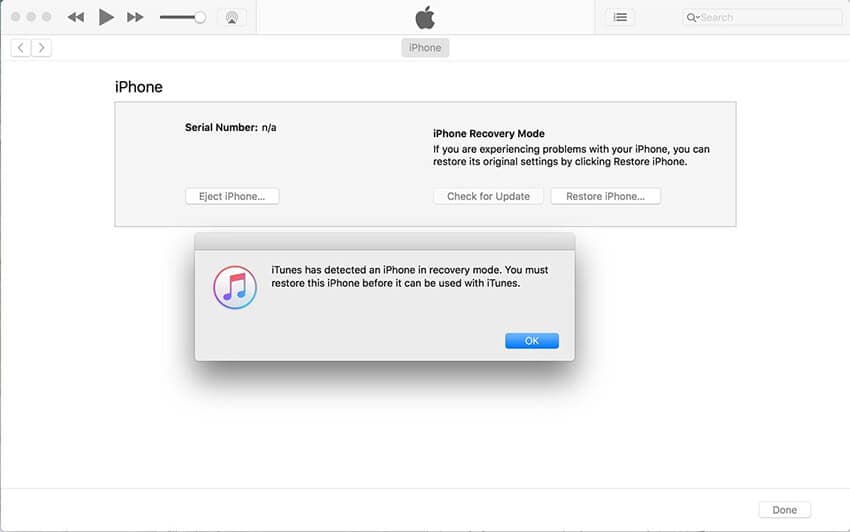
Hold down the keys until you see the message on your iTunes screen about “your iPhone has been detected in recovery mode.”
Step 3: Once done, click on “Ok” and choose the “Restore iPhone” option. Confirm your actions, and you’re done.
Part 3. How to erase an iPhone without Apple ID via Settings
Erasing an iPhone without Apple ID becomes necessary when we happen to use a second-hand phone or when we share a phone with someone. It is indeed a hard task to overcome these issues as we constantly strive to change our phone or replace it with a second-hand one. We have jotted a few steps that can help you erase an iPhone without Apple ID via settings for your ease.
Step 1: On your Apple iPhone 7, press the “Settings” icon on your App drawer.
Step 2: Under the Settings, scroll down and click on the “General” option.
Step 3: Now, you need to scroll all the way down to the “Reset” button and click on it. Then, look for “Erase All Content and Settings” and tap on the same.
Step 4: Enter your passcode to confirm. This action will pop up a screen where you need to select Erase iPhone again, and boom, you are done now.
Part 4. Tip you may need to erase Apple ID
Now, just in case you wish to delete your Apple ID completely, you need to perform a simple practice of removing any devices associated with your Apple ID.
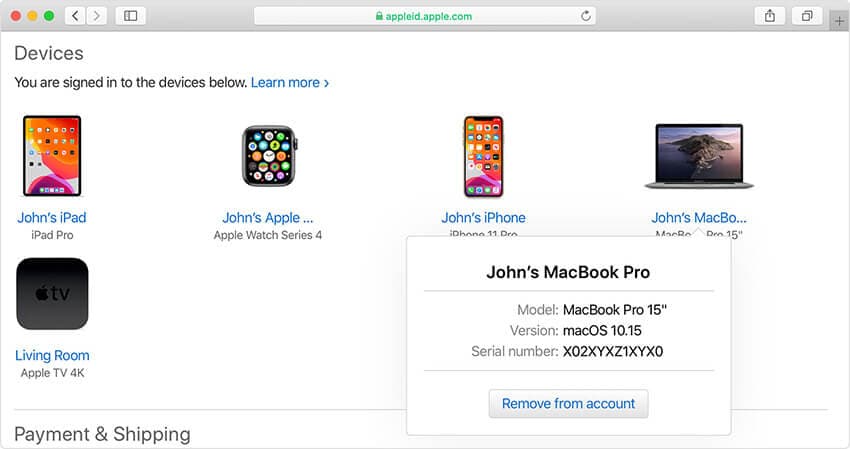
Step 1: One can simply visit appleid.apple.com and log in with the Apple ID credentials already allotted to the user.
Note: You might get a prompt of a two-factor authentication code while being on this page.
Step 2: Once you scroll down the line, choose, and click on the “Device” option.
Step 3: Choose the desired device and click on the “Remove from account” option followed by a “Remove this – Device Name” to confirm the action. Perform this step for all other devices.
How to erase an Apple ID via Apple’s Data and Privacy website
Now let’s get started with erasing an Apple ID via Apple’s Data and Privacy website are simple and, we have mentioned a simple way to take care of the same:
Step 1: Once you’re done removing the Apple iPhone 7 devices linked to your Apple ID, visit privacy.apple.com and log in with the same Apple ID and password credentials.
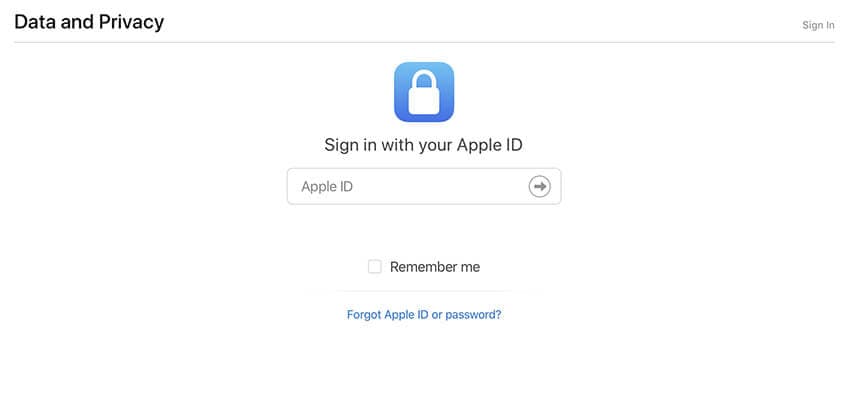
Step 2: Once you authenticate, click on the prompt indicating the option to “Continue.”
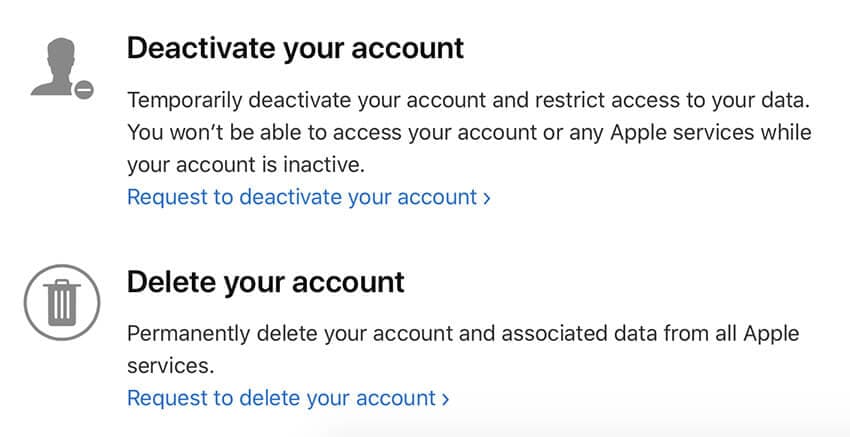
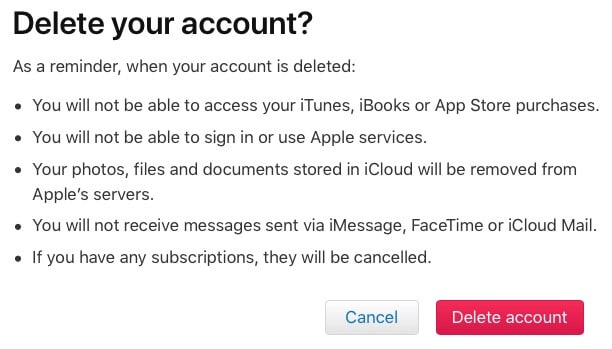
Step 3: Once you click on the “Get started” prompt on the screen, you will get a tab to “Delete your account.” This will prompt you with an Apple message indicating the information regarding the deletion process time.
Step 4: Before everything, make sure you back up your data and follow the instructions steps prompted by Apple’s website. This will lead you to choose a reason for deletion from the click-down option and click “Continue.”
Message – You will get the details of the entire process for a quick review before you can submit for the final deletion of the policies
Step 5: Click on “Delete terms and conditions” by checking the read and agreed on the box. Make sure to provide a good call-back number to finalize the process.
Step 6: This submission will give you your access code which you can later use for clarification and, now you can click on the “Delete Account” option
Conclusion
Coming towards the end of the topic, we now are fully sure that you fully understand how to erase an iPhone without an Apple ID. Just in case you have any doubts, please feel free to comment below. And do remember to share this with your friends and family if you find it useful.
A Step-by-Step Guide to Finding Your Apple ID On Your Apple iPhone 7
In the world of Apple devices and services, your Apple ID is your key to unlocking a world of possibilities. The digital fingerprint connects you to your Apple iPhone 7, iPad, Mac, and all the apps and services you love. But if you’re asking, “How do I find my Apple ID?” you’ve come to the right place.
This article will take you on a journey to discover your Apple ID. The mission? To provide you with a clear guide, ensuring that finding your Apple ID is as easy as pie. So, dive in and unravel the secrets of your Apple ID!

Part I. A Brief Introduction to Apple ID?
At the heart of your Apple experience is an Apple ID. But what exactly is it, and why is it so important?

What Is My Apple ID?
Think of your Apple ID as your unique passkey to the entire Apple ecosystem. It’s a combination of your email address and a secure password that you use to sign in to all things Apple. Whether it’s your cherished iPhone, trusty iPad, or reliable Mac, your Apple ID ties them all together, making your digital life seamless.
Why Is Your Apple ID Significant?
Your Apple ID plays a crucial role in your digital journey. Here are some key points to highlight its significance:
- **Access to Apple Services.**Your ID is your golden ticket to various Apple services like the App Store, iTunes, and iCloud. It’s how you download apps, purchase music, and store your cherished photos and files in the cloud.
- **Device Linkage.**Your Apple ID serves as the glue that binds your devices. It ensures that your Apple iPhone 7, iPad, and Mac are in sync. When you change something on one device, it reflects across all your Apple gadgets.
- **Security and Privacy.**Apple places a high premium on security and privacy. Your ID helps keep your data safe and confidential, whether it’s your messages, emails, or personal information.
- **Find My.**If you ever misplace your Apple iPhone 7 or other Apple devices, your Apple ID is your lifeline to track and recover them using the “Find My” feature.
- **App Purchases.**Your Apple ID remembers all the apps you’ve purchased, making it easy to reinstall them on a new device without repurchasing.
In a nutshell, your Apple ID is the gateway to a world of digital convenience and security. It makes your life easier, keeps your data safe, and ensures your Apple devices work seamlessly together. Now that you understand the importance of your Apple ID let’s move on to the exciting part: finding it!
Part II. How Do I Find My Apple ID on iPhone/iPad/Mac/Windows?
Knowing your Apple ID is the key to unlocking your Apple world. You’ll need your Apple ID if you’re an iPhone aficionado, a Mac enthusiast, or a Windows user dipping into the Apple ecosystem. Let’s explore how to find Apple ID on various devices.
On iPhone or iPad
The following steps are for finding your Apple ID on an iPhone or an iPad:
- Step 1: Begin by unlocking your Apple iPhone 7 or iPad. Now, open the Settings app. It’s the one with the gearwheel icon – you can’t miss it!

- Step 2: Scroll down and tap “Sign in to your [Device].” If you’re already signed in, your name and Apple ID should be at the top.
- Step 3: There it is! Your Apple ID is displayed at the top of the screen, just beneath your name. Write it down or take a screenshot for safekeeping.

On Mac
Here’s how to locate your Apple ID on a Mac device:
- Step 1: If you’re on a Mac, click the “Apple logo” in the top-left corner of the screen. From the drop-down menu, select System Preferences.

- Step 3: In the System Preferences window, click on Apple ID.

- Step 4: Your Apple ID is now right in front of you, under your profile picture. Jot it down or take a screenshot – just in case.

On Windows PC
If you’ve lost your Apple ID and need to find it on your Windows device, follow these steps:
- Step 1: If you’re using a Windows PC, launch iCloud on your PC. Syncing your Apple device (such as an iPhone or iPad) to your computer is probably why you installed this.
Note: You can use iTunes instead of iCloud if you don’t have one on your Windows PC yet.

- Step 2: And that’s it! Your Apple ID should be there. Your Apple ID will be associated with your name as long as you are logged in.
Why It’s Important
Even on a Windows PC, your Apple ID is your gateway to Apple services, which means you can access your iCloud data and enjoy Apple Music and the iTunes Store.
Remember Knowing Your Apple ID Is Crucial
Your Apple ID is the key to a world of apps, services, and secure data. Knowing how to find it on your device is the first step in making the most of your Apple experience. So, take a moment to discover your Apple ID on your Apple iPhone 7, iPad, Mac, or Windows PC. It’s a small effort that brings you big benefits!
Part III. Want a Quicker Way To Unlock Your Apple Devices?
Have you ever found yourself locked out of your Apple device, desperately seeking a solution to regain access? If so, you’re not alone. For those times when you need a quick and reliable way to unlock your Apple device, Wondershare Dr.Fone - Screen Unlock is here to the rescue.
Introduction to Dr.Fone - Screen Unlock
So, what is Dr.Fone - Screen Unlock? It’s a nifty tool designed to simplify unlocking your Apple devices. Whether it’s a forgotten passcode, a locked screen, or an Apple ID issue, Dr.Fone - Screen Unlock is your go-to solution.
Key Features and Benefits
Let’s explore the key features and benefits of Dr.Fone - Screen Unlock:
- **Simplicity at Its Best.**One of the standout features of Dr.Fone - Screen Unlock is its simplicity. There is no need for technical expertise or hours of frustration. With a user-friendly interface, this tool makes the unlocking process a breeze, even for the less tech-savvy.
- Dr.Fone - Screen Unlock is designed to work swiftly, ensuring you regain access to your device in no time.
- It’s not limited to specific Apple devices – it supports various models, making it an all-in-one solution.
- **Data Protection.**The tool ensures your data remains intact during the unlocking process, so you don’t have to worry about losing precious information.
- Dr.Fone - Screen Unlock has a dedicated support team to assist you if you encounter any issues.
How To Use Dr.Fone - Screen Unlock
Unlocking your Apple device with Dr.Fone - Screen Unlock is as easy as 1-2-3. Here’s a step-by-step guide:
- Step 1: After Wondershare Dr.Fone has finished installing on your computer, go to Toolbox > Screen Unlock > iOS to open the relevant window.
- Step 2: Select the Unlock iOS Screen button repeatedly within the new window that has opened up so that you can proceed with unlocking the screen of your iOS device.

- Step 3: To begin unlocking the iOS device, tap Start on the following screen. Check to see if your gadget has adequate battery life.

- Step 4: The next step is to enter Recovery Mode on your iOS device. Put your iDevice into the appropriate mode by following the on-screen prompts. If you cannot get your iDevice to boot into Recovery Mode, you can attempt putting it into DFU mode by tapping the Try to enter DFU Mode button at the bottom.
- Step 5: The platform automatically recognizes the Device Model after users successfully enter Recovery Mode on their iDevice. Make any necessary adjustments to the model and pick the System Version. After that, tap the Start button to continue the screen unlocking process.
- Step 6: The next screen will show you where your device’s iOS firmware download stands. If you want to cancel the operation, just hit the Stop button. If the iOS firmware takes a long time to download on your platform, you can copy the download link by clicking the Copy option.

- Step 7: Once the iOS firmware has been downloaded and verified, it will be displayed on the following screen. Continue by clicking the Unlock Now button.
- Step 8: A dialog box asking for confirmation of the action will pop up on the screen. Enter the unlock code and select Unlock to continue.

- Step 9: On the following screen, you’ll see an iOS device’s unlocking status. Don’t forget to keep the Apple iPhone 7 device plugged in, as doing otherwise will disrupt it.
- Step 10: To complete unlocking your iDevice, tap the Done button once you’re done. If you’re still stuck with a locked iOS device, tap the Try Again button to try again.

It’s important to note that Dr.Fone - Screen Unlock is a trusted solution that prioritizes data security and ease of use. So, if you ever find yourself locked out of your Apple device and need a quick and reliable way to unlock it, Dr.Fone - Screen Unlock should be your first choice.
Part IV. Additional Tips and Troubleshooting
While this guide has covered the basics of finding your Apple ID and using Dr.Fone - Screen Unlock, there are some common issues that Apple users might encounter. Here are some tips and troubleshooting solutions to help you navigate these problems:
Forgotten Apple ID Password
Issue: If you’ve forgotten your Apple ID password, don’t worry. You can reset it by following these steps:
- Visit the Forgot Apple ID or passwordlink on the Apple website.
- Enter your Apple ID and follow the prompts to reset your password.
Two-Factor Authentication Issues
Issue: Sometimes, two-factor authentication can cause access problems. Here’s what you can do:
- Ensure your trusted device is nearby when you sign in with your Apple ID.
- Verify that your device has an internet connection.
- Double-check your date and time settings.
Account Locked for Security Reasons
Issue: If your Apple ID is locked for security reasons, follow these steps:
- Visit iforgot.apple.com and unlock your account using your Apple ID and password.
- You may need to answer security questions or use two-factor authentication.
Problems With Apple ID Verification
Issue: If you’re having trouble with Apple ID verification, try these tips:
- Ensure you’re using the correct Apple ID and password.
- Check your email for a verification link.
- Follow the on-screen prompts for verification.
Unable To Sign Into iCloud
Issue: If you can’t sign in to iCloud, follow these steps:
- Make sure your device is running the latest software.
- Verify your network connection.
- Try signing in using a different device.
With these additional tips and troubleshooting solutions, you’ll be better prepared to handle any hiccups related to your Apple ID and password. We hope this information helps you make the most of your Apple experience!
Conclusion
In the vast Apple universe, your Apple ID is your golden ticket to an array of services and endless convenience. Remember, it’s not just a passcode; it’s your passport to an easier digital life. This “How to find Apple ID“ journey has been even smoother with Dr.Fone - Screen Unlock. This trusted tool simplifies the process, making it accessible to everyone.
So, explore Dr.Fone - Screen Unlock and make your Apple experience hassle-free. And don’t forget to safeguard your Apple ID like the treasure it is. Because with your Apple ID secure, you’re ready to unlock a world of endless possibilities!
Also read:
- [Updated] 2024 Approved How to Capture and Share Your Games Online
- 5 Best Mid-Range Gaming Keyboards for Enthusiasts
- Direct MP3 to YouTube 3 Steps for Seamless Video Posting
- Guía Fácil De Recuperar Archivos De Un Disco Duro Externo Sin Formatear
- How To Remove Phone Number From Your Apple ID on Your iPhone 12 mini?
- How To Transfer WhatsApp From iPhone 15 to other iPhone? | Dr.fone
- In 2024, 5 Ways to Track Infinix GT 10 Pro without App | Dr.fone
- In 2024, How to Delete iCloud Account From iPhone 14 Pro without Password?
- In 2024, How To Remove Phone Number From Your Apple ID from Your iPhone 15 Plus?
- In 2024, How to Sign Out of Apple ID From iPhone 14 without Password?
- In 2024, Removing Device From Apple ID For your Apple iPhone 13 mini
- In 2024, Your Account Has Been Disabled in the App Store and iTunes From Apple iPhone 6 Plus?
- MTS形式ビデオのPCエディット方法 - ステップバイステップチュートリアル
- Top-Notch Solutions for Disabled Apple ID From iPhone 6 Plus Making It Possible
- Troubleshooting Guide: Resolving PC Instability and Crashes in NBA 2K21
- Unleashing Video Potential The iMovie Blueprint for YouTube Editors for 2024
- Title: In 2024, iCloud Separation How To Disconnect Apple iPhone 7 and iPad
- Author: Alma
- Created at : 2025-02-13 17:03:28
- Updated at : 2025-02-14 20:08:11
- Link: https://apple-account.techidaily.com/in-2024-icloud-separation-how-to-disconnect-apple-iphone-7-and-ipad-by-drfone-ios/
- License: This work is licensed under CC BY-NC-SA 4.0.