
In 2024, Turning Off Two Factor Authentication From Apple iPhone XR? 5 Tips You Must Know
Turning Off Two Factor Authentication On Apple iPhone XR? 5 Tips You Must Know
Apple has produced one of the most consumed, acknowledged, and preferred smartphones that allowed them to rule the industry for a considerably long period of time. Their style and presentation were not the only reason that made people look forward to buying an iPhone. Apple created its own operating system and presented their own versions of security and protection. One of the most recognized and impeccable features offered by Apple in its innovative structure was the security and safety through Apple ID and Apple Account. Every important feature that operated throughout the Apple iPhone XR or iPad was focused over a single entity, the Apple ID. However, apart from the Apple ID, there were several other layers of authentications and verifications that were added throughout the protocol structure. A couple of them are renowned as Two Factor Verification and Two Factor Authentication. This article produces a very generous set of advice that should be looked over while handing these layers of protection. To get a better understanding of the procedures involved, you need to look over the guide to gain better knowledge on how to turn off Two Factor Authentication on your Apple.

Part 1. Is two-step verification the same as two-factor authentication?
There might be a few differences involved in these two security models; however, it should be kept in mind that they focus their purpose on securing the Apple ID of the user. Two Factor Verification is a security protocol that protects access to the various activities performed through the Apple ID. It attenuates an extra verification step across the Apple iPhone XR device in addition to the password for the Apple ID. The device receives a verification code from an authentication factor that allows the authorities to confirm the credibility of the user.
The Two Factor Authentication is considered as an upgrade to the Two Factor Verification, which was released two years after the Two Factor Verification, in 2015. This authentication method exempted the offline recovery keys and application-specific passcodes. They added a six-digit authentication code onto the original password and produced an offline, time-dependent code that is to be generated through the Settings of the trusted device of the user. This feature was appended into the iOS 9 and OS X El Capitan with a region-specific target.
Part 2. How to turn off two-step verification?
As you are aware of the Two-Step Verification process, it is quite easy and typical in configuring. However, when it comes to turning the settings off, it is also a simple and straightforward procedure that can be easily covered by following the steps provided below.
Step 1: You are required to open the Apple ID Account web page on your browser and sign in with your Apple ID credentials.
Step 2: As you log into the website, access the “Security” section, and tap “Edit” from the options provided on the list.
Step 3: Tap on the “Two-Step Verification” option and turn it off. Confirm to conclude the process. You may be required to select the new security questions and verify the data of birth in the process. As you would be done with it, an email would be received across your connected address for confirmation.
Part 3. How to turn off two-factor authentication? (lower than iOS 10.3)
Two Factor Authentication cannot be turned off in a few cases and accounts for iOS versions greater than 10.3. However, if you have activated Two Factor Authentication across the iOS versions lower than 10.3, you can deactivate the feature through a series of simple steps. The exemption of this security feature across your device leaves it protected only through a password and a few security questions. For turning off the Two Factor Authentication from your Apple device, you need to follow the steps provided as follows:
Step 1: Open your browser and access your Apple ID Account website. Provide the details of your Apple ID and log in.
Step 2: Tap on “Edit” in the “Security” section and turn off the “Two Factor Authentication” option.
Step 3: This would lead you to set new security questions for the Apple ID account, followed by a verification of your date of birth. The successful execution of the process would lead to turning it off.
Part 4. Why can’t you turn off two-factor authentication if you already use it? (iOS 10.3 and later)
For users who have an Apple device with an iOS 10.3 or later version, they cannot turn the Two Factor Authentication off after it is accessed. The latest iOS and macOS included extra layers of security in their features, which led towards a better security foundation and protection of information. Users who have updated their account information can unenroll in two weeks after updating. For this, you are required to simply access the confirmation email that you have received and tap on the link to approach the previous security settings. Thus, it makes it far more than impossible for users to turn their Two Factor Authentication off if they consider it unnecessary for their device. This feature is something that would always remain intact with their device as an extra layer of security. Its absence does leave a chance of illegal access to the Apple iPhone XR device and an increased risk of a security breach. Since it is directly built across the Apple iPhone XR device and its settings, this makes it a very hard-to-approach characteristic.
Part 5. How to turn off two-factor authentication by removing Apple ID
Users who are very reluctant to remove the two-factor authentication off their device can consider removing the Apple ID itself for fulfilling the purpose. However, when it comes to executing such tasks, the need for a third-party platform gets evident. Third-party platforms provided dedicated services in providing users with a unique platform of operation with an environment that suits their purpose perfectly. Many platforms provide such impressive services, yet the selection gets quite difficult for a series of reasons. The following pointers explain the reasons to the users over why they should focus on selecting a platform such as Dr. Fone – Screen Unlock (iOS) for this purpose.
- You need to have no excessive knowledge of handling the platform.
- You can cover all the dynamics of unlocking the Apple iPhone XR device without the use of iTunes.
- The platform provides you with the ability to unlock the passcode of your Apple device with ease.
- It offers you to protect your device from the disabled state.
- Works across all models of iPhone, iPad, and iPod Touch.
- Provides services to the latest version of iOS.
Dr. Fone – Screen Unlock (iOS) makes it easy for the users to control and remove their Apple ID and disable the two-factor authentication across their device. However, when it comes to controlling the platform, it follows a few simple and efficient steps that would guide you in executing the task successfully.
Step 1: Connect your Device and Launch Application
You need to connect your Apple device with the desktop and launch Dr. Fone across the computer. Tap on the “Screen Unlock” tool present on the home window and proceed with the removal of two-factor authentication.

Step 2: Access Appropriate Option
On the next screen that opens, you are required to select “Unlock Apple ID” from the three options. Proceed to your Apple device to take the process further.

Step 3: Trust the Computer
Open the Apple iPhone XR device and tap on “Trust” over the prompt that appears on the screen. Following this, you need to navigate to the Settings of your device to initiate a reboot.

Step 4: Execution of Process
Once you are done with initiating a reboot, the platform automatically detects the update in the process and initiates removing the Apple ID from the Apple iPhone XR device. Once the platform is done with the process, it provides a prompt message in the next window displaying the execution of the removal of Apple ID from your device. This also removes the Two Factor Authentication off your device.

Conclusion
The article has presented a very detailed comparison of the Two Factor Verification and Two Factor Authentication and provided an elaborated discussion over how to turn these security features off their devices. The article also discussed a third-party platform that would guide in removing such security features of the Apple iPhone XR devices over the requirement of the user. You need to go through this article to get a better knowledge of the execution of the mechanism.
How to Sign Out of Apple ID On Apple iPhone XR without Password?
“Why can’t I sign out of my iPhone?”
It’s no secret that all Apple products have one common USP, i.e., security. Whether you’re using an iPhone or an iPad, creating an Apple ID online is needed. It is practically impossible for someone else to access your device without your permission. However, this factor can also become a severe headache, especially if you have forgotten the password to your Apple ID.
Without the password, you can’t even sign out of your Apple ID, let alone use different services on the iDevice. If you’re also stuck in a similar situation, we’re here to help. In this guide, we’ve compiled a list of effective tactics on how to sign out of Apple ID without password. These methods will help you remove your Apple ID from your iDevice, even if you don’t remember the password.
Part 1: Sign Out of Apple ID with Password
Before delving into methods for signing out of your Apple ID without a password, it’s essential to outline the conventional procedure of signing out with your password. Follow these steps to successfully sign out of your Apple ID on your iOS device:
Step 1: Open the “Settings” app on your device and tap on your name at the top of the Settings menu. Following this, tap on “Sign Out” at the bottom of the Apple ID settings page.
Step 2: Enter your Apple ID password when prompted. Choose the data you want to keep a copy of on your device and tap “Sign Out.”

Part 2: Sign out of Apple ID without Password by Apple ID Unlocker
If you have forgotten the password of your Apple ID and don’t have a way to recover it, there is no need to panic. You can easily remove passwords from your iOS device using Wondershare Dr.Fone - Screen Unlock (iOS) . Its “Remove Apple ID “ feature can effectively assist you in signing out of your Apple ID without requiring a password. This method provides a smooth solution for users facing issues related to forgotten passwords.
Dr.Fone - Screen Unlock (iOS)
One click to Sign Out of Apple ID without Password.
- Simple, click-through, process.
- Unlock screen passwords or Apple ID from all iPhones and iPads.
- No tech knowledge is required, everybody can handle it.
- Supports almost all iPhones and the latest iOS version fully!


4,395,216 people have downloaded it
Dr.Fone’s iPhone unlocking tool can permanently bypass the Apple ID lock. It works even if the Find My/Find My iPhone feature is active on the Apple iPhone XR device. This tool helps restore access to all your iCloud services and Apple ID features by signing in with a new account. Following are the steps to remove the Apple ID from your iOS Device:
Step 1: Access Remove Apple ID in Wondershare Dr.Fone
To begin, open Wondershare Dr.Fone on your computer. Then, navigate to “Toolbox,” tap “Screen Unlock,” and define “iOS” as the Apple iPhone XR device type. It will give you access to the iOS screen unlock menu, where you need to choose “Remove Apple ID.” Now, you need to connect your iDevice to the computer.

Step 2: Enable Lock Screen and 2FA
When your iDevice is connected to your computer, you’ll notice a connectivity status displayed on the following screen. Proceed by clicking the “Unlock Now” button. Dr.Fone will now ask if you have the screen lock and 2FA enabled on your device. The answer to these questions needs to be affirmative, and if you don’t have the option enabled, you will need to do it before proceeding.

Step 3: Enable Recovery Mode on Your iOS Device
Once you’ve confirmed these options, you’ll be directed to a screen that presents on-screen guidelines for placing your iDevice in Recovery Mode. Adhere to the instructions that correspond to your specific iOS model. After initiating Recovery Mode on the Apple iPhone XR device, the subsequent screen will present its details.

Step 4: Complete the Apple ID Removal Process
Upon the identification of the Apple iPhone XR device Model, you will simply be prompted to choose the “System Version” and initiate the process by clicking on “Start.” Now, wait for the firmware to download, and once it is downloaded, click “Unlock Now.” A confirmation window promptly emerges on the screen, prompting you to input a code for further progress. Enter the code and select “Unlock” to begin the process.

Part 3: Sign Out of Apple ID Without Password by Resetting Your Apple ID Password
If you find yourself unable to recall your Apple ID password, you can reset it through a simple process. Here’s how to sign out of your Apple ID without a password by resetting your Apple ID password:
Step 1: Access the Settings menu and select your name. Then, navigate to the Sign-In & Security section and choose the option labeled “Change Password.”

Step 2: Simply follow the on-screen instructions to complete the password reset process. You can also perform these steps on a trusted iPad or Apple Watch.
Part 4: Sign Out of Apple ID without Password on Apple Web
Another convenient way how to sign out of Apple ID without the password is to reset the password of your Apple ID by tapping the “Forgot Password” option. In this case, however, you must remember all the security questions to reset your password successfully. If you don’t remember the security questions, you can also reset the recovery password using the registered e-mail ID.
Follow these instructions to reset your password and then sign out of the Apple ID.
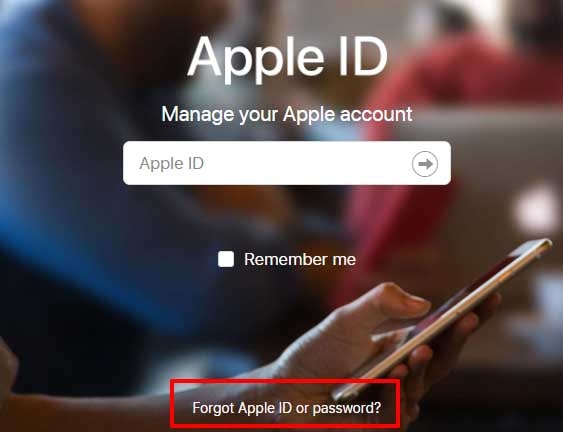
Step 1: Go to the Apple ID Account Page and click “Forgot Apple ID or Password”.
Step 2: Enter your Apple ID and click “Continue”. In the next window, select “I Need to Reset My Password”.
Step 3: Now, select the method using which you want to reset the password. Here are the three possible options.
If you’ve set up security questions while creating your Apple ID, you can choose “Answer Security Questions”. This method will only work if you remember all the answers to every security question. Once you select this method, you’ll be prompted to a new window, with all security questions. Answer these questions and follow the further instructions to reset your password.
If you’ve added a recovery e-mail while creating your Apple ID, you can also use it to reset the password. In this case, select “Get an E-mail”. You’ll receive a password reset e-mail on your registered email.

- Whichever recovery method you choose, make sure to follow the on-screen instructions carefully. Once your password reset process completes, you’ll have to individually update the password in every iCloud service, be it iTunes or iMessage.
In case you have enabled two-way verification on your Apple iPhone XR, you’ll receive a different screen after clicking “Forgot Apple ID or Password”. In this case, you’ll have to follow a different approach to reset your Apple ID password.
Step 1: Go to the Apple ID Account page and click “Forgot ID or Password”.
Step 2: Enter your Apple ID and select the “Reset Password” option.
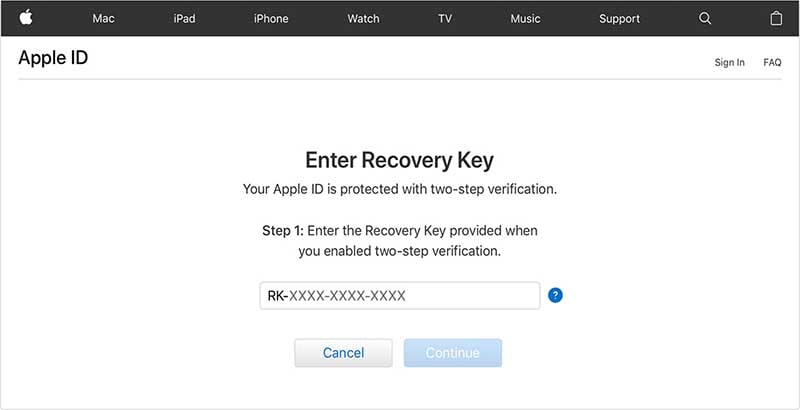
Step 3: In the next window, you’ll be asked to enter the “Recovery Key”. This is a unique key that is provided when a user enables two-way verification for their iCloud account. Enter the recovery key and click “Continue”.
Step 4: Choose a trusted device to receive the verification code. Now, enter this verification code and click “Continue”.
Step 5: In the next window, enter a new password and tap “Reset Password”.
Once you’ve reset the password, you can easily sign out of the Apple ID by navigating through Settings>Apple ID>Sign Out on your Apple iPhone XR.
Part 5: Sign Out of Apple ID without Password by Apple Support App
If you’re unable to reset your Apple ID password on your own, you can seek assistance from Apple’s official Support app. It provides expert guidance and troubleshooting. Here’s how to use the Apple Support app to sign out of your Apple ID without a password:
Step 1: Access the Apple Support app on another Apple device. In case it’s not available, you have the option to download the Apple Support app from the App Store. Scroll to the bottom until you find Support Tools, then select “Reset Password.” Here, opt for “A different Apple ID.”

Step 2: Provide your Apple ID, and if your Apple ID slips your mind, you can attempt using your email address or phone number instead. Proceed by tapping “Next,” and adhere to the step-by-step guidelines on the screen to reset your password.

Conclusion
That wraps up our tips on how to sign out of Apple ID without password. No doubt, Apple products are probably the most secure devices on the planet, but it can become extremely challenging to access the features of your iDevice when you’ve forgotten the password. If that’s the case, make sure to follow the above-mentioned tactics to sign out of the previous Apple ID and create a new one to regain control over your iDevice.
How to Fix Locked Apple ID on Apple iPhone XR
Part of why you own and use Apple devices is the reliability of the Apple iPhone XR devices and the ease of using them. This starts with the quality of hardware and the synergy with the software that runs the hardware, and the user experience you get. Apple puts great emphasis on this, and rightly so, for this is one of the keys defining and differentiating factors for people to choose Apple’s iOS over Google’s Android. Like with all good things in life, sometimes, a spanner is put in the works that bring your smooth-sailing life to an abrupt halt. With smartphones playing pivotal roles in our lives today, from payments to internet experiences to getting work done to stay in touch with people, anything that stops us from using our smartphone or endangers that experience is a cause for worry. A locked Apple ID is one such thing. It does not happen frequently, in fact, most users will never experience a locked Apple ID, but for the ones who are fortunate enough to have such a rare experience in life, help is at hand. All you need to do is relax and read on. By the end of it, you will have an unlocked Apple ID and you can go back to cruising.
Part I: Difference Between Activation Lock and Locked Apple ID
Apple being Apple, does a lot to make sure that users get the smoothest experience possible when interacting with their Apple products, both hardware, and software. Yet, sometimes, the messaging gets confusing, and people are not sure what is what. One such thing is the difference between iCloud Activation Lock and Apple ID Lock. While people are more likely to encounter Activation Lock and less likely to encounter Apple ID Lock, they are often confused when they encounter Apple ID Lock and struggle to figure out what that means and how to resolve the issue.
Activation Lock is when your supported Apple device is locked for a number of reasons. The most common reason is a stolen device that was locked by its owner, however, there are other perfectly valid reasons such as an outgoing employee forgetting to sign out and erase their Apple device before submitting it back. The IT department would not be able to reset that device without turning off Find My Apple iPhone XR and Activation Lock on the Apple iPhone XR device.
A locked Apple ID usually happens when the user has forgotten their password to their Apple ID account and attempts to figure out the password have been unsuccessful. Sometimes, Apple ID gets locked automatically under some conditions, and that requires users to reset their password to gain access. A locked Apple ID does not mean that your device is locked for your use. You can keep using it so long as you do not try to use another Apple ID with it since to do that you would have to sign out of your current Apple ID (which is locked) and you won’t be able to do that. On the other hand, Activation Lock renders the entire device unusable till the lock is cleared.
In short, Apple ID Lock is about a user’s account with Apple, akin to how Google Account works on Android devices. Apple ID Lock locks a user’s account with Apple while retaining complete usage of the Apple iPhone XR device whereas Activation Lock locks the Apple iPhone XR device and prevents anyone from using it until the correct credentials are entered. This is about verifying the ownership of the Apple iPhone XR device and works to deter theft of Apple devices.
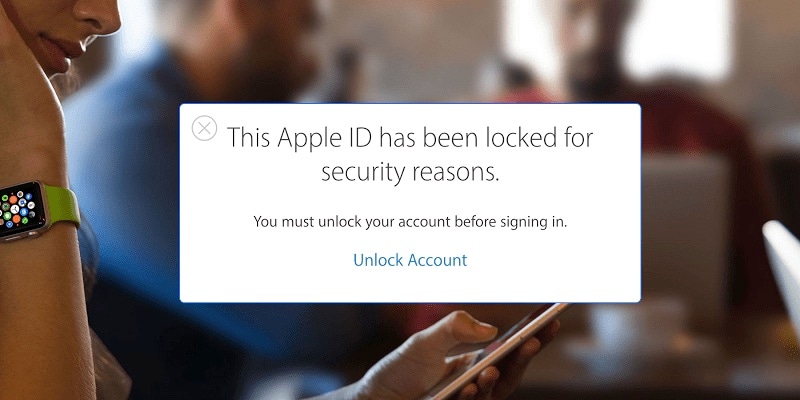
Part II: Checking If Your Apple ID Is Locked
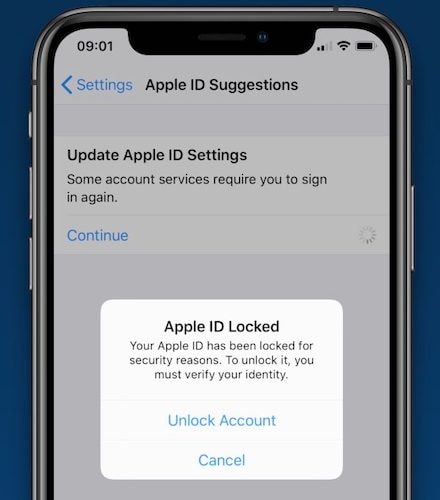
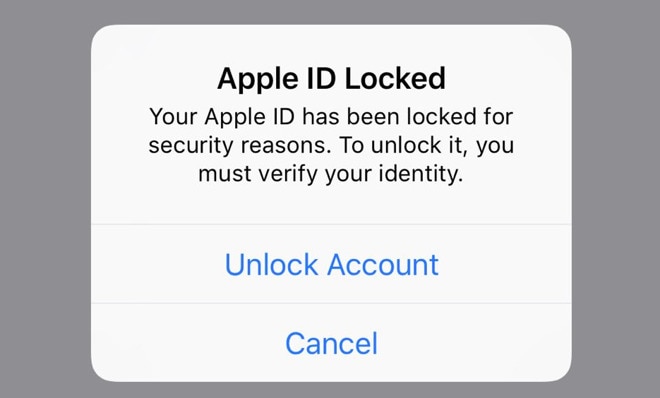
A locked Apple ID is rather unmistakable. Your device would keep telling you that your Apple ID is locked for your security. Your Apple ID could be locked or disabled altogether if someone has tried to gain access to your account (and, obviously, failed). Apple would disable access to the Apple ID unless you are able to prove rightful ownership and reset the password successfully.
Part III: Reasons for Locked Apple ID
There can be a few reasons why your Apple ID is locked. You forgot the password and now it is locked since you entered the wrong password too many times. A scarier prospect, albeit a real one, is that some malicious actor attempted to login into your Apple ID account but failed. Had they succeeded, you would have gotten a message that ‘your Apple ID is being used on another device’ now.
Apple does a lot to ensure that your Apple ID remains safe. You trust Apple with a lot of your data, including financial data by way of your credit cards associated with Apple ID to make purchases on the App Store and iTunes Store. Therefore, some of the time, Apple preempts issues by proactively locking up your Apple ID or even disabling it. It goes without saying that sometimes it is something so simple as a software error that is believed to have locked up Apple IDs for many users around the world a while ago. It is also entirely possible that it was some malicious actor probing the servers for accounts.
All of these will result in a locked Apple ID that users will have to reset their password to in order to gain access back.
Part IV: How to Unlock Apple ID on Apple iPhone XR
It is unfortunate you are facing a locked Apple ID. Apple tries its best to make users aware of safety protocols they need to follow to minimize and mitigate such unfortunate occurrences, such as using two-factor authentication, trusted devices, trusted phone numbers, passwords, passcodes, etc. that serve as deterrents to prevent unauthorized access to devices and accounts. Yet, when the unfortunate happens, what to do?
IV.I: Unlock Apple ID Via Two-Factor Authentication
Apple implemented two-factor authentication a long time ago to prevent unauthorized access to Apple ID accounts. If you have it enabled, you would be able to use two-factor authentication to unlock your Apple ID again.
Step 1: Go to https://iforgot.apple.com .
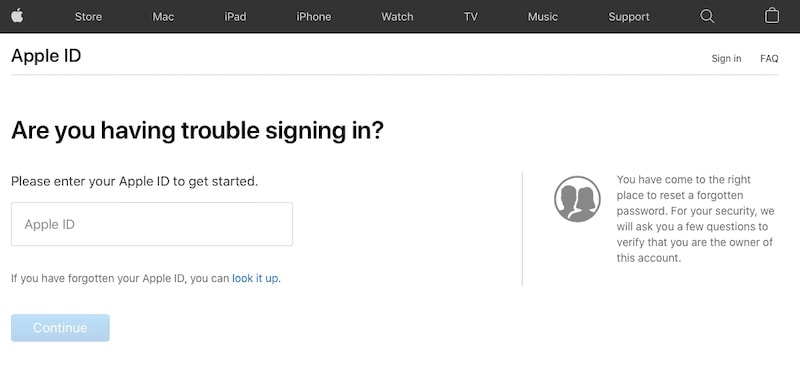
Step 2: Key in your Apple ID and proceed.
Step 3: Confirm your mobile number associated with the Apple ID.
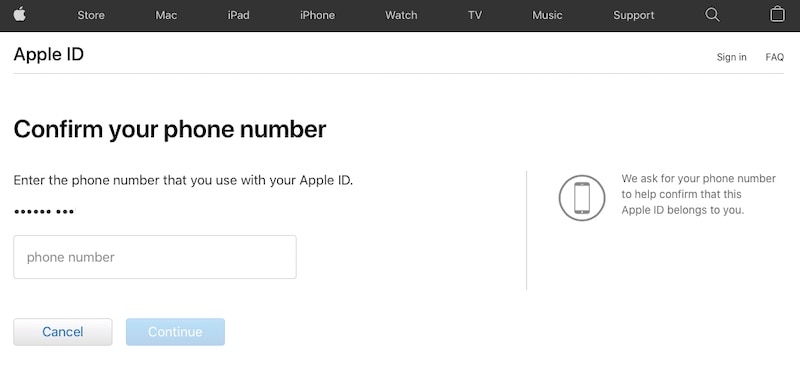
If you have another device associated with the Apple ID and it is a trusted device, you can now receive instructions to proceed with a two-factor code on that device.
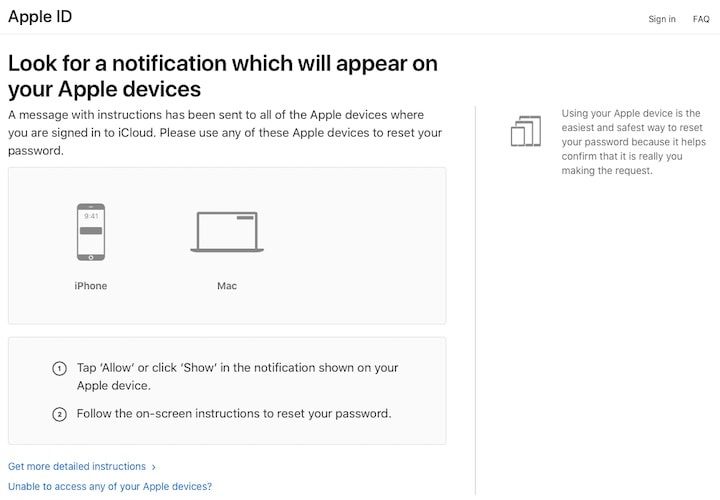
Step 4: Use that code to unlock your Apple ID using two-factor authentication.
IV.II Unlock Apple ID Via Dr.Fone - Screen Unlock (iOS)
Dr.Fone is a name that will be instantly familiar to anyone who has ever had any issue with their mobile devices and would be able to vouch for the quality and efficacy of this software at fixing issues quickly and efficiently.
Dr.Fone is a collection of carefully crafted modules that helps you when most needed. Ranging from helping you wipe your devices securely with Data Eraser to maintain your privacy when you sell your device or give it to service and helping you erase not just junk on your device but also user data such as SMS (whether single or batch) to free up some space on your Apple iPhone XR, to Phone Transfer that helps you to easily transfer data you’re your old phone to your new Apple iPhone XR including restoring from iCloud Backups, Dr.Fone is a venerable utility from Wondershare that does it all and lives up to its name. Naturally, this tool was designed to help you unlock your Apple ID as well.
Step 1: Download Dr.Fone.
Step 2: Launch Dr.Fone and select the Screen Unlock module.
Step 3: Click Unlock Apple ID to start the process.
Step 4: Connect your device to the computer and wait for Dr.Fone - Screen Unlock (iOS) to detect it. You must know the passcode of your device.
You will be asked on your Apple iPhone XR to Trust the computer, and then you will need to enter the passcode.
Step 5: Unlocking Apple ID via Dr.Fone - Screen Unlock (iOS) will erase the contents of the Apple iPhone XR device. You need to confirm this by typing six zeroes (000 000) in the popup.
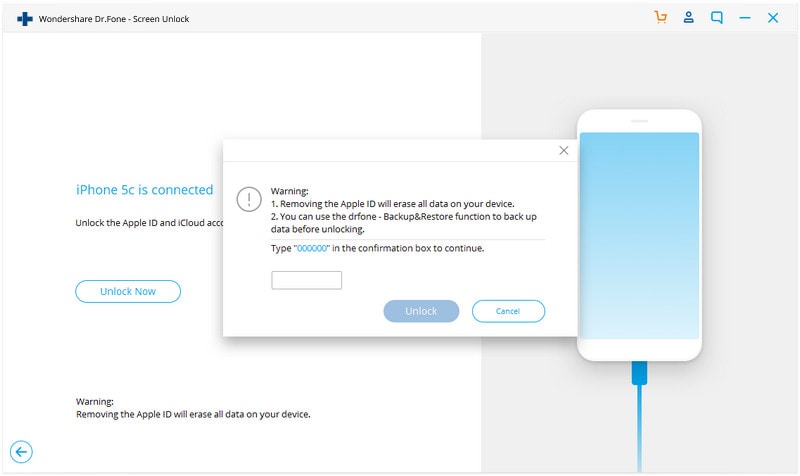
Step 6: Follow the on-screen instructions to reset all your settings on the Apple iPhone XR and then reboot to start the unlocking process.
Dr.Fone - Screen Unlock (iOS) will notify you when the process is complete.
Part V: Conclusion
Considering how much the Apple ID is pivotal to our Apple experience, it can be incredibly unnerving to realize that it is locked or disabled, due to any reason. We use our Apple ID for iCloud services on Apple devices, to make purchases on iTunes Store and App Store and payments using Apple Pay. Apple knows this and has checked in place to make sure that only you are in possession of your Apple ID account at all times. It can cause a little hassle at times, since if someone makes multiple failed attempts to gain access to your account, Apple will lock your Apple ID until you can unlock it with proper verifications and reset your password.
Also read:
- [New] Core Definitions of Cyber Storytelling for 2024
- [Updated] Comedic Choreography Producing Funny Mock Films for 2024
- Apple ID Locked or Disabled On Apple iPhone 12 Pro? 7 Mehtods You Cant-Miss
- Charting Your Financial Course The 3-Step Methodology for Estimating YouTube Income for 2024
- In 2024, Audio Liberation From YouTube Three Safe Methods
- In 2024, Featuring the Newest TikTok Rappers to Watch
- In 2024, Forgot Your Apple ID Password and Email On Apple iPhone 6 Plus? Heres the Best Fixes
- In 2024, How To Erase an Apple iPhone 14 Pro Max Without Apple ID Password?
- In 2024, How to Remove an AirTag from Your Apple ID Account On Apple iPhone X?
- In 2024, How To Remove Phone Number From Your Apple ID on Your Apple iPhone XS?
- In 2024, How To Reset the Security Questions of Your Apple ID From Your Apple iPhone 6s
- In 2024, Tips and Tricks for Apple ID Locked Issue On Apple iPhone 14 Pro Max
- Join Conference Calls From Your Tesla: Zoom Meets Electric - The Next Big Thing in Vehicle Connectivity
- Resolving Issues When Your Thaumaturge App Doesn't Start on Windows
- Revamp Computing Power - New Driver Update
- Save Your Memories: The Ultimate Software for iPhone Note Data Recovery
- Title: In 2024, Turning Off Two Factor Authentication From Apple iPhone XR? 5 Tips You Must Know
- Author: Alma
- Created at : 2024-12-31 23:02:28
- Updated at : 2025-01-05 17:08:09
- Link: https://apple-account.techidaily.com/in-2024-turning-off-two-factor-authentication-from-apple-iphone-xr-5-tips-you-must-know-by-drfone-ios/
- License: This work is licensed under CC BY-NC-SA 4.0.