
In 2024, Turning Off Two Factor Authentication From iPhone 14 Plus? 5 Tips You Must Know
Turning Off Two Factor Authentication On Apple iPhone 14 Plus? 5 Tips You Must Know
Apple has produced one of the most consumed, acknowledged, and preferred smartphones that allowed them to rule the industry for a considerably long period of time. Their style and presentation were not the only reason that made people look forward to buying an iPhone. Apple created its own operating system and presented their own versions of security and protection. One of the most recognized and impeccable features offered by Apple in its innovative structure was the security and safety through Apple ID and Apple Account. Every important feature that operated throughout the Apple iPhone 14 Plus or iPad was focused over a single entity, the Apple ID. However, apart from the Apple ID, there were several other layers of authentications and verifications that were added throughout the protocol structure. A couple of them are renowned as Two Factor Verification and Two Factor Authentication. This article produces a very generous set of advice that should be looked over while handing these layers of protection. To get a better understanding of the procedures involved, you need to look over the guide to gain better knowledge on how to turn off Two Factor Authentication on your Apple.

Part 1. Is two-step verification the same as two-factor authentication?
There might be a few differences involved in these two security models; however, it should be kept in mind that they focus their purpose on securing the Apple ID of the user. Two Factor Verification is a security protocol that protects access to the various activities performed through the Apple ID. It attenuates an extra verification step across the Apple iPhone 14 Plus device in addition to the password for the Apple ID. The device receives a verification code from an authentication factor that allows the authorities to confirm the credibility of the user.
The Two Factor Authentication is considered as an upgrade to the Two Factor Verification, which was released two years after the Two Factor Verification, in 2015. This authentication method exempted the offline recovery keys and application-specific passcodes. They added a six-digit authentication code onto the original password and produced an offline, time-dependent code that is to be generated through the Settings of the trusted device of the user. This feature was appended into the iOS 9 and OS X El Capitan with a region-specific target.
Part 2. How to turn off two-step verification?
As you are aware of the Two-Step Verification process, it is quite easy and typical in configuring. However, when it comes to turning the settings off, it is also a simple and straightforward procedure that can be easily covered by following the steps provided below.
Step 1: You are required to open the Apple ID Account web page on your browser and sign in with your Apple ID credentials.
Step 2: As you log into the website, access the “Security” section, and tap “Edit” from the options provided on the list.
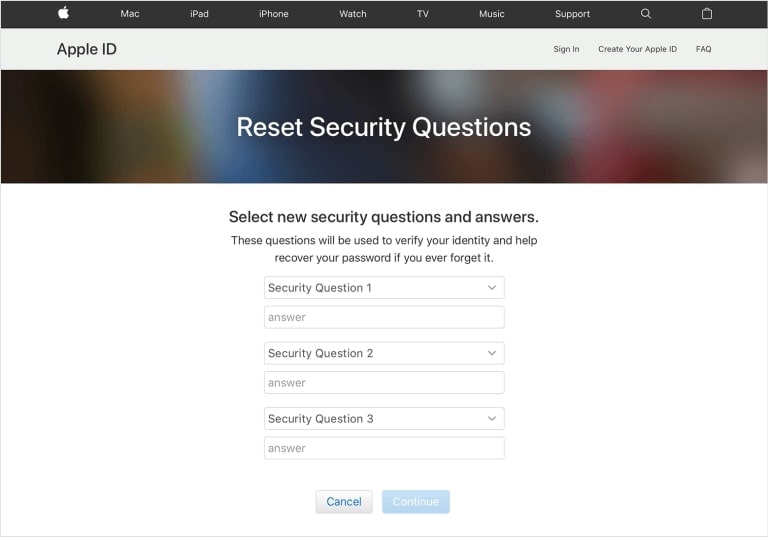
Step 3: Tap on the “Two-Step Verification” option and turn it off. Confirm to conclude the process. You may be required to select the new security questions and verify the data of birth in the process. As you would be done with it, an email would be received across your connected address for confirmation.
Part 3. How to turn off two-factor authentication? (lower than iOS 10.3)
Two Factor Authentication cannot be turned off in a few cases and accounts for iOS versions greater than 10.3. However, if you have activated Two Factor Authentication across the iOS versions lower than 10.3, you can deactivate the feature through a series of simple steps. The exemption of this security feature across your device leaves it protected only through a password and a few security questions. For turning off the Two Factor Authentication from your Apple device, you need to follow the steps provided as follows:
Step 1: Open your browser and access your Apple ID Account website. Provide the details of your Apple ID and log in.
Step 2: Tap on “Edit” in the “Security” section and turn off the “Two Factor Authentication” option.
Step 3: This would lead you to set new security questions for the Apple ID account, followed by a verification of your date of birth. The successful execution of the process would lead to turning it off.
Part 4. Why can’t you turn off two-factor authentication if you already use it? (iOS 10.3 and later)
For users who have an Apple device with an iOS 10.3 or later version, they cannot turn the Two Factor Authentication off after it is accessed. The latest iOS and macOS included extra layers of security in their features, which led towards a better security foundation and protection of information. Users who have updated their account information can unenroll in two weeks after updating. For this, you are required to simply access the confirmation email that you have received and tap on the link to approach the previous security settings. Thus, it makes it far more than impossible for users to turn their Two Factor Authentication off if they consider it unnecessary for their device. This feature is something that would always remain intact with their device as an extra layer of security. Its absence does leave a chance of illegal access to the Apple iPhone 14 Plus device and an increased risk of a security breach. Since it is directly built across the Apple iPhone 14 Plus device and its settings, this makes it a very hard-to-approach characteristic.
Part 5. How to turn off two-factor authentication by removing Apple ID
Users who are very reluctant to remove the two-factor authentication off their device can consider removing the Apple ID itself for fulfilling the purpose. However, when it comes to executing such tasks, the need for a third-party platform gets evident. Third-party platforms provided dedicated services in providing users with a unique platform of operation with an environment that suits their purpose perfectly. Many platforms provide such impressive services, yet the selection gets quite difficult for a series of reasons. The following pointers explain the reasons to the users over why they should focus on selecting a platform such as Dr. Fone – Screen Unlock (iOS) for this purpose.
- You need to have no excessive knowledge of handling the platform.
- You can cover all the dynamics of unlocking the Apple iPhone 14 Plus device without the use of iTunes.
- The platform provides you with the ability to unlock the passcode of your Apple device with ease.
- It offers you to protect your device from the disabled state.
- Works across all models of iPhone, iPad, and iPod Touch.
- Provides services to the latest version of iOS.
Dr. Fone – Screen Unlock (iOS) makes it easy for the users to control and remove their Apple ID and disable the two-factor authentication across their device. However, when it comes to controlling the platform, it follows a few simple and efficient steps that would guide you in executing the task successfully.
Step 1: Connect your Device and Launch Application
You need to connect your Apple device with the desktop and launch Dr. Fone across the computer. Tap on the “Screen Unlock” tool present on the home window and proceed with the removal of two-factor authentication.

Step 2: Access Appropriate Option
On the next screen that opens, you are required to select “Unlock Apple ID” from the three options. Proceed to your Apple device to take the process further.

Step 3: Trust the Computer
Open the Apple iPhone 14 Plus device and tap on “Trust” over the prompt that appears on the screen. Following this, you need to navigate to the Settings of your device to initiate a reboot.

Step 4: Execution of Process
Once you are done with initiating a reboot, the platform automatically detects the update in the process and initiates removing the Apple ID from the Apple iPhone 14 Plus device. Once the platform is done with the process, it provides a prompt message in the next window displaying the execution of the removal of Apple ID from your device. This also removes the Two Factor Authentication off your device.

Conclusion
The article has presented a very detailed comparison of the Two Factor Verification and Two Factor Authentication and provided an elaborated discussion over how to turn these security features off their devices. The article also discussed a third-party platform that would guide in removing such security features of the Apple iPhone 14 Plus devices over the requirement of the user. You need to go through this article to get a better knowledge of the execution of the mechanism.
How To Reset the Security Questions of Your Apple ID On Your Apple iPhone 14 Plus
Your Apple ID serves as the gateway to a multitude of Apple services, encompassing the likes of the App Store, iCloud, iTunes, and beyond. To fortify the safeguarding of your Apple ID, Apple kindly requests that you establish security questions.
These inquiries act as an extra shield, enabling you to regain access to your account should you ever forget your password. However, there are various reasons to explain why people want Apple ID reset security questions, like discussed below. In this ultimate guide, we provide step-by-step instructions on how to reset the security questions of their Apple ID.
Part 1: What Is the Purpose of the Apple ID Security Questions
Before talking about “reset my security questions Apple ID,” let’s talk about what they are. Apple has a reputation for ensuring the high security of its devices and services. The devices have Face ID and Touch ID for security and strong encryption standards. Apple devices are considered among the most secure in the tech industry. Moreover, Apple takes device security seriously. An example is the use of security questions.
When you create an Apple ID or set up a new device, Apple prompts you to choose security questions. These questions are carefully designed to be something only you would know. This explains their role as an extra layer of protection for your account. Typical instances include questions like “What is the name of your first pet?” or “In which city were you born?”
Importance of Apple ID Security Questions
The security questions associated with your Apple ID serve a critical role. They perform a pivotal role in ensuring the security and confidentiality of your digital presence. Numerous modern authentication techniques, such as biometrics, offer a strong layer of safeguarding.
Nonetheless, there might be instances where you require reentry to your account, such as in cases of forgotten passwords. In such scenarios, security questions serve as a vital lifeline, enabling you to authenticate your identity and regain control of your Apple ID.
Purpose of Security Questions
- Account Recovery: Security questions are a valuable tool for account recovery. They provide a means for you to prove your identity to Apple support in case you’re locked out of your account. Thus helping you regain access to your account quickly.
- Additional Layer of Security: Imagine someone manages to get your Apple ID details. Even then, they would still need to answer your security questions to make changes to your account. This extra layer of account protection prevents unauthorized access.
- Privacy Protection: Apple understands the importance of privacy. By setting up security questions, you can choose information that is meaningful to you. At the same time, it is not easily discoverable by others, enhancing the privacy of your account.
Part 2: How To Reset the Apple ID Security Questions Through the Account Settings
As we’ve established, Apple prioritizes security and privacy. There are various reasons why you might want to reset your Apple ID security questions. These range from enhancing security to changing the info associated with your account. Whatever your reason, it’s essential to securely follow the proper procedure for iCloud reset security questions.
Why Reset Your Apple ID Security Questions?
- Enhancing Security: Security is an ever-evolving field. Resetting your security questions periodically can strengthen your account’s defense. It is especially handy against emerging threats and ensures your information remains secure.
- Prevention of Attacks: Do you suspect unauthorized access or believe your security questions may have been compromised? In this scenario, resetting them immediately can protect your account.
- Adhering to Best Practices: Security experts recommend changing passwords and security questions periodically. Regularly updating your security questions is a cautious security practice.
- Making Relevant Changes: Over time, life circumstances change. You might move to a new location, get a new pet, or have different personal experiences. Updating your security questions to reflect these changes can make them more effective.
Guide for Resetting Apple ID Security Questions Through Account Settings
Resetting your Apple ID security questions through your account settings is a straightforward process that enhances the security of your Apple ID. Follow these detailed steps to reset your security questions:
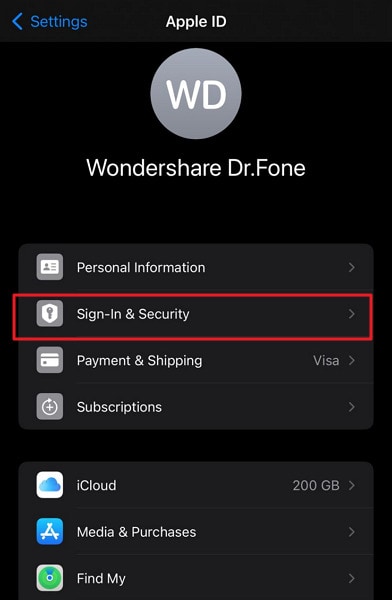
- Step 1. Begin by visiting and signing into the official Apple ID management page at appleid.apple.com. Then, proceed to the “Sign-In and Security” section for changing the security questions.
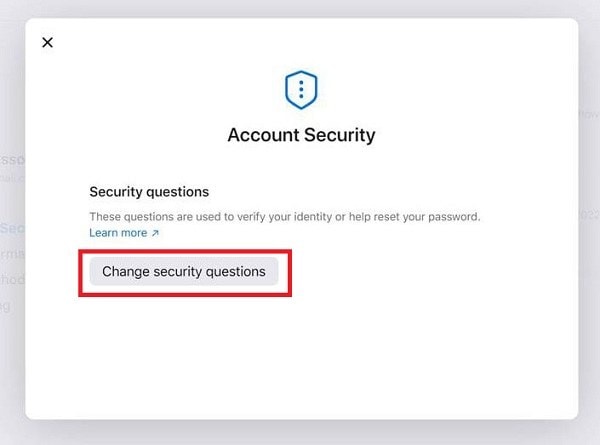
- Step 2. Now, click “Account Security” and follow it by locating “Change security questions.” Click on it to proceed, and you’ll now be prompted to set up new security questions and provide their corresponding answers.
- Step 3. After adding your new security questions and answers, click the “Update” button. To complete the process, you will need to verify your identity by entering your Apple ID password.
Pro Tip: What if Your Apple ID Got Locked? Unlock It With the Best Solution
So, you’ve been following our ultimate guide to reset your Apple ID security questions. However, you hit a roadblock – your Apple ID is locked. It happens many times that people forget their Apple ID passcode or get their Apple ID locked due to various reasons. In such cases, there is no need to panic that you are now unable to unlock the ID and access your important data.
This is because we have an excellent solution that can help you regain access to your Apple ID quickly and efficiently. With the help of the Wondershare Dr.Fone, you can easily get your Apple ID unlocked without a passcode.
Using this tool, users are able to bypass the iCloud activation lock and Apple ID without a password to use it as per their need. Moreover, they can also Bypass MDM and screen time without data loss, which is a plus point of this unique tool.
Key Features of Wondershare Dr.Fone
- This tool is compatible with the latest iPhone 15 models and all iOS versions, including iOS 17.
- No technical skill is required to use this tool because of its easy-to-use interface.
- 6-digit passcode, Touch ID, Face ID, and various screen locks can be removed in no time.
Steps To Unlock Apple ID Without Password via Wondershare Dr.Fone
Following are the simple steps you need to follow to unlock your Apple ID after you have forgotten the passcode:
- Step 1: Initiate the Process by Launching Wondershare Dr.Fone
Begin the unlocking process of Apple ID by installing and launching Dr.Fone’s latest version on your computer. Connect your Apple iPhone 14 Plus to the computer and tap on the “Toolbox” option to access different options, from which you need to select “Screen Unlock.”
- Step 2: Tap on Respective Option and Answer Platform Questions
Afterward, hit the “Remove Apple ID” option and tap the “Unlock Now” button in the next window. Proceeding ahead, the platform will ask you some questions which you will need to answer. However, it is necessary to ensure that your Apple iPhone 14 Plus has “Screen Lock” and “2FA” enabled.

- Step 3: Enable Recovery Mode and Choose System Version
Then, put your device in Recovery Mode so that the platform can detect the “Device Model.” With this, you will need to choose “System Version” in the respective window and tap on the “Start” button. Required firmware will start downloading that is suitable to your device.

- Step 4: Disable Apple ID on Your Device
On its successful completion, you will be notified from the platform, after which you are required to proceed by clicking on the “Unlock Now” button. A prompt will pop up on the screen; type the code in it and hit “Unlock.” This will remove the Apple ID passcode successfully in just a few moments.

Part 3: How To Perform Apple ID Reset Security Questions Using iForgot Website
Apple offers multiple avenues for users to perform essential security protocol changes, one of which is through the iForgot website. This website serves as a valuable resource for Apple device users in various scenarios. These include forgotten passwords, 2FA issues, account recovery, and unlocking Apple IDs. Here is the process of Apple ID reset security questions using the iForgot website:
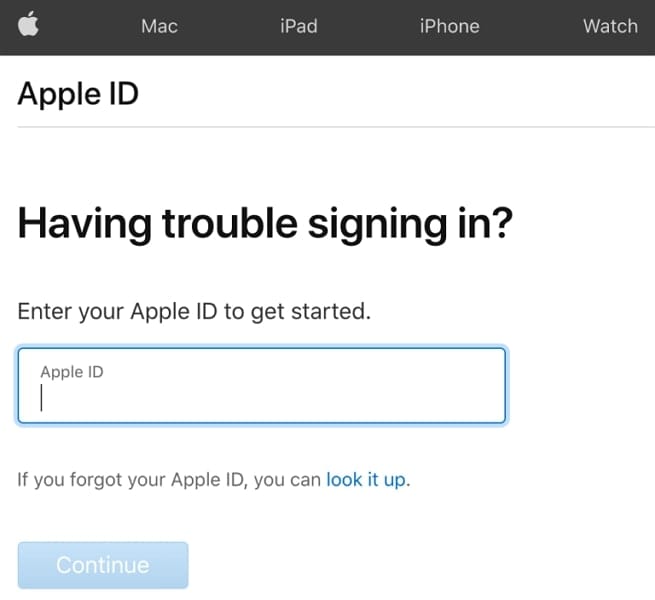
- Step 1. Begin by opening your web browser and navigating to the iForgot website at https://iforgot.apple.com/. You will then be asked to input your Apple ID. After entering your Apple ID, proceed by clicking the “Continue” button.
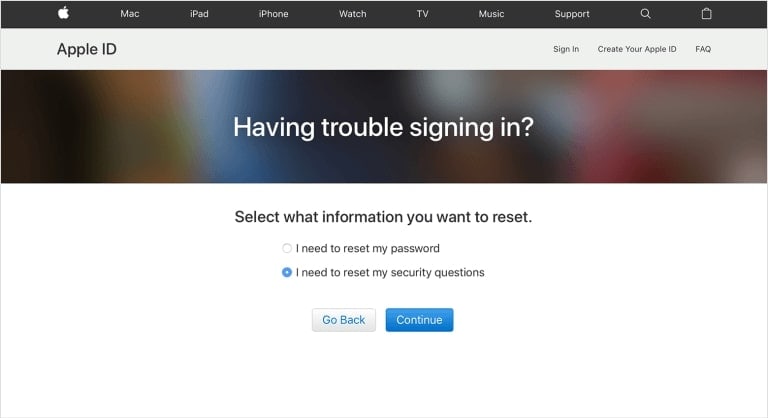
- Step 2. On the following page, you’ll encounter various options for account recovery. Opt for “I need to reset my security questions” and click “Continue.” For added security measures, Apple will request you to confirm your identity.
- Step 3. After your identity has been successfully verified, you’ll receive prompts to establish new security questions. Once you’ve created your new security questions, remember to save the changes.
Part 4: How To Reset the Apple ID Questions by Contacting the Customer Support
Contact Apple’s Customer Support if you have failed to reset your Apple ID security questions. They are well-equipped to assist with a wide range of device-related problems. You can use the following guide on how to reset the security questions on Apple ID via Apple Customer Support:
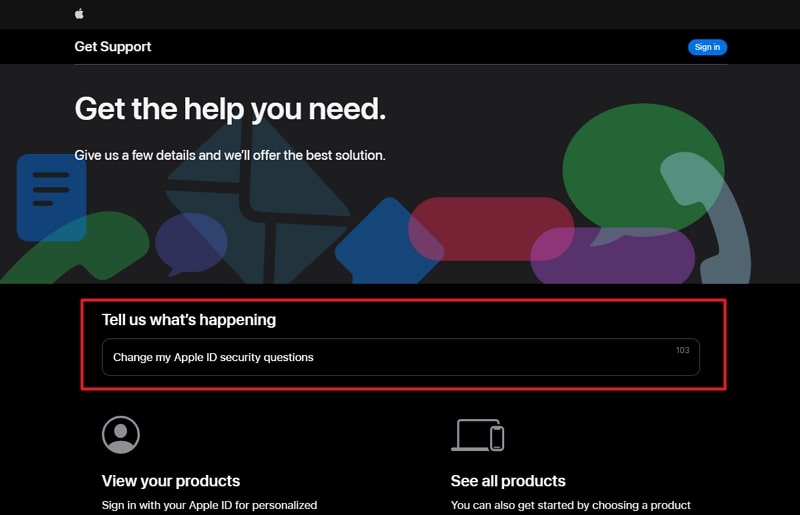
- Step 1: Begin by visiting the Apple Support website located at https://getsupport.apple.com/. Once there, use the search bar to type your issue. In this section, look for and click on “ Change my Apple ID security questions.”
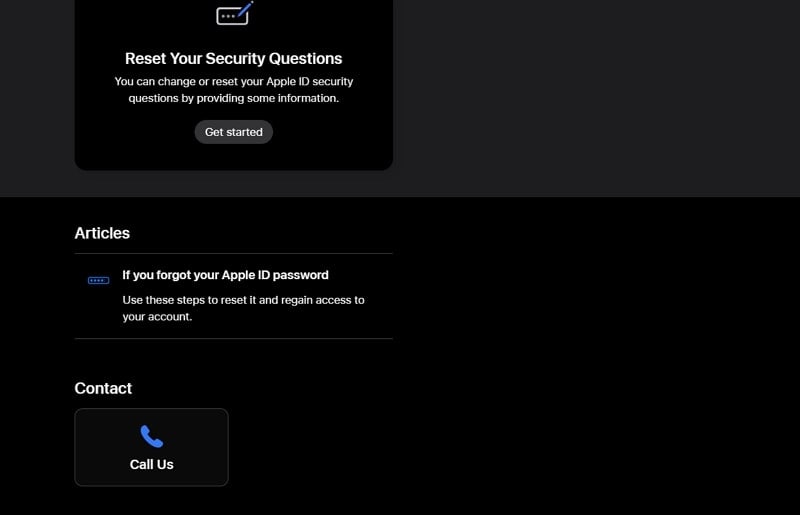
- Step 2: After selecting your issue, you will be presented with various support articles and options. Scroll down and choose the desired option from the “Contact” section. Follow the on-screen instructions to contact Apple support and provide details about your issue.
Conclusion
To summarize, we’ve explored the importance of Apple ID security questions. We provided you with different ways on how to reset the security questions on Apple ID. The article highlighted the significance of security in the Apple ecosystem. It also explained the role security questions play in protecting your account.
We discussed the various reasons why you might want to reset your Apple ID security questions. You learned how to reset your security questions through your Apple ID account settings and via the iForgot website. Additionally, we introduced Wondershare Dr.Fone as a reliable solution for unlocking your Apple ID. Dr.Fone offers a user-friendly interface, a high success rate, and the ability to resolve various iOS device issues.
Top-Notch Solutions for Disabled Apple ID On Apple iPhone 14 Plus: Making It Possible
The Apple ID serves as the cornerstone of an iOS user’s digital identity. It grants access to a multitude of essential services and applications. This unique identifier is crucial for accessing the App Store, iTunes, iCloud, and other Apple services. However, the security of this pivotal account is paramount. Any security breaches or suspicious activities can prompt Apple ID to be disabled.
To avoid the potential consequences of a disabled Apple ID, it is imperative to explore effective solutions. This guide seeks to furnish users with a range of excellent strategies to address the issue at hand. So, if you are wondering why is my Apple ID disabled, continue to read the article.
Part 1. Discussing the Reasons for Apple ID Getting Disabled
Wondering why your Apple ID has been disabled? Experiencing intense frustration is not uncommon in this scenario. Nonetheless, understanding the potential triggers behind this issue is crucial. For Apple users, learning the factors leading to the Apple ID disabled problem is essential. The following are some typical reasons that can account for this predicament:
1. Security Questions
Failing to answer security questions accurately during the account recovery process can trigger Apple’s security protocols. It can lead to the temporary or permanent disabling of the Apple ID. Inaccurate or forgotten responses to these critical security measures can raise red flags. This eventually results in restricted access to the account.
2. Unauthorized Access Attempts
Apple’s strict security measures are designed to identify and prevent unauthorized access attempts. If the system detects unusual login activities or repeated failed login attempts, it may automatically disable the ID. Moreover, it is done to protect the user’s personal information and sensitive data.
3. Suspicious Account Activities
Any suspicious activities associated with the Apple ID can prompt Apple’s security algorithms to disable the ID. These include unusual purchase patterns, unauthorized transactions, or reports of account misuse. Furthermore, it usually results in temporary disabling as a precautionary measure.
4. Breach of Terms of Service
Not adhering to Apple’s terms and conditions may result in the prompt Apple ID being disabled. Examples include engaging in fraudulent activities or using unauthorized software or tools. In addition, manipulating Apple’s services or violating the company’s usage policies can also cause disablement. It is often accompanied by a permanent suspension from Apple’s ecosystem.
5. Unresolved Billing Issues
Unresolved billing disputes or outstanding payment issues can trigger the disabled problem. Moreover, declined transactions linked to the Apple ID can also be a cause. It restricts the user’s access to various Apple services until the payment concerns are rectified.
Part 2. Reset the Password: Solve Apple ID Disabled Issues
With Apple ID disabled, one of its primary solutions involves resetting the password. Fortunately, this can be achieved directly from an iOS device or a Mac. Users are offered convenient choices to regain authority over their accounts quickly. Here, you’ll find detailed, sequential instructions for each approach:
Resetting Password From iOS Device
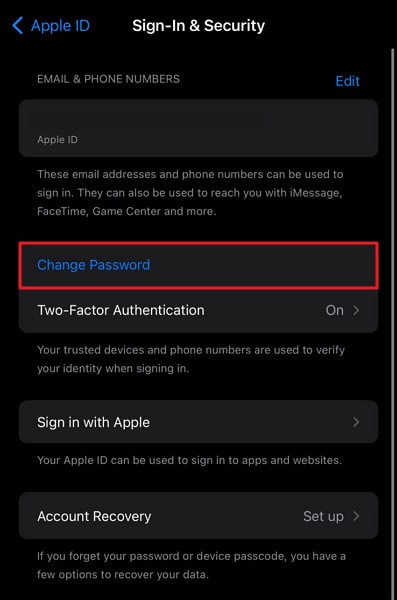
- Step 1: To access the Settings app on your iOS device, locate and open the application with the “Gear” icon. Once inside, select your name and proceed to the subsequent screen, where you should tap “Sign-In & Security.”
- Step 2: Now, tap the “Change Password” option and follow it by entering your iOS device passcode. Then, enter and confirm the new password and press “Change Password” to finalize it.
Resetting Password From Mac
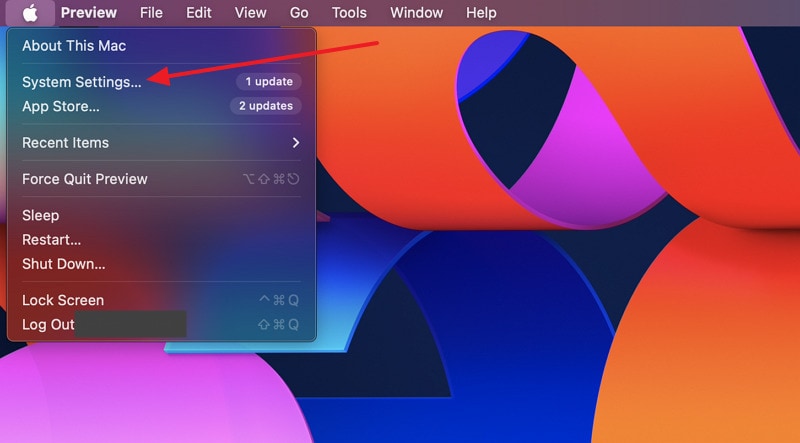
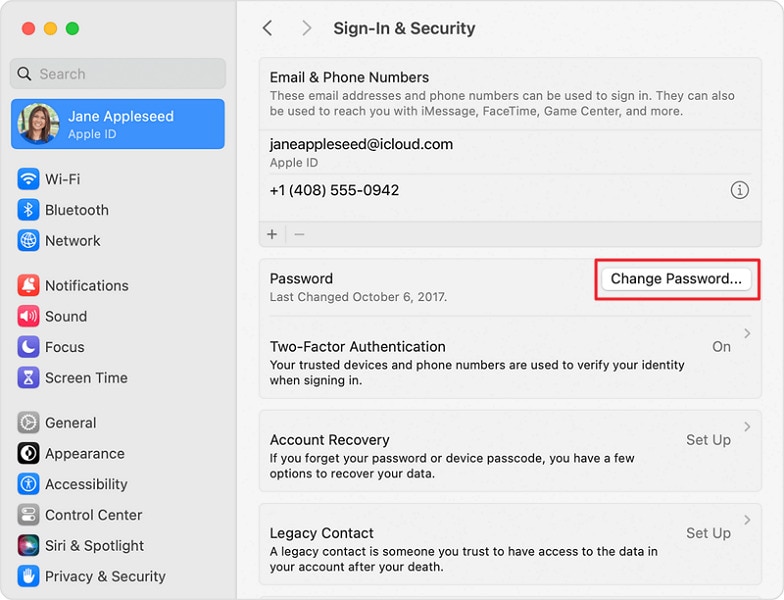
- Step 1: On your MacBook, navigate to the “Apple” menu from the top left side and choose the “System Settings” option. Next, tap on your name and press “Sign-In & Security” on the following screen.
- Step 2: Move to the “Password” option and click “Change Password.” Now, follow the on-screen prompts to complete the password resetting process by providing your MacBook passcode.
Part 3. Use Apple Support App: Solve Apple ID Disabled Issues
If you lack access to a dependable device for resetting your password, there’s no cause for concern. Apple provides to reset your Apple ID password using an alternative device. This can be accomplished through the official Apple Support app. The following procedures offer a thorough walkthrough:
- Step 1: On a device you’ve borrowed, download the official Apple Support app and launch it. Scroll down within the app to “Support Tools” and select “Reset Password.”
Image name: fix-apple-id-disabled-5.jpg
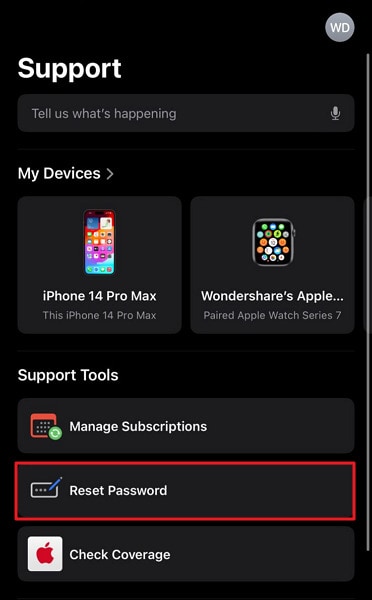
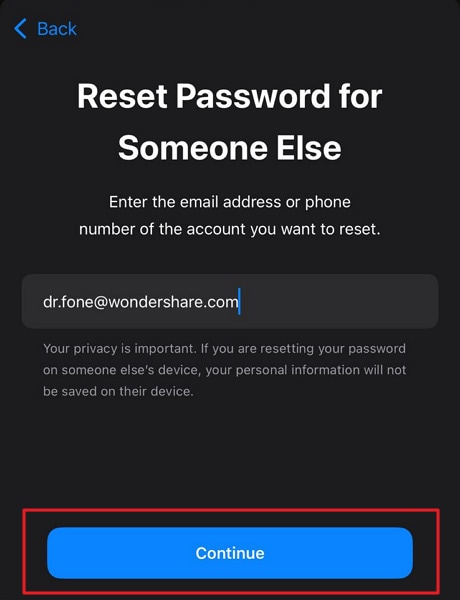
- Step 2: Following this, choose “Help Someone Else,” input your Apple ID, and tap “Continue.” Follow the on-screen prompts to complete the password reset process.
Part 4. Using iForgot Website: Solve Apple ID Disabled Issues
In instances where conventional methods fail, using the iForgot website can offer an alternative route. The platform provides an extensive range of tools and resources. It is tailored to aid users in the process of resetting their Apple ID credentials. Follow these step-by-step instructions to use the iForgot website effectively to fix the “Why is My Apple ID Disabled” problem:
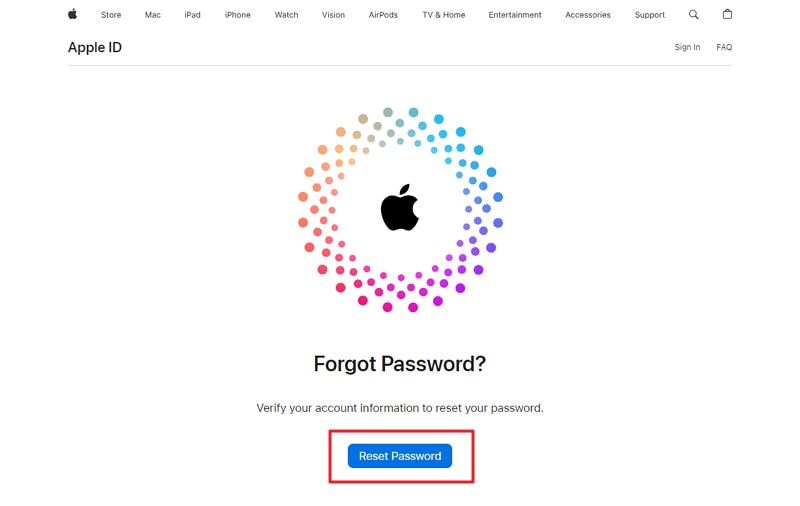
- Step 1: Launch a web browser, visit iforgot.apple.com, and select the “Reset Password” option. It will give you access to the Apple ID password reset page. Here, provide your Apple ID, usually your email address linked to your Apple account, and proceed by clicking “Continue.”
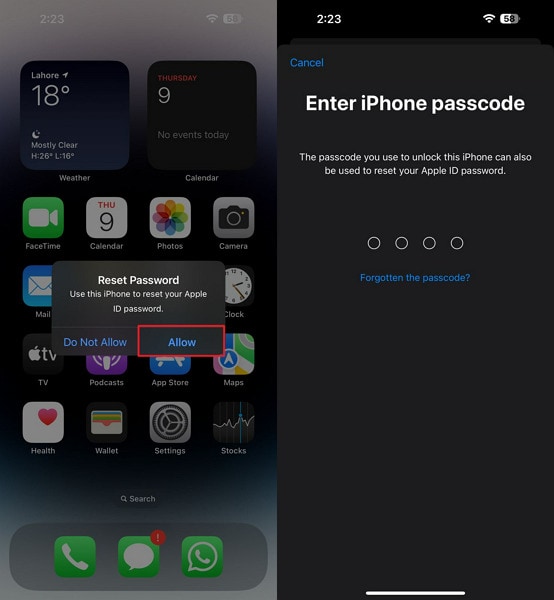
- Step 2: On the next screen, Apple will inform you that they have sent a confirmation message to your trusted devices for resetting the password. Tap “Allow” on one of your trusted devices and provide your iDevice passcode to reset the Apple ID password.
Part 5. Wondershare Dr.Fone - Screen Unlock (iOS): A Comprehensive Solution To Solve Apple ID Disabled Issues
No need to worry if you’re experiencing difficulties accessing iCloud and other Apple services due to a forgotten Apple ID password. Wondershare Dr.Fone can bypass the Apple ID lock completely. This tool allows users to regain access to their iCloud services and other Apple ID features. Otherwise, your Apple ID would lose its functionality within your iOS devices.
Furthermore, this capability of Wondershare Dr.Fone remains effective even if the Find My iPhone feature is activated on the Apple iPhone 14 Plus device. This tool can also bypass the Screen Time Passcode if you have forgotten your password. By utilizing this feature, you will be able to resolve your disabled Apple ID issue.
Dr.Fone - Screen Unlock (iOS)
Unlock iPhone/iPad Lock Screen Without Hassle.
- Simple, click-through, process.
- Unlock screen passwords from all iPhone and iPad.
- No tech knowledge required, everybody can handle it.
- Supports the latest iOS version fully!


4,395,217 people have downloaded it
Key Features of Wondershare Dr.Fone
- Wondershare Dr.Fone allows users to unlock their iDevices screen, which enables them to regain access to their devices.
- You can also use this robust iPhone unlock tool to remove the SIM carrier lock to use your device internationally.
- This iDevice screen unlock software provides multiple tools like data eraser, data recovery, phone transfer, WhatsApp transfer, system repair, etc.
Instructions Involved To Solve Apple ID Disabled Issues via Wondershare Dr.Fone
Wondershare Dr.Fone is specially designed for users with various technical experiences. It presents an easy-to-follow guide with its user-friendly interface to assist its users in every way possible. Here is how to Solve Apple ID disabled issues via Wondershare Dr.Fone - Screen Unlock (iOS):
- Step 1. Access the Robust Screen Unlock Tool
You will have to start by opening Wondershare Dr.Fone on your system and accessing the “Toolbox” section present in the left panel. Then, continue with the “Screen Unlock” feature and select the “iOS” device. Proceed with the “Remove Apple ID” option among different options from the next window.
- Step 2. Begin Unlocking the Apple ID
After connecting your iDevice to the system, you need to move forward with the “Unlock Now” button. Before moving forward, it’s essential to ensure you have Screen Lock and Two-Factor Authentication enabled on your Apple iPhone 14 Plus. After that confirmation, carry on with the on-screen instructions.

- Step 3. Put iPhone in the Recovery Mode and Recognize the Model
You need to put your Apple iPhone 14 Plus in Recovery Mode by following the on-screen instructions to initiate the Apple ID unlocking process. The software will recognize the “Device Model” in a self-controlling way. After that, you will have to go ahead with the “System Version” selection and hit the “Start” button.

- Step 4. Download the Firmware and Provide Confirmation
The relevant firmware will start downloading, and you will have to proceed with the “Unlock Now” button after the downloading. You will have to enter a code for confirmation, and after that, you can view the removal progress. Move forward by hitting the “Done” button if the Apple ID gets unlocked.
Conclusion
In conclusion, this article aims to address the critical issue of Apple ID disabled. It can significantly disrupt the smooth operation of iOS devices. We have offered a thorough examination of the different elements that may result in the deactivation of an Apple ID. Moreover, we have introduced several effective measures to assist you in addressing this matter. It allows you to regain access to your Apple ID.
Furthermore, the article has highlighted the comprehensive capabilities of Wondershare Dr.Fone. It is for users encountering persistent challenges in resolving their disabled Apple ID. Moreover, Dr.Fone is a robust and reliable solution that can offer a more in-depth remedy to the problem.
Also read:
- [New] 2024 Approved Hitting the Sweet Spot Top 5 Tips for Channel Growth
- [New] 2024 Approved Master Techniques for Live Sport Broadcast Recording
- [New] In 2024, Twitter Marketing 101 Step-by-Step Guide
- 3 Ways of How to Get Someones Apple ID Off Apple iPhone 14 without Password
- Catch 'Em All in No Time - Learn to Play Pokemon Go Now!
- Everything To Know About Apple ID Password Requirements For Apple iPhone 6 Plus
- In 2024, Apple ID Locked or Disabled On Apple iPhone XS? 7 Mehtods You Cant-Miss
- In 2024, Best Tecno Spark Go (2023) Pattern Lock Removal Tools Remove Android Pattern Lock Without Losing Data
- In 2024, How to Change Credit Card from Your iPhone 6 Plus Apple ID and Apple Pay
- In 2024, How to Fix when Apple Account Locked From Apple iPhone SE (2020)?
- In 2024, How to Remove Apple ID from iPhone 11 Pro Max without Password?
- In 2024, How To Remove the Two Factor Authentication On iPhone 13 Pro Max
- In 2024, iCloud Separation How To Disconnect Apple iPhone 15 Pro and iPad
- In 2024, Step-by-Step Guide to Adding Descriptive Text in TikTok Videos
- Logitech G533 Microphone Not Functional? Here's How You Can Get It Working Again
- Maximizing Virtual Memory in Windows 11 Systems
- Transformative Tabletop Experience with GPT-Powered Imagination Boosting
- Title: In 2024, Turning Off Two Factor Authentication From iPhone 14 Plus? 5 Tips You Must Know
- Author: Alma
- Created at : 2024-10-15 16:43:49
- Updated at : 2024-10-20 16:14:10
- Link: https://apple-account.techidaily.com/in-2024-turning-off-two-factor-authentication-from-iphone-14-plus-5-tips-you-must-know-by-drfone-ios/
- License: This work is licensed under CC BY-NC-SA 4.0.