
Troubleshooting Error Connecting to the Apple ID Server On Apple iPhone 14 Pro Max
Troubleshooting ‘Error Connecting to the Apple ID Server’ On Apple iPhone 14 Pro Max
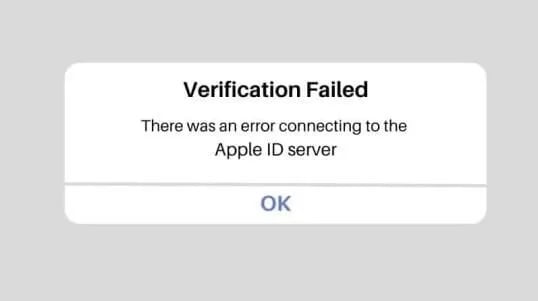
Experiencing an “error connecting to the Apple ID server“ can be a frustrating roadblock for users. Apple owners often face this issue, hindering seamless access to their Apple ID. Fear not; the guide unveils 11 practical solutions to troubleshoot the problem.
The article has everything from verifying your network connection to ensuring the accuracy of your Apple ID credentials. Don’t let the Apple ID verification failed dilemma linger. Explore the page below and navigate through these troubleshooting steps for a seamless connection to the server.

Part 1: What Causes the “Error Connecting to the Apple ID Server” Problem?
Below are the potential culprits if an error is connected to the Apple ID server. Understanding these causes is pivotal for effective troubleshooting.
Temporary Problems With Apple Servers
Periodic disruptions in Apple servers can lead to the “Apple ID verification failed“ issue. These may occur due to routine maintenance or unexpected server outages.
The Internet Connection Is Not Working
The problem may also stem from a disrupted internet connection. You should investigate your Wi-Fi or cellular data to ensure a stable connection. Restarting routers or switching to an alternative network can also help.
Problems With Apple ID
Authentication issues can arise if users input incorrect Apple ID credentials or if their accounts face security concerns. Verifying and correcting these details or resetting the Apple ID password is crucial.
Incorrect Date and Time Settings
The device’s date and time settings must be accurate to establish a secure connection with the Apple ID server. You should check and adjust these settings, enabling automatic updates for synchronization.
Part 2: [10 Quick Solutions] There Was an Error Connecting to the Apple ID Server
The section below provides user-friendly fixes tailored to ease frustration and restore seamless connectivity.
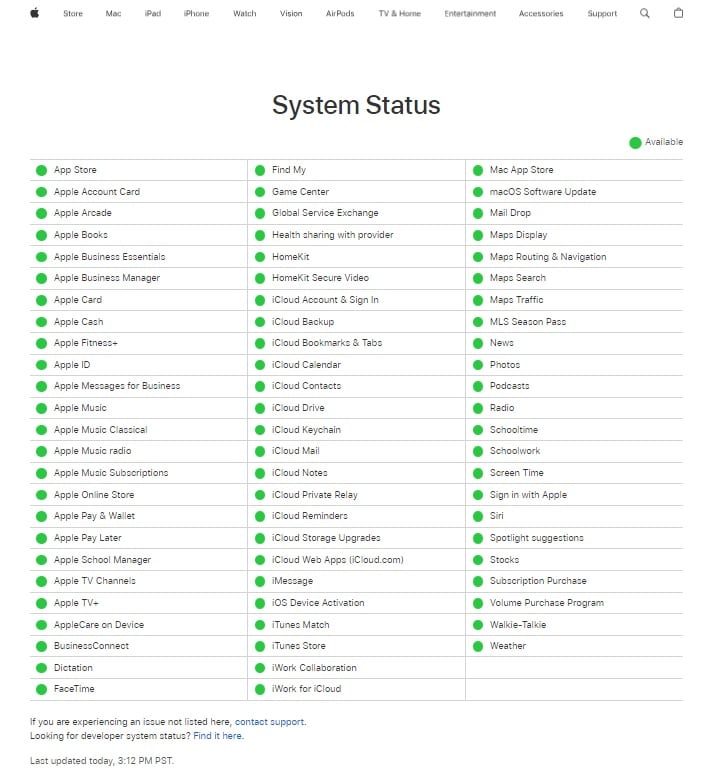
Check Apple’s Servers
The initial step is to investigate the status of Apple’s servers. Server outages or scheduled maintenance can be the culprits behind the connectivity hiccup. Head to Apple’s service status page for real-time updates on server conditions.
Check Your Network Connection
A fundamental yet crucial solution is to examine your network connection. Instabilities in Wi-Fi or cellular data can impede communication with Apple’s servers. Ensure a stable connection and troubleshoot any disruptions, considering a switch to an alternative network. You can follow this guide to check your network signal.
Set Up Another Admin User Account (for macOS Users)
Creating a new admin user account can serve as a strategic move for macOS users. Here’s how. It helps isolate issues tied to a specific user account. It provides insights into whether the problem is user-specific. Here’s how.
- Step 1: Open System Preferences on your Mac and choose Users & Groups.
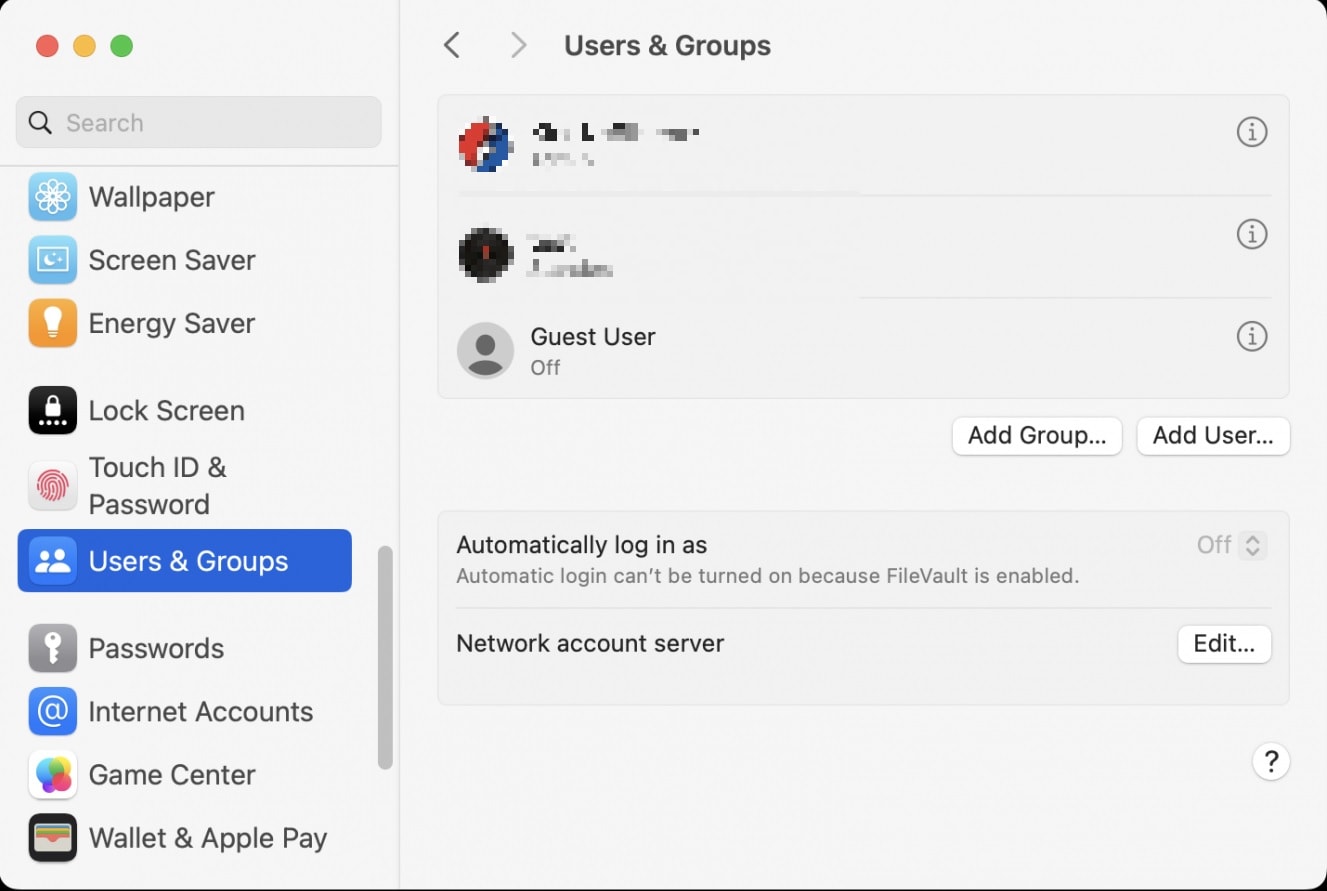
- Step 2: Click the lock icon and enter your admin password. Click the + or Add User… button to add a new user, selecting Administrator as the account type. Log in to the new account and check if the issue persists.
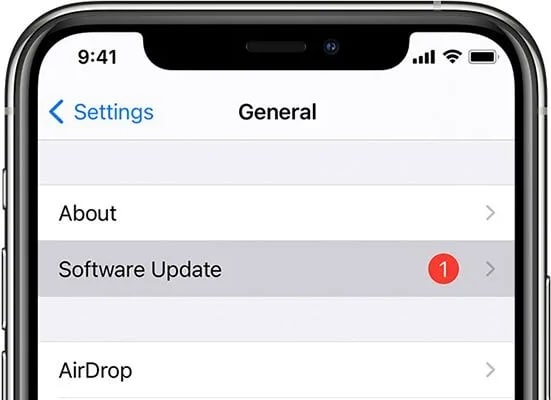
Update Your iOS or macOS Software
Outdated operating systems often contribute to connectivity issues. Ensure your iOS or macOS software is up to date by checking for available updates. Here’s how.
- For iOS: Go to Settings, tap General, and select SoftwareUpdate.
- For macOS: Open SystemPreferences, click on Software Update.
Download and install any available updates.
Boot macOS in Safe Mode
Booting your Mac in Safe Mode is another approach to troubleshooting. The mode disables unnecessary processes, allowing you to identify and resolve potential conflicts causing the connection error. To put your Mac into safe mode, restart it and hold down the Shift key. Release it when the Apple logo appears.

Restart Your Apple Device
A classic yet effective solution is to restart your Apple device. This simple action refreshes system processes and can resolve various connectivity issues. Power off your device and turn it back on to initiate a clean start.
Sign Out and Sign Back Into Your Apple ID Account
Temporarily signing out of your Apple ID account and then signing back in can be a virtual reset. The process refreshes the connection and addresses potential authentication issues, resolving the error.
- On iOS: Go to Settings, tap your Apple ID, and choose SignOut. Sign in again.
- On macOS: Open SystemPreferences, select Apple ID, and click Sign Out. Sign in again.
Reset Your Apple ID Password
Security concerns related to compromised credentials can contribute to the connection problem. If in doubt, initiate a password reset for your Apple ID. It not only enhances account security but also addresses authentication errors. Here’s how.
Disable VPN
If you use a Virtual Private Network (VPN), consider temporarily disabling it. VPNs can sometimes interfere with the connection to Apple’s servers, causing the error. Disabling the VPN allows you to test whether it’s the source of the problem.
Adjust Date and Time Settings Automatically
Inaccurate date and time settings on your device can lead to authentication failures. Ensure your device’s date and time are accurate and set to update automatically. This prevents synchronization issues with the Apple ID server.

If you’ve tried all the above and you’re still getting the error connecting to the Apple ID server, you may want to consider using Wondershare Dr.Fone - Screen Unlock. It is a powerful tool that can help you bypass the Apple ID lock screen on your Apple iPhone 14 Pro Max, iPad, or iPod touch.
Part 3: A More Comprehensive Solution: Use a Professional Third-Party Software
Wondershare Dr.Fone is renowned for its versatile features. The platform’s Screen Unlock function is designed to address Apple ID-related challenges. What’s more, Dr.Fone is compatible with various iOS versions. It ensures its applicability across a broad range of devices. Its user-friendly interface makes it accessible for both novice and experienced users.

Dr.Fone - Screen Unlock (iOS)
Unlock iPhone/iPad Lock Screen Without Hassle.
- Simple, click-through, process.
- Unlock screen passwords from all iPhone and iPad.
- No tech knowledge required, everybody can handle it.
- Supports the latest iOS version fully!


4,395,217 people have downloaded it
Key Features
- **Comprehensive lock screen removal.**Fone excels in eliminating various lock screens on iOS devices, providing an all-encompassing solution to accessibility challenges.
- **iCloud activation lock and Apple ID bypass.**The software stands out by allowing users to bypass the iCloud activation lock and Apple ID without a password. The feature is particularly useful for users facing login complications.
- **MDM bypass without data loss.**Fone goes beyond standard capabilities by enabling users to bypass Mobile Device Management (MDM) without data loss. This function is crucial for corporate settings or individuals managing multiple devices.
- **Effortless process.**Simplifying the user experience, Dr.Fone offers straightforward steps for the unlocking process.
Step-by-Step Guide on Using Dr.Fone - Screen Unlock
Below are the steps to use Dr.Fone - Screen Unlock.
Step 1: Download and Install Dr.Fone - Screen Unlock on your computer. Launch the app afterward,
Step 2: From the main interface, choose the Screen Unlock option. Next, connect your iOS device to the computer using a USB cable. Click on iCloud Activation Lock Removal to initiate the process.

- Step 3: Follow the on-screen instructions and wait for Dr.Fone to detect your device information automatically. From there, the software will provide the necessary firmware package. Click Unlock Now to initiate the process.
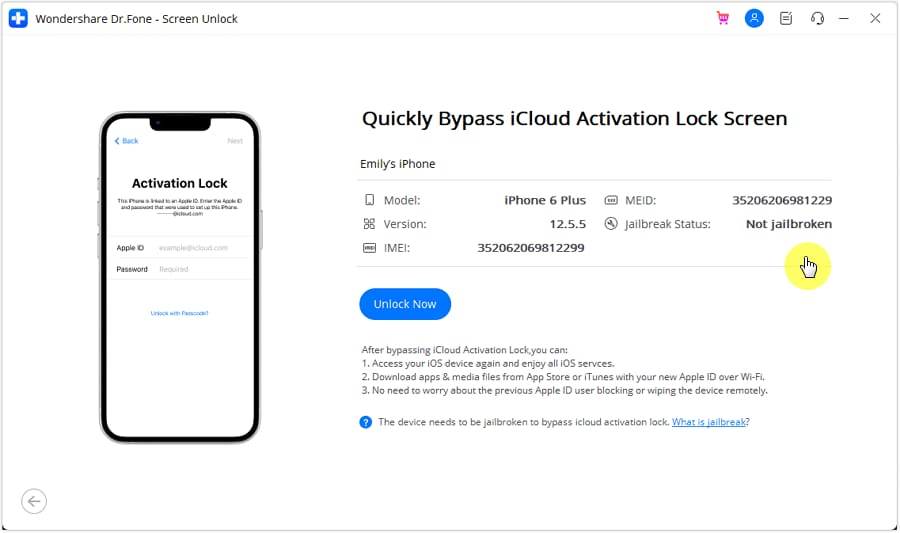
- Step 4: Upon completion of the process, a confirmation message will be displayed on the window. Click the Done button to finalize the unlocking of the Activation Lock.

Conclusion
Don’t lose hope if you still can’t connect to the Apple ID server. Take advantage of the provided solutions for a seamless resolution. However, it would help if you also consider the convenience and effectiveness of Dr.Fone - Screen Unlock for a comprehensive fix.
If the Apple ID verification failed error persists, reaching out to Apple Support remains a reliable avenue for additional assistance with your Apple ID connectivity concerns. Your resolution journey begins with these steps, ensuring a swift return to hassle-free Apple services.
How to Delete iCloud Account On Apple iPhone 14 Pro Max without Password?
If you own various Apple products, you must be familiar with the significance of iCloud service. iCloud is a cloud storage service that allows Apple users to sync their data and access it across different Apple devices, be it iPhone, iPad, or Macbook.
Now, there are several situations where a user might want to delete their iCloud account, especially when one has created too many iCloud accounts and don’t remember the passwords to all of them.
So, in this guide, we’re going to share some insight into how to delete iCloud account without password so that you can get rid of all the unnecessary accounts and use a single one across all your iDevices.
Part 1: How to delete iCloud account without password on iPhone?
If you have an iPhone at the moment, here are three different ways to delete an iCloud account using your phone itself.
1.1 Remove iCloud from settings on iPhone
Follow these instructions to delete the iCloud account from the “Settings” menu on your Apple iPhone 14 Pro Max.
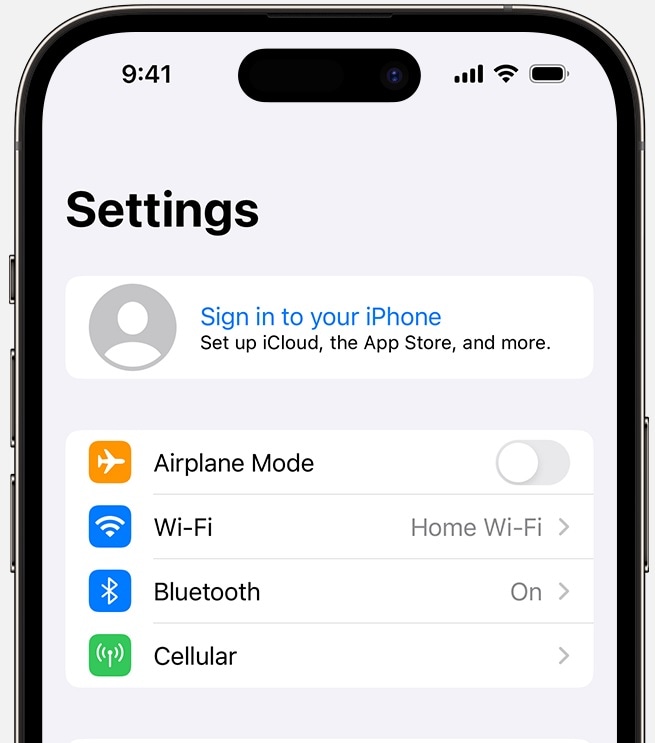
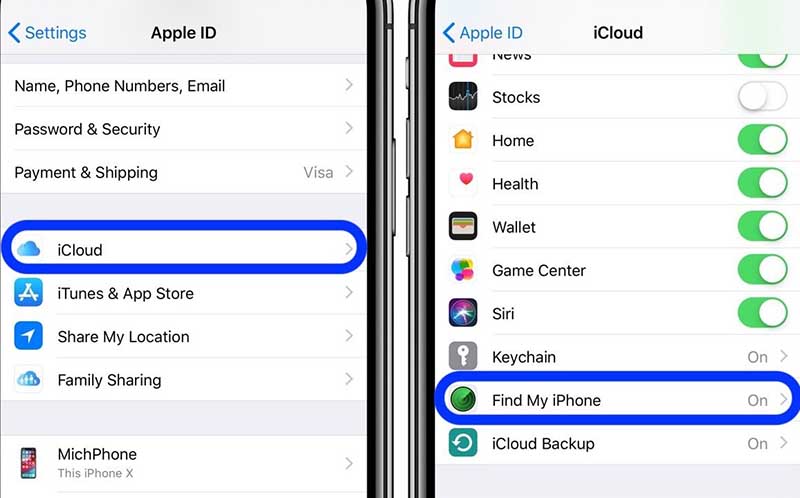
Step 1: Open “Settings” and scroll down to click on “iCloud”.
Step 2: You’ll be asked to enter your password. Here enter any random number and click “Done”.
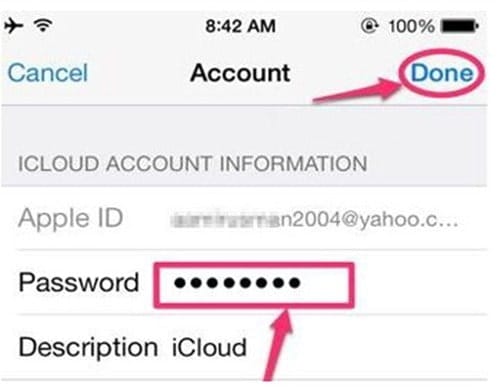
Step 3: iCloud will tell you the password is incorrect. Tap “Ok” and you’ll be prompted back to the iCloud screen.
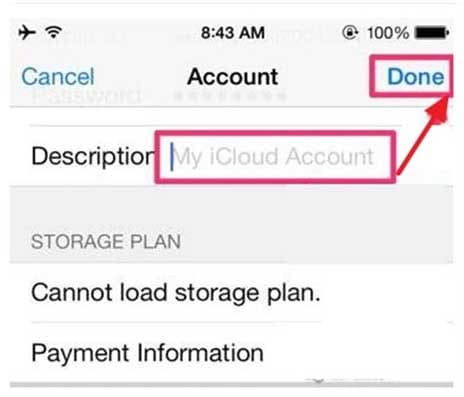
Step 4: Now, click on “Account” and erase everything from “Description”. Click “Done” and you’ll again go back to the iCloud screen. This will disable the “Find My iPhone” feature and you’ll be able to remove the iCloud account easily.
Step 5: Again, tap on iCloud and scroll down till the end. Tap “Delete Account” and again click “Delete” to confirm your action.

That’s how to delete iCloud account without password directly from “Settings” on your Apple iPhone 14 Pro Max.
1.2 Delete iCloud account via iTunes
Another convenient way to delete the iCloud account is to use iTunes on your Apple iPhone 14 Pro Max. Let’s walk you through the process of deleting an iCloud account using iTunes.
Step 1: First of all, make sure to disable the “Find My iPhone” feature. Navigate to “Settings” > “iCloud” > “Find My iPhone” and toggle the switch off to turn off the feature.
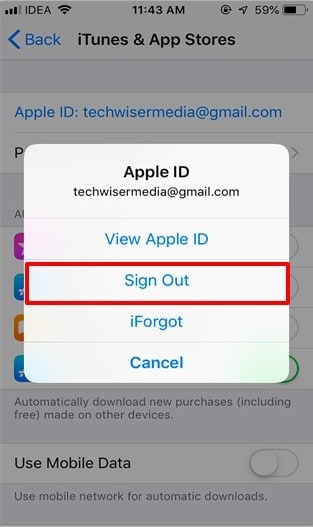
Step 2: Now, go back to the “Settings” window and click “iTunes & App Store”.

Step 3: Tap on your “Account” at the top. A pop-up will appear on your screen. Here, click “Sign Out” and the iCloud account will be removed from your iDevice.
1.3 Create a new password
If you have enabled two-way verification on your Apple iPhone 14 Pro Max, you can also delete the iCloud account by resetting the password. In this case, however, you’ll have to visit the Apple ID Account Page and use it to reset the password.
Here’s how to delete iCloud account without password by creating a new password.
Step 1: Visit the Apple ID Account page and select “Forgot Apple ID or Password”.
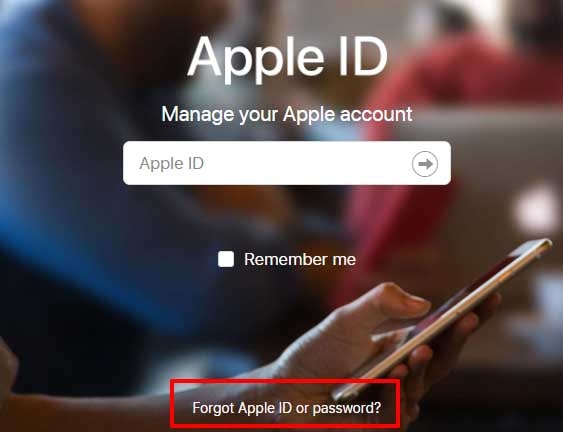
Step 2: Now, enter your Apple ID and tap “Continue”. Select “I Need to Reset My Password” to initiate the password resetting process.
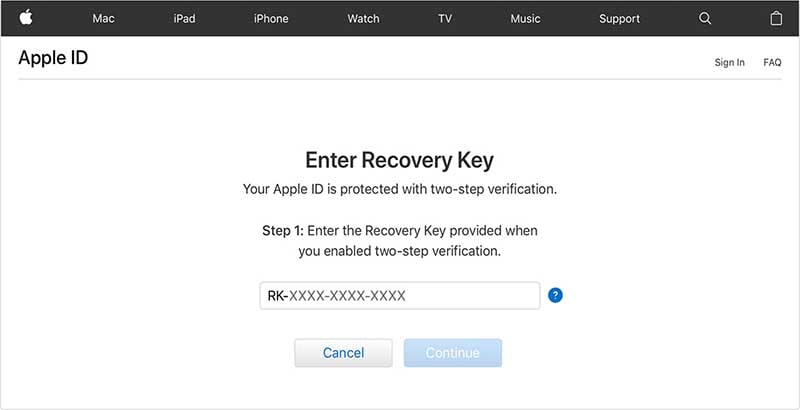
Step 3: You’ll be prompted to a new window where you’ll have to enter the “Recover Key”. This key is an exclusive that’s generated when a user enables two-way verification for their iCloud account.
Step 4: Enter the recovery key and tap “Continue”. Now, select a trusted device where you want to receive the verification code. Enter this verification code to continue with the process.
Step 5: In the next window, you can reset the password. Simply, add the new password and click the “Reset Password” button.
Once the password is changed, you can easily delete your iCloud account by going to “Settings” > “iCloud” > “Delete Account”. Enter the new password and your iCloud account will be deleted permanently.
In case you haven’t enabled two-way verification for your iCloud account, there’s still a way to reset the password. However, you must remember the security questions that you answered or the recovery e-mail you had added while setting up your iCloud account.
Step 1: Open the Apple ID Account page and tap “Forgot Apple ID or Password”. Enter your Apple ID and select “I need to reset my password”.
Step 2: You’ll be redirected to a new window displaying two different methods, i.e., “Answer Security Questions” an “Get an Email.” Choose a suitable method and follow the further steps to reset your password.

Part 2: How to delete iCloud account without password on computer using Dr.Fone - Screen Unlock (iOS)?
If you find all the above methods slightly challenging, we have a simpler solution for you. Wondershare Dr.Fone Screen Unlock (iOS) is an exclusive tool for iOS users that’ll help them remove screen locks and delete iCloud accounts from an iDevice, even if you don’t remember the password or even if the “Find My iPhone” feature is enabled.
Thanks to its user-friendly interface, it’ll become a hassle-free task to delete the iCloud account using Dr.Fone Screen Unlock. Since the software is available for Windows as well as Mac, one can easily use it to bypass Apple ID sign-in, irrespective of the OS one’s using on their PC.
So, let’s quickly discuss how to delete iCloud account without password using Dr.Fone Screen Unlock.
Note: Before moving further, make sure to back up the entire data as this will erase everything from your Apple iPhone 14 Pro Max.
Step 1: Launch Dr.Fone Screen Unlock
Install Dr.Fone Screen Unlock on your PC and double-tap its icon to launch the software. Now, connect your iDevice to the computer using a USB cable.
Step 2: Select Screen Unlock
Now, in the main interface of Dr. Fone Screen Unlock, select “Screen Unlock”.
Step 3: Choose the Option
In the next window, you’ll see three different options. Select “Remove Apple ID” as we want to delete the iCloud account.

Step 4: Trust the Apple iPhone 14 Pro Max device
Now, to successfully establish the connection between the two devices, enter the passcode on your iDevice and tap the “Trust” button to confirm the connection.

Step 5: Reset Your Apple iPhone 14 Pro Max
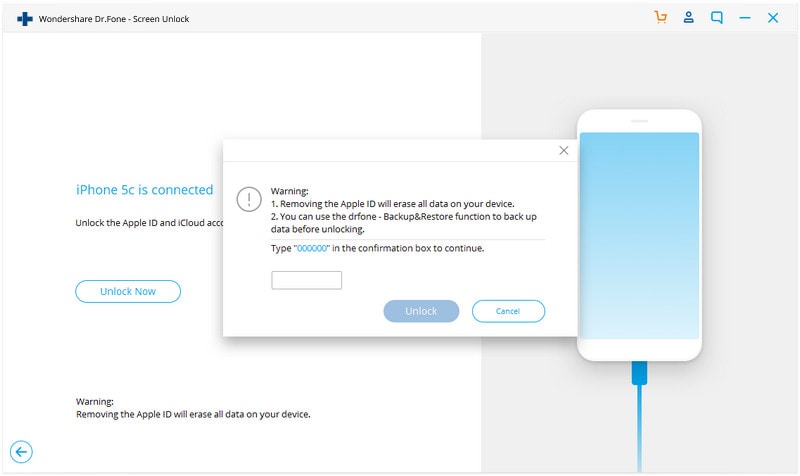
Once the two devices are successfully connected, tap “Unlock Now” on your computer screen. This will trigger a warning message. Click “Unlock” to continue with the process.
At this point, you’ll be asked to enter recovery mode. You can follow the on-screen instructions to successfully enter recovery mode.

Step 6: Unlock Apple ID
After entering the recovery mode, Dr.Fone will automatically initiate the unlocking process. Do not disconnect the iDevice from your computer as this can cause damage to the Apple iPhone 14 Pro Max device itself.

As soon as your Apple ID gets unlocked, a confirmation message will pop up on your screen. Simply reboot your smartphone and you’ll be able to sign in with a new Apple ID without any hassle.

It doesn’t matter if you’re using Windows or Mac, Dr.Fone – Screen Unlock for iOS will make it extremely easy to delete the iCloud account without the password. So, if you are looking for a reliable and convenient way to remove an iCloud account, make sure to use Dr.Fone – Screen Unlock.
Conclusion
That’s the entire guide on how to delete iCloud account without password. Even though iCloud is an exceptional feature, one is likely to forget the password to his iCloud account. If you’re stuck in a similar situation and want to create a new iCloud account, make sure to use the above tactics to delete the previous iCloud account, even if you don’t remember the password.
How To Remove Phone Number From Your Apple ID on Your Apple iPhone 14 Pro Max?
After getting a new device, iPhone users must prepare a unique identification term for their Apple ID. Creating and setting up this ID is not different each time. Not to mention, one can use this one registered ID to access multiple Apple-based features like podcast subscriptions, apps, etc.
While the code is essential, it can become inactive if your registered phone number is no longer available or your change your number. You must remove the phone number from your Apple ID and add a new one.
Unsure about the steps, though? This post covers that, so read ahead.
Part 1. What is the Purpose of a Phone Number for Apple ID?
Typically, the email is not linked with Apple ID since the function is linked with phone numbers. Apple services-based communication is passed through the Messages app on the iPad, iPhone, iPod Touch, and the Apple ID.
Registering the phone number to Apple ID will allow you to get the necessary account-related messages on your device smoothly. If you do not sign in to iCloud with a SIM card, using Messages or the FaceTime app will become challenging. So, you need to know how to remove your phone number from iCloud or Apple ID when your registered number is inactive.
Part 2. Can You Remove the Trusted Phone Number from Apple ID?
If you want to learn how to remove the number from Apple ID and if possible, the answer is yes and quite quickly. Apple allows users switching to another carrier to remove their already authorized and linked phone number from the Apple ID. This is helpful for two-factor authentication phases so that the Apple iPhone 14 Pro Max user can avoid getting fully locked out from the account.
Part 3. 3 Ways to Remove a Phone Number from Your Apple ID
If you are wondering about the steps for how to remove an old phone number from Apple ID, there are different styles available. Here are the main processes you can utilize.
Method 1. Remove Phone Number via iPhone/iPad’s Settings
In the matter of how to remove a phone number from an Apple ID, the most effortless process is to go into the Settings app and delete it from there. This is possible if you have your registered phone with you and the Apple ID. Simple access and remove the number.
Step 1: Access the Settings option on your iPad or iPhone device.
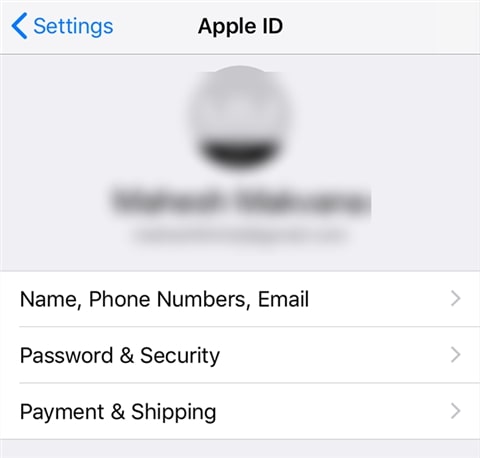
Step 2: Tap on the Apple account ID.
Step 3: Reach the Password & Security section.

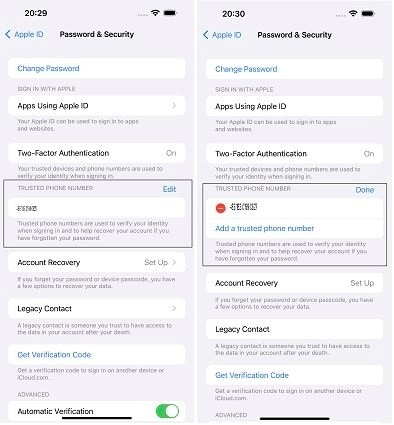
Step 4: You will see the Edit icon on the right-hand side. Click on it and then tap on the “Add a Trusted Phone Number” option.
Step 5: Add the Apple iPhone 14 Pro Max Passcode > new phone number.
Step 6: Select Edit again to delete the old phone number. Press Done.
Method 2. Remove the Phone Number Using a Mac
Users can turn the phone number OFF that they registered to Apple ID through their Mac device. In this context, accessing the FaceTime or Messages app is essential in the context of how to remove phone number from Apple ID via Mac steps.
Step 1: Access the FaceTime or Messages app. Sign in using the same Apple ID you use for the apps on your Apple iPhone 14 Pro Max.
Step 2: Go to Messages and tap on the Settings option. Then, choose the iMessage selection.
For Facetime, click on the FaceTime option and go to Preferences > General.
Step 3: From the list, choose the tickmark beside the phone number to uncheck it. That will deactivate the phone number for your account.

Method 3: Remove Phone Number via Change Apple ID Password
It is possible to change the password for Apple ID in the matter of how to remove a phone number from Apple ID. Adjusting the phone number is the natural next step when you carry out this step, so you can remove the number and use another at this stage.
Step 1: On your iPad and iPhone, tap on the Settings menu.
Step 2: Tap on the icon with your name and click on the Password & Security option.
Step 3: Select the Change Password option.

Step 4: The prompt to add the current Apple ID password, or the passcode, will appear. Add it to confirm, and then insert your new password.
Step 5: Hit the Change Password button.
Step 6: You will get logged out of the account. Sign in with the new password, and the phone number will get removed.
Part 4. How to Remove Apple ID without Password?
All the methods mentioned help remove phone numbers associated with the Apple ID but still require you to access the Apple iPhone 14 Pro Max device. What if the Apple iPhone 14 Pro Max device is locked and the necessary details are unavailable, like the password? You can use Dr.Fone - Screen Unlock (iOS) to remove the Apple ID by bypassing the passcode.
It is possible to remove phone number from Apple ID by accessing the Apple iPhone 14 Pro Max device with simple taps through this app. You have to make the Find My iPhone feature active, and the app will bypass the Apple ID password within seconds.
Best Features:
- Supported on various iOS and iPadOS devices.
- Remove all types of lock screens, like Apple ID, Face ID, Touch ID, Screen Time Passcode, etc.
- Fast process of screen and password bypassing.
How to use it?
Step 1: Download/install/launch the app on Mac/Windows. Select Screen Unlock when the app opens on the interface.
Step 2: Choose the “Remove Apple ID” option and add the passcode, as instructed. Allow the system to trust the Apple iPhone 14 Pro Max device for authentication through the following prompt.

Step 3: Put the Apple iPhone 14 Pro Max device into recovery mode following the on-screen instructions. Then, restart the Apple iPhone 14 Pro Max device. This will automatically kickstart the unlocking process and will take some seconds.
Step 4: Finally, see that Apple ID’s device has been unlocked on the next page.
Video Guide: How to Remove Apple ID without Password?
Part 5. FAQs about Apple ID Phone Number
- How to Add a Trusted Phone Number to Your Apple ID?
The steps for adding the trusted phone number to Apple ID are accessible through Settings > Apple ID icon/name > Password & Security > Edit icon beside the phone number already in use. Click on the “Add a trusted phone number” option and insert the new one. Confirm with your device passcode at the end.
- Why Isn’t My Apple ID Accepting My Apple iPhone 14 Pro Max Number?
Apple ID accepts phone numbers for linking for two-factor authentication. The local number in the region is needed for pairing the number and Apple ID.
- Does Changing Apple ID affect Phone Number?
No, the Apple ID and phone number are not connected as features or codes. So, adjusting the Apple ID will not affect your device’s phone number.
Conclusion
Indeed, there are multiple methods you can take to remove the phone number registered to your Apple ID successfully. They are accessible in multiple ways through Mac, iPad, or iPhone settings. If you forgot the Apple ID, you could even remove it using Dr.Fone - Screen Unlock (iOS) . Ultimately, choose the process to trust based on your specific needs.
Also read:
- [New] How to Live Stream to Facebook From DJI Drone?
- 2024 Approved Obsudio Screen Recorder Examination Top Contenders Revealed
- Apple ID Locked or Disabled On Apple iPhone 12 mini? 7 Mehtods You Cant-Miss
- Best-in-Class Memetics Engine
- Direct Route Watching Popular Reactions in a Flash on YouTube for 2024
- Exploring the Dilemma of Steering Advanced Artifice Intelligences
- How to Remove an AirTag from Your Apple ID Account On Apple iPhone 8 Plus?
- In 2024, 10+ Top Tips for Accessing the Best of International Cricket Online
- In 2024, How To Fix Apple ID Verification Code Not Working On Apple iPhone SE
- In 2024, How to Remove an AirTag from Your Apple ID Account From iPhone 8?
- In 2024, How to Reset Apple ID and Apple Password From Apple iPhone 14
- In 2024, How to Reset Apple ID and Apple Password On iPhone 6 Plus
- In 2024, How to Sign Out of Apple ID On iPhone 6s Plus without Password?
- OpenAI Shields ChatGPT From Intelligence Loss
- The Definitive Guide to iOS & Android Maker Tools
- Unannounced Google Pixel Devices Being Sold – A Closer Look at the Surprising Trend
- Title: Troubleshooting Error Connecting to the Apple ID Server On Apple iPhone 14 Pro Max
- Author: Alma
- Created at : 2024-10-31 05:20:56
- Updated at : 2024-11-01 03:40:02
- Link: https://apple-account.techidaily.com/troubleshooting-error-connecting-to-the-apple-id-server-on-apple-iphone-14-pro-max-by-drfone-ios/
- License: This work is licensed under CC BY-NC-SA 4.0.